This article describes the content of X-LINUX-RT expansion package, version v6.2.0, which can be applied on top of STM32 MPU ecosystem release note - v6.2.0.
1. Article purpose[edit | edit source]
The purpose of this article is to:
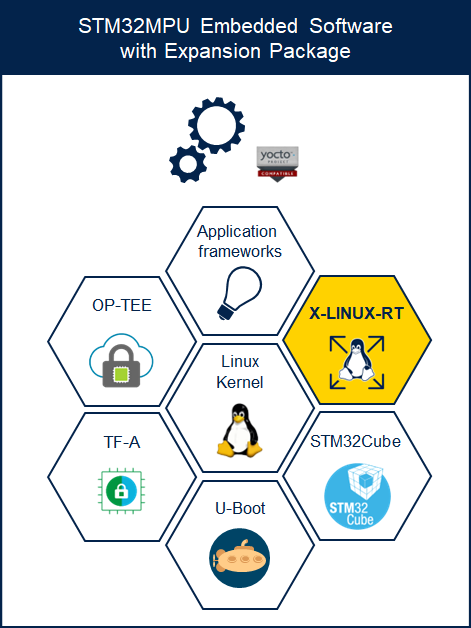
- Introduce the X-LINUX-RT expansion package,
- Define the hardware & software deliverables to use the X-LINUX-RT package,
- Describe all steps to integrate the X-LINUX-RT package and associated expected results,
- Give some use-case examples enabled by the X-LINUX-RT package.
2. X-LINUX-RT expansion package description[edit | edit source]
2.1. Overview[edit | edit source]
X-LINUX-RT is an STM32 MPU OpenSTLinux expansion package that targets the real-time (RT) feature in the Linux® kernel.
An RT system is a system that responds to a request in a time lapse and not as fast as possible. It targets:
- Determinism
- LATENCY but not SPEED
For a better understanding about real-time Linux, refer to the Linux RT foundation website[1].
The X-LINUX-RT expansion package is delivered as a new meta layer. The following chapters show how to build it with the OpenSTLinux Distribution Package.
2.2. Main software modifications[edit | edit source]
2.2.1. Linux kernel configuration[edit | edit source]
The Linux kernel configuration must be modified to enable:
- CONFIG_PREEMPT_RT: configuration for enabling Real-Time (RT) preemption patchset in the Linux kernel
- CONFIG_HIGH_RES_TIMERS: configuration for enabling high-resolution timers support
- CONFIG_EXPERT: configuration for enabling expert-level options in the Linux kernel configuration system. Useful to open advance RT settings
And disable:
- CONFIG_CPU_FREQ: configuration for enabling frequency scaling management (dynamic CPU operating performance points)
- CONFIG_CPU_IDLE: configuration for enabling CPU idle power management for STM32MP1 series
This is done by applying the config fragment file fragment-07-rt.config available when applying this expansion package (see 0011-v6.6-stm32mp-rt-r3.patch ).
2.2.2. OP-TEE OS configuration[edit | edit source]
2.2.2.1. OP-TEE OS Profile[edit | edit source]
Set OP-TEE OS in a system_services profile to optimize the system latency (Refer to STM32MPU_OP-TEE_profiles for more details about OP-TEE profiles).
It is configured by default in context of OpenSTLinux Distribution Package, and has to be considered in case of OpenSTLinux Developer Package, as described in below chapters.
2.2.2.2. OP-TEE OS board device trees[edit | edit source]
Because the frequency scaling has been disabled, and to ensure an optimal lifetime for the microprocessor, the frequency is fixed following the recommended industrial profile.
- 900 MHz for STM32MP13x lines

- 650 MHz for STM32MP15x lines
- 1.2 GHz for STM32MP2 series
2.3. Main restrictions[edit | edit source]
The X-LINUX-RT expansion package is only available as a Distribution Package. There is neither X-LINUX-RT Starter Package nor X-LINUX-RT Developer Package delivered with this version.
Nevertheless, to install the X-LINUX-RT feature in your OpenSTLinux Developer Package, you can jump to this chapter#How to install X-LINUX-RT in the OpenSTLinux Developer Package.
2.4. Versioning[edit | edit source]
The latest version of the X-LINUX-RT expansion package is named openstlinux-6.6-yocto-scarthgap-mpu-v26.02.18 and must be used with components delivered for ecosystem release v6.2.0 ![]() .
.
2.5. Associated licenses[edit | edit source]
This software package is licensed under a SOFTWARE LICENSE AGREEMENT FOR ST MATERIALS (SLA). Customers should only use this package in compliance with the software license agreement (SLA), STM32CubeMP15 licenses, and STM32CubeMP2 licenses.
3. Prerequisites[edit | edit source]
3.1. Hardware prerequisites[edit | edit source]
- Below is the list of supported STM32 MPU boards. Click on the associated links to jump to the articles describing how to set up the boards:


3.2. Software prerequisites[edit | edit source]
Be familiar with:
- OpenSTLinux Distribution Package. Refer to the STM32MPU Distribution Package article for more information.
- OpenSTLinux Developer Package. Refer to the STM32MPU Developer Package article for more information.
- Get the OpenSTLinux ecosystem release v6.2.0
 (steps to follow described in chapters below).
 - Get information about impacts when enabling CONFIG_PREEMPT_RT in the Linux kernel. Refer to https://wiki.linuxfoundation.org/realtime/documentation/start.
4. Hardware Setup[edit | edit source]
Boards should be assembled as defined in #Hardware prerequisites.
5. Software setup[edit | edit source]
5.1. How to get software[edit | edit source]
The X-LINUX-RT expansion package is delivered in a git repository on GitHub: https://github.com/STMicroelectronics/meta-st-x-linux-rt.git (Scarthgap branch for compatibility with this ecosystem release v6.2.0 ![]() )
)
There is a dependency with External_DT component(branch v6-stm32mp) manage by this expansion package.
It can be integrated using the OpenSTLinux Distribution Package to build new OpenSTLinux images.
5.1.1. How to install the Distribution Package[edit | edit source]
5.1.1.1. Install the OpenSTLinux Distribution Package[edit | edit source]
Install the OpenSTLinux Distribution Package v6.2.0.
5.1.1.2. Download the X-LINUX-RT meta layer[edit | edit source]
- Clone the meta-st-x-linux-rt git repositories
pushd <Distribution Package installation directory>/layers/meta-st
git clone https://github.com/STMicroelectronics/meta-st-x-linux-rt.git -b openstlinux-6.6-yocto-scarthgap-mpu-v26.02.18
popd
5.1.1.3. Build the Distribution Package[edit | edit source]
- Source the build environment with the correct board and layer
- For STM32MP13x lines :
DISTRO=openstlinux-weston MACHINE=stm32mp13-rt source layers/meta-st/scripts/envsetup.sh
- For STM32MP15x lines :
DISTRO=openstlinux-weston MACHINE=stm32mp1-rt source layers/meta-st/scripts/envsetup.sh
- For STM32MP2 series (for ecosystem release v6.2.0 ):
DISTRO=openstlinux-weston MACHINE=stm32mp2-rt source layers/meta-st/scripts/envsetup.sh
- Build the image
bitbake st-image-weston
| Building the image might take a long time depending on the host computer performance. |
5.1.2. How to populate the flash memory with the image[edit | edit source]
You can refer to Flashing the built image to program your board with X-LINUX-RT binaries.
5.1.3. How to run X-LINUX-RT package software[edit | edit source]
To run X-LINUX-RT package software: boot the image loaded on the board as explained in previous chapter.
5.2. How to check that the RT feature is enabled[edit | edit source]
You can check if the RT feature is enabled and working. For that, run the following command while the board is on, to check the kernel version:
uname -s -r -v
Command line results:
| Without the RT feature |
Linux 6.6.116 #1 SMP PREEMPT Wed Feb 18 14:04:26 UTC 2026 |
|---|---|
| With the RT feature |
Linux 6.6.116-rt66 #1 SMP PREEMPT_RT Wed Feb 18 18:27:50 UTC 2026 |
6. How to run Cyclictest[edit | edit source]
6.1. Use-cases execution and expected results[edit | edit source]
Cyclictest accurately and repeatedly measures the difference between the time at which a thread is intended to wake up and the time at which it actually wakes up.
For a better understanding of cyclictest, refer to the cyclictest webpage in the Linux RT foundation website[2].
For example on STM32MP257F-DK ![]() (two cores with smp), the following command can be used for one hour test: (--quiet option can be added to improve measurement)
(two cores with smp), the following command can be used for one hour test: (--quiet option can be added to improve measurement)
cyclictest --mlockall --smp -p 90
Command line results:
| Without the RT feature |
... T: 0 ( 2095) P:90 I:1000 C: 28659 Min: 7 Act: 7 Avg: 12 Max: 1166 T: 1 ( 2096) P:90 I:1500 C: 19106 Min: 7 Act: 8 Avg: 54 Max: 652 ... |
|---|---|
| With the RT feature |
... T: 0 ( 2131) P:99 I:100 C:36000000 Min: 7 Act: 10 Avg: 10 Max: 78 T: 1 ( 2132) P:99 I:100 C:36000000 Min: 7 Act: 11 Avg: 10 Max: 87 ... |
6.2. Use-case restrictions[edit | edit source]
Low-power modes Stop and Standby are supported but not the S2Idle mode.
7. How to go further[edit | edit source]
7.1. How to improve system latency with perf-rt flavor[edit | edit source]
To improve latency, a new DISTRO, named openstlinux-rt, is provided with the X-LINUX-RT package.
This DISTRO is based on following characteristics:
- It uses SysVinit[3] instead of SystemD
- There is no Weston
- A Linux kernel config fragment file fragment-10-rt-perf.config is applied (provided by patch file present in this expansion package, see 0011-v6.6-stm32mp-rt-r3.patch ). It:
- Limits the runtime interactions of the Linux kernel with OP-TEE are to the minimum (boot and low-power sequences). This avoids context switches between the secure and nonsecure worlds that heavily impact the kernel latency.
- Disables the tickless Linux kernel by setting CONFIG_HZ_PERIODIC=y. This increases the power consumption but reduces from-idle transition latency
- Removes power domains management
- Provides other optimization
- It uses <board_type>-perf-rt.dts device trees across all software components (provided in External_DT component).
- Only for MACHINE stm32mp13-rt-perf, stm32mp1-rt-perf or stm32mp2-rt-perf
- IWDG watchdog management is transferred to the Linux kernel
7.1.1. Build openstlinux-rt[edit | edit source]
If not done yet, set up the X-LINUX-RT Distribution Package as described #How to install the Distribution Package chapter.
To select the openstlinux-rt DISTRO, run the following command:
DISTRO=openstlinux-rt MACHINE=<your machine> source layers/meta-st/scripts/envsetup.sh
- <your machine> = one of stm32mp13-rt-perf, stm32mp1-rt-perf or stm32mp2-rt-perf
Build the image
bitbake st-image-core
7.1.2. Flash openstlinux-rt[edit | edit source]
Then flash it, as explained in previous chapter.
7.1.3. Performances measurement[edit | edit source]
To check RT performances improvement, run the new cyclictest command
- Example for STM32MP257F-DK
 (two cores with smp) and optimized cyclictest command parameters (1 hour)
cyclictest --mlockall --smp -p 99 -i 100 -d 0 -A 0 -D 1h
...
T: 0 ( 1849) P:99 I:100 C:36000000 Min:      7 Act:    9 Avg:    8 Max:      25
T: 1 ( 1850) P:99 I:100 C:36000000 Min:      7 Act:    9 Avg:    8 Max:      29
...
7.2. How to install X-LINUX-RT in the OpenSTLinux Developer Package[edit | edit source]
To build X-LINUX-RT in the OpenSTLinux Developer Package, some patches provided in the X-LINUX-RT meta layer must be applied on top of the Linux kernel component.
7.2.1. Install the OpenSTLinux SDK[edit | edit source]
The OpenSTLinux SDK contains all the basis needed for the X-LINUX-RT expansion package.
It must be downloaded and installed (refer to the STM32MPU_Developer_Package#Installing_the_SDK chapter).
Once the installation is done, a directory, containing the OpenSTLinux SDK, is present.
7.2.2. Download the OpenSTLinux Developer Package[edit | edit source]
The OpenSTLinux Developer Package, containing all the BSP components source code, must be downloaded and extracted. For that, refer:
- first to STM32MPU_Developer_Package#Installing_the_Starter_Package,
- then to the STM32MPU_Developer_Package#Installing_the_OpenSTLinux_BSP_packages chapter.
7.2.3. Deploy Linux kernel component and generate the native Linux kernel configuration[edit | edit source]
Refer to README.HOW_TO.txt.{stm32mp1,stm32mp2,stm32mp2-m33td} "helper file" up to Configure kernel source code section. This file is present in the "Linux kernel installation directory".
7.2.4. Download the X-LINUX-RT meta layer[edit | edit source]
Clone the meta-st-x-linux-rt git repository
cd <Developer Package installation directory>
git clone https://github.com/STMicroelectronics/meta-st-x-linux-rt.git -b openstlinux-6.6-yocto-scarthgap-mpu-v26.02.18
7.2.5. Apply X-LINUX-RT delivery sources[edit | edit source]
Only Linux kernel is patched and its configuration is updated for the RT feature.
7.2.5.1. Apply patches[edit | edit source]
The patches delivered in <Developer Package installation directory>/meta-st-x-linux-rt/recipes-kernel/linux/6.6/ must be applied.
- 0010-Rebase-on-v6.6.116-rt66.patch
- 0011-v6.6-stm32mp-rt-r3.patch
For that:
- Enter into the directory containing the Linux kernel sources (refer to previous step #Deploy Linux kernel component and generate the native Linux kernel configuration)
- Apply the patches:
for p in `ls -1 <Developer Package installation directory>/meta-st-x-linux-rt/recipes-kernel/linux/6.6/*.patch`; do patch -p1 < $p; done
The Linux kernel source is ready to be configured before build.
A Linux kernel config fragment must be copied to the source code (arm directory for STM32MP1 series and arm64 for STM32MP2 series) :
cp <Developer Package installation directory>/meta-st-x-linux-rt/recipes-kernel/linux/6.6/fragment-10-network-improvment.config <Linux kernel source directory>/arch/{arm,arm64}/configs/
7.2.5.2. Add and apply new config fragments[edit | edit source]
Some of the new fragments now present inside the Linux kernel source must be applied.
scripts/kconfig/merge_config -m -r -O ${OUTPUT_BUILD_DIR} ${OUTPUT_BUILD_DIR}/.config arch/{arm,arm64}/configs/fragment-07-rt.config arch/{arm,arm64}/configs/fragment-07-rt-sysvinit.config arch/{STLightGreen|{arm,arm64}}}/configs/fragment-10-network-improvment.config
(yes || true) | make oldconfig O="${OUTPUT_BUILD_DIR}"
- Only for STM32MP13x lines , apply the fragment <Developer Package installation directory>/stm32mp-openstlinux-6.6-yocto-scarthgap-mpu-v26.02.18/sources/ostl-linuxlinux-stm32mp-6.6.116-stm32mp-r3-r0/optional-fragment-06-nosmp.config as explained in the README.HOW_TO.txt.{stm32mp1,stm32mp2,stm32mp2-m33td} helper file.
scripts/kconfig/merge_config -m -r -O ${OUTPUT_BUILD_DIR} ${OUTPUT_BUILD_DIR}/.config ../optional-fragment-06-nosmp.config
(yes || true) | make oldconfig O="${OUTPUT_BUILD_DIR}"
7.2.5.3. Build Linux kernel[edit | edit source]
- The Linux kernel can now be built and deployed, as explained in STM32MPU_Developer_Package#Building_and_deploying_the_Linux_kernel_for_the_first_time.
8. References[edit | edit source]
9. Archives  [edit | edit source]
| STM32MPU release | OpenSTLinux release note |
|---|---|
| STM32 MPU-Ecosystem-v6.1.0 | X-LINUX-RT expansion package - v6.1.0 |
| STM32 MPU-Ecosystem-v6.0.0 | X-LINUX-RT expansion package - v6.0.0 |