This article explains how to use the stai_mpu API for human pose estimation applications supporting OpenVX [1] back-end.
1. Description[edit | edit source]
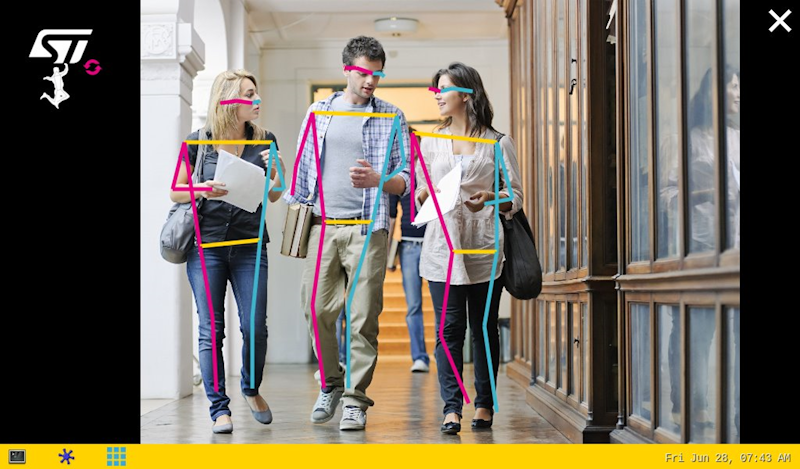
The human pose estimation neural network model allows localization and estimation the pose of a person from an input image or video by predicting the spatial locations of key body joints known as keypoints. Common pose estimation neural network models are able to detect 17 keypoints of a human body.
The application demonstrates a computer vision use case for human pose estimation where frames are grabbed from a camera input (/dev/videox) and analyzed by a neural network model interpreted by OpenVX framework.
A Gstreamer pipeline is used to stream camera frames (using v4l2src), to display a preview (using gtkwaylandsink) and to execute neural network inference (using appsink).
The result of the inference is displayed in the preview. The overlay is done using GtkWidget with cairo.
The model used with this application is the ST YoloV8n-pose downloaded from the stm32-hotspot ultralytics github fork[2]
| For this application, an TensorFlow Lite per-tensor asymmetric quantized model is used, which is accelerated using the neural processing unit (NPU). Then, the model has been converted to NBG format using ST Edge AI tool. For more information about this tool, refer to the dedicated article. |
2. Installation[edit | edit source]
2.1. Install from the OpenSTLinux AI package repository[edit | edit source]
After having configured the AI OpenSTLinux package you can install X-LINUX-AI components for human pose estimation application:
2.2. Source code location[edit | edit source]
- in the OpenSTLinux Distribution with X-LINUX-AI Expansion Package:
- <Distribution Package installation directory>/layers/meta-st/meta-st-x-linux-ai/recipes-samples/pose-estimation/files/stai_mpu
- on the target:
- /usr/local/x-linux-ai/pose-estimation/stai_mpu_pose_estimation.py
- on GitHub:
3. How to use the application[edit | edit source]
3.1. Launching via the demo launcher[edit | edit source]
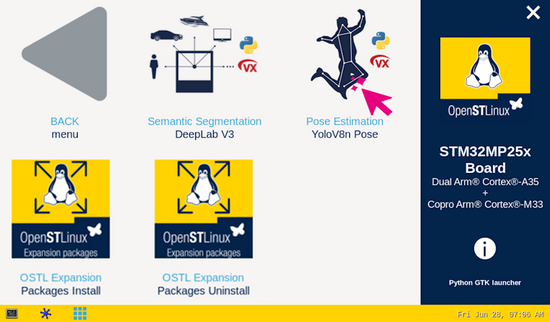
You can click on the icon to run Python OpenVX application installed on your STM32MP2x board with AI hardware accelerator.
3.2. Executing with the command line[edit | edit source]
The pose estimation Python application is located in the userfs partition:
/usr/local/x-linux-ai/pose-estimation/stai_mpu_pose_estimation.py
It accepts the following input parameters:
usage: stai_mpu_pose_estimation.py [-h] [-m MODEL_FILE] [-i IMAGE]
                                    [-v VIDEO_DEVICE] [--conf_threshold CONF_THRESHOLD] [--iou_threshold IOU_THRESHOLD]
                                    [--frame_width FRAME_WIDTH] [--frame_height FRAME_HEIGHT] [--framerate FRAMERATE]
                                    [--input_mean INPUT_MEAN] [--input_std INPUT_STD] [--normalize NORMALIZE]
                                    [--validation] [--val_run VAL_RUN]
options:
  -h, --help  show this help message and exit
  -m MODEL_FILE, --model_file MODEL_FILE Neural network model to be executed
  -i IMAGE, --image IMAGE image directory with image to be classified
  -v VIDEO_DEVICE, --video_device VIDEO_DEVICE video device ex: video0
  --conf_threshold CONF_THRESHOLD Confidence threshold
  --iou_threshold IOU_THRESHOLD IoU threshold, used to compute NMS
  --frame_width FRAME_WIDTH width of the camera frame (default is 640)
  --frame_height FRAME_HEIGHT height of the camera frame (default is 480)
  --framerate FRAMERATE framerate of the camera (default is 15fps)
  --input_mean INPUT_MEAN input mean
  --input_std INPUT_STD input standard deviation
  --normalize NORMALIZE input standard deviation
  --validation enable the validation mode
  --val_run VAL_RUN set the number of draws in the validation mode
4. Testing with Yolov8n-pose on STM32MP2x with AI hardware accelerator[edit | edit source]
The model used for testing is the yolov8n_256_quant_pt_uf_pose_coco-st.nb
| Yolov8n-pose is a multi-pose estimation neural network, it means that the model is able to perform pose estimation on several
persons which stands in the field of view of the camera. |
To ease launching of the application, two shell scripts are available for Python application on the board:
- launch pose estimation based on camera frame inputs:
/usr/local/x-linux-ai/pose-estimation/launch_python_pose_estimation.sh
- launch pose estimation based on the pictures located in /usr/local/x-linux-ai/pose-estimation/models/yolov8n_pose/testdata directory
/usr/local/x-linux-ai/pose-estimation/launch_python_pose_estimation_testdata.sh
5. Going further[edit | edit source]
The two shell scripts described before offers the possibility to select the framework automatically depending on the model provided or by specifying it. To be able to run the application using a specify frameworks, the models for each frameworks must be available in the /usr/local/x-linux-ai/pose-estimation/models/yolov8n_pose/ directory. Then, you will need to specify the framework as an argument of the launch scripts as follow.
- Run pose estimation based on camera input with the chosen framework. Available framework option is : nbg
/usr/local/x-linux-ai/pose-estimation/launch_python_pose_estimation.sh nbg
- Run pose estimation based on picture located in the /usr/local/x-linux-ai/pose-estimation/models/yolov8n_pose/testdata directory with the chosen framework. Available framework option is: nbg.
/usr/local/x-linux-ai/pose-estimation/launch_python_pose_estimation_testdata.sh nbg

