The goal of this page is to describe the OpenJDK installation procedure on your STM32 MPU board and (native) desktop, in a STM32MPU Distribution Package environment.
It is the "Open Standard Edition Java Development Kit" installation process.
According to the OpenstLinux Weston software architecture, XWayland is used for all Java applications based on X11, which means AWT/SWING Java display/graphical applications.
By default the Java Development Kit is installed on the rootfs partition of the target.
1. Prerequisites[edit | edit source]
1.1. Hardware prerequisites[edit | edit source]
- STM32MP157x-DKx Discovery kit
 or STM32MP157x-EV1 Evaluation board
 - a keyboard and a mouse connected to the board
1.2. Software prerequisites[edit | edit source]
The STM32MPU Distribution Package must be installed on your host. To do this, follow the procedure described in the STM32MPU Distribution Package#Installing the OpenSTLinux distribution article.
The process has been verified with ecosystem release v5.0.0 ![]() of the OpenSTlinux distribution.
of the OpenSTlinux distribution.
2. The yoctoproject meta-java[edit | edit source]
JAVA for Linux-based embedded systems is available as metadata in the Yocto project.
- Clone the following git repository into [your STM32MPU Distribution path]/layers
cd [your STM32MPU Distribution path]/layers
git clone git://git.yoctoproject.org/meta-java
Depending on the Yocto release, select the right branch. (for example, branch mickledore for the ecosystem release v5.0.0 ![]() )
)
cd meta-java
git checkout remotes/origin/mickledore
- Two patches need to be applied to meta-java layers:
cd [your STM32MPU Distribution path]/layers/meta-java
1- In recipes-core/xml-commons/xml-commons-resolver1.1_1.2.bb
-SRC_URI = "http://archive.apache.org/dist/xml/commons/xml-commons-resolver-${PV}.tar.gz"
+SRC_URI = "http://archive.apache.org/dist/xml/commons/binaries/xml-commons-resolver-${PV}.tar.gz"
2- In recipes-core/openjdk/openjdk-8_272.bb
+ERROR_QA:remove = "patch-fuzz"
- If not already done, set up your build environment
 cd [your STM32MPU Distribution path]
 source layers/meta-st/scripts/envsetup.sh
(Select for the DISTRO openstlinux-weston and for MACHINE stm32mpx)
- Add the meta layer in your Yocto environment
 cd [your STM32MPU Distribution path]/build-openstlinuxweston-stm32mpx
 bitbake-layers add-layer [your STM32MPU Distribution path]/layers/meta-java
- Define at least the following variables in your local.conf file
([your STM32MPU Distribution path]/build-openstlinuxweston-stm32mpx/conf/local.conf)

#Possible provider: cacao-initial-native and jamvm-initial-native
PREFERRED_PROVIDER_virtual/java-initial-native = "cacao-initial-native"

#Possible provider: cacao-native and jamvm-native
PREFERRED_PROVIDER_virtual/java-native = "jamvm-native"

#Optional since there is only one provider for now
PREFERRED_PROVIDER_virtual/javac-native = "ecj-bootstrap-native"
- Include in your image the openjdk-8 component
cd [your STM32MPU Distribution path]/layers/meta-st/meta-st-openstlinux/recipes-st/images
Edit the file st-image-weston.bb and add the following line under CORE_IMAGE_EXTRA_INSTALL
  openjdk-8 \
  openjdk-8-demo \
- Choose XWayland configuration in meta-st/meta-st-openstlinux.
cd [your STM32MPU Distribution path]/layers/meta-st/meta-st-openstlinux
Three modifications to be done:
1- conf/distro/openstlinux-weston.conf
-DISTRO_FEATURES:remove = " x11 "
+DISTRO_FEATURES:append = " x11 wayland "
# with X11
-#PREFERRED_PROVIDER_virtual/xserver = "${@bb.utils.contains('DISTRO_FEATURES', 'x11 wayland', 'xwayland', 'xserver-xorg', d)}"
+PREFERRED_PROVIDER_virtual/xserver = "${@bb.utils.contains('DISTRO_FEATURES', 'x11 wayland', 'xwayland', 'xserver-xorg', d)}"
2- recipes-st/packagegroups/packagegroup-framework-core-extra.bb
- ${@bb.utils.contains('DISTRO_FEATURES', 'x11 wayland', 'xf86-input-keyboard', '', d)} \
3- recipes-graphics/xorg-xserver/xserver-xorg_%.bbappend (new file)
FILESEXTRAPATHS:prepend := "${THISDIR}/${PN}:"
DEPENDS += "libxshmfence"
- Increase the Rootfs partition size
Update the file ([your STM32MPU Distribution path]/layers/meta-st/meta-st-stm32mp/conf/machine/include/st-machine-common-stm32mp.inc)
IMAGE_ROOTFS_MAXSIZE = "819200"
- Build the image
 cd [your STM32MPU Distribution path]/build-openstlinuxweston-stm32mpx
 bitbake st-image-weston
3. Compilation and execution of some JAVA demos[edit | edit source]
- forkjoin benchmark Java application
 cd /usr/lib/jvm/openjdk-8/sample/forkjoin/mergesort
 javac MergeDemo.java
 java MergeDemo 200 100 3 1 1 3
Running with parameters: 200 100 3 1 1 3
Time in milliseconds. Y-axis: number of elements. X-axis parallelism used.
            1    2    3
    200:   10    7    8
    300:   17   12   12
    400:   20   14   14
  Total:   47   33   34
- For all GUI Java application, user must export DISPLAY variable and launch a XWayland socket.
The same ":N" DISPLAY value is used to launch XWayland socket (only one instance can be run for one "N" value).
export DISPLAY=:1
Choose 'X' and 'Y' according to your Java application:
Xwayland :1 -geometry 'X'x'Y'&
Remove some glamor warnings
export XWAYLAND_NO_GLAMOR=1
Note that some XKEYBOARD not fatal warnings can occur
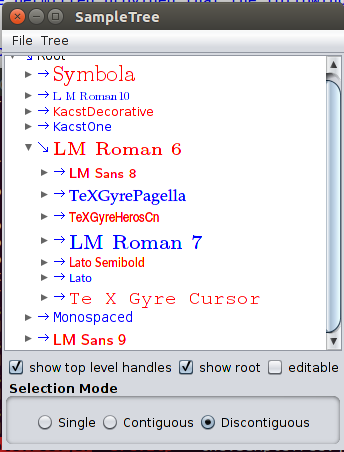
1- SampleTree Java application
Read the README.txt file for details.
To execute in a Linux Weston console on the board, with a keyboard and a mouse.
 export DISPLAY=:1
 Xwayland :1 -geometry 350x450&
 cd /usr/lib/jvm/openjdk-8/demo/jfc/SampleTree
 java -jar SampleTree.jar
2- GraphicsTest Java applet
Read the README.txt file for details.
To execute in a Linux Weston console on the board, with a keyboard and a mouse.
 export DISPLAY=:1
 Xwayland :1 -geometry 400x400&
 cd /usr/lib/jvm/openjdk-8/demo/applets/GraphicsTest
 /usr/lib/jvm/openjdk-8/bin/appletviewer example1.html
