This article explains how to use the X-LINUX-QT developer package to build Qt applications for the STM32 microprocessor series. It has been written for STM32MP2 series but it can be adapted easily to STM32MP1 series.
The validation and snapshots of this article have been made with X-LINUX-QT expansion package v2.1.0, but can be easily translated to other releases.
1. Prerequisites[edit | edit source]
Check first, detailed prerequisites in X-LINUX-QT_expansion_package#Prerequisites and X-LINUX-QT Developer Package#Prerequisites.
The Qt™ Creator[1] tool is used to build, debug and run applications demos on target.
The X-LINUX-QT developer package is up and running on your board. For that, follow information provided in X-LINUX-QT Developer Package article.
2. Install the Qt Creator[edit | edit source]
- The Qt™ Creator can be downloaded and installed following this link.
- The Qt™ online installer can be downloaded following this link.
- Installing the X-LINUX-QT developer package configures also the new STM32MPU Kit for the already installed Qt™ Creator IDE.
IMPORTANT: this new STM32MPU Kit is only created when installing X-LINUX-QT v2.1.0 developer package (see #Install_the_X-LINUX-QT_developer_package_v2.1.0) over Yocto-based OpenSTLinux embedded software v6.0.0
But if X-LINUX-QT developer package v2.1.0 have been installed, this kit can be easily cloned inside Qt Creator to a new kit targeting the SDK generated from distribution package v2.3.0 or v2.2.0.
3. Select the new kit installed by the X-LINUX-QT developer package[edit | edit source]
| Qt6 6.6.3 must be installed in order to have the list of examples for that Qt version. |
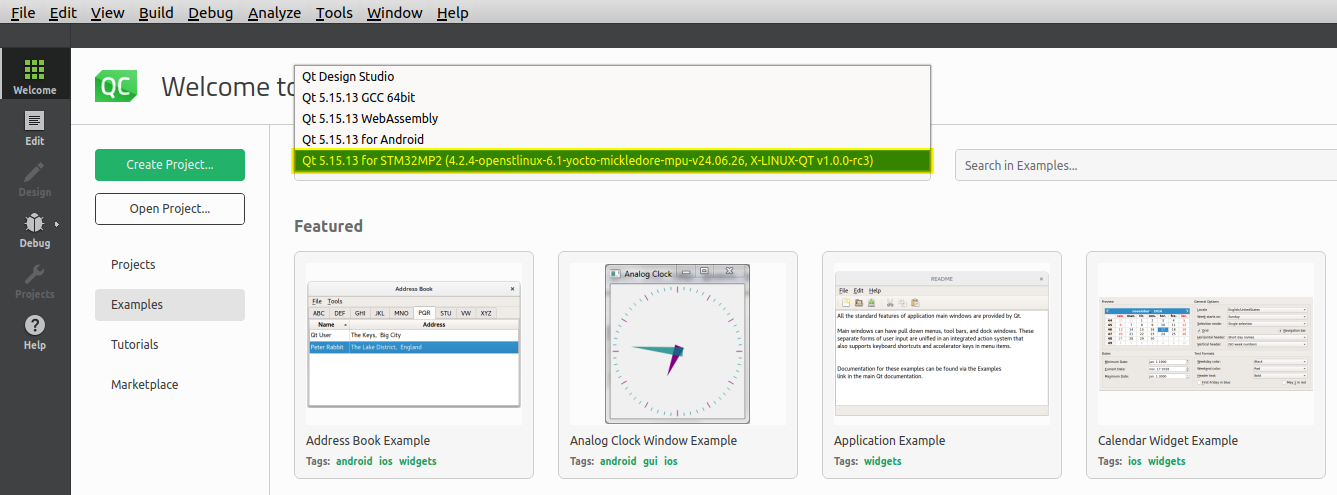
Once the Qt™ Creator is launched and the Welcome to Qt™ Creator is displayed:
- Go to the
Examplesfrom the list on the left, - Then select the new Qt6 6.6.3 from the dropdown list.
The supported examples are then displayed.
4. Select the project example[edit | edit source]
- Search for a specific example in the
Search barin front of the selected kit. - Select the example you are looking for (just a simple click on it).

- Close the "Help window" if not needed.

5. Configure the project example[edit | edit source]
- Make sure that the new kit added by X-LINUX-QT developer package is selected
- Press the
Configure Projectbutton:

- Make sure all configuration steps are successfully done (green bars):

6. Configure the STM32 MPU Kit[edit | edit source]
- Select the
Configure Projectbutton from the vertical bar on the left. - Select the new Kit added by the X-LINUX-QT developer package.
- Select
Run Settings. - On the right panel, scroll down till the
Environmentsection. - Press the
Detailsbutton. - Add the below environment variables:
XDG_RUNTIME_DIR=/run/user/1000
QT_QPA_PLATFORM=wayland
QT_VULKAN_LIB=/usr/lib/libvulkan.so.1

7. Build and run the project[edit | edit source]
- Make sure that the board is connected to the host machine via the USB DRD TypeC connector. for that, follow the instructions from the X-LINUX-QT expansion package#Hardware prerequisites section and check how to get your board connected to the host machine.
- Once in the
Run Settingpanel, the notice below should not appear at the bottom of the screen.

- Press the
Runbutton from the vertical bar on the left to build, deploy and run the selected example on the connected board.

- If everything went well, then the example will be running on the connected board.
