This article explains how to use the stai_mpu API for semantic segmentation applications supporting OpenVX [1] back-end.
1. Description[edit source]
The semantic segmentation neural network model allows categorizing each pixel in an image into a class or object with the final objective to produce a dense pixel-wise segmentation map of an image, where each pixel is assigned to a specific class or object. The DeepLabV3 is a state-of-art deep learning model for semantic image segmentation, where the goal is to assign semantic labels (such as person, dog, cat) to every pixel in the input image.
The application enables three main features:
- A camera streaming preview implemented using GStreamer. All the image processing is done on the ISP level using the DCMIPP main pipe.
- An NN inference based on the camera (or test data pictures) inputs is being run on the NPU using OpenVX back-end.
- A user interface implemented using Python™ GTK, where the NN inference results are drawn and displayed.
The performance depends on the NN model used and on the execution engine. Using the NPU/GPU hardware acceleration for NN model inference gives better performance. In this case, the CPU is dedicated to the camera stream and is not involved in the NN inference. For a software inference, the CPU resources are shared between the handling of the camera stream and the NN inference.
The model used with this application is the DeepLabV3 downloaded from the TensorFlow™ Lite Hub[2].
2. Installation[edit source]
2.1. Install from the OpenSTLinux AI package repository[edit source]
After having configured the AI OpenSTLinux package you can install X-LINUX-AI components for semantic segmentation application:
2.2. Source code location[edit source]
- in the OpenSTLinux Distribution with X-LINUX-AI Expansion Package:
- <Distribution Package installation directory>/layers/meta-st/meta-st-x-linux-ai/recipes-samples/semantic-segmentation/files/stai_mpu
- on the target:
- /usr/local/x-linux-ai/semantic-segmentation/stai_mpu_semantic_segmentation.py
- on GitHub:
3. How to use the application[edit source]
3.1. Launching via the demo launcher[edit source]
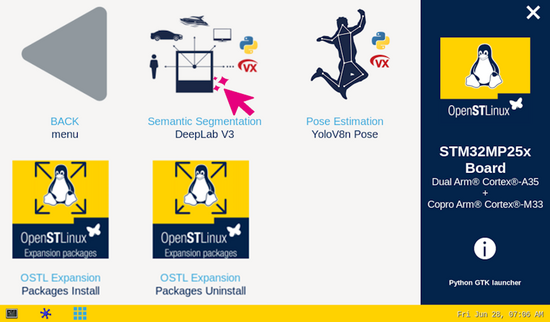
You can click on the icon to run Python OpenVX application installed on your STM32MP2x board.
3.2. Executing with the command line[edit source]
The semantic segmentation Python application is located in the userfs partition:
/usr/local/x-linux-ai/semantic-segmentation/stai_mpu_semantic_segmentation.py
It accepts the following input parameters:
usage: stai_mpu_semantic_segmentation.py [-h] [-m MODEL_FILE] [-i IMAGE]
                                    [-v VIDEO_DEVICE] [--conf_threshold CONF_THRESHOLD] [--iou_threshold IOU_THRESHOLD]
                                    [--frame_width FRAME_WIDTH] [--frame_height FRAME_HEIGHT] [--framerate FRAMERATE]
                                    [--input_mean INPUT_MEAN] [--input_std INPUT_STD] [--normalize NORMALIZE]
                                    [--validation] [--val_run VAL_RUN]
options:
  -h, --help  show this help message and exit
  -m MODEL_FILE, --model_file MODEL_FILE Neural network model to be executed
  -i IMAGE, --image IMAGE image directory with image to be classified
  -v VIDEO_DEVICE, --video_device VIDEO_DEVICE video device ex: video0
  --conf_threshold CONF_THRESHOLD Confidence threshold
  --iou_threshold IOU_THRESHOLD IoU threshold, used to compute NMS
  --frame_width FRAME_WIDTH width of the camera frame (default is 640)
  --frame_height FRAME_HEIGHT height of the camera frame (default is 480)
  --framerate FRAMERATE framerate of the camera (default is 15fps)
  --input_mean INPUT_MEAN input mean
  --input_std INPUT_STD input standard deviation
  --normalize NORMALIZE input standard deviation
  --validation enable the validation mode
  --val_run VAL_RUN set the number of draws in the validation mode
4. Testing with DeepLabV3 on STM32MP2x[edit source]
The model used for testing is the deeplabv3_257_int8_per_tensor.nb
To ease launching of the application, two shell scripts are available for Python application on the board:
- launch semantic segmentation based on camera frame inputs:
/usr/local/x-linux-ai/semantic-segmentation/launch_python_semantic_segmentation.sh
- launch semantic segmentation based on the pictures located in /usr/local/demo-ai/semantic-segmentation/models/deeplabv3/testdata directory
/usr/local/x-linux-ai/semantic-segmentation/launch_python_semantic_segmentation_testdata.sh
5. Going further[edit source]
The two shell scripts described before offers the possibility to select the framework automatically depending on the model provided or by specifying it. To be able to run the application using a specify frameworks, the models for each frameworks must be available in the /usr/local/x-linux-ai/semantic-segmentation/models/deeplabv3/ directory. Then, you will need to specify the framework as an argument of the launch scripts as follow.
- Run semantic segmentation based on camera input with the chosen framework. Available framework option is : nbg
/usr/local/x-linux-ai/semantic-segmentation/launch_python_semantic_segmentation.sh nbg
- Run semantic segmentation based on picture located in the /usr/local/demo-ai/semantic-segmentation/models/deeplabv3/testdata directory with the chosen framework. Available framework option is: nbg.
/usr/local/x-linux-ai/semantic-segmentation/launch_python_semantic_segmentation_testdata.sh nbg

