Target description
The purpose of this article is to explain step by step how to use the Secure Manager provided in the X-CUBE-SEC-M-H5, using the STM32H573 discovery board.
This "How To" guide is using the default configuration provided in the X-CUBE-SEC-M-H5.
If you want to modify this default configuration, refer to the How to start with Secure Manager customized config on STM32H5 article.
It is strongly advised to start with this practical example before starting to customize your own solution.
1. Introduction
- Start by reading the Secure Manager STM32H5 How to Intro article.
- For technical background, refer to the Secure Manager for STM32H5 article.
2. Prerequisites
2.1. Hardware
- STM32H573 discovery board: the STM32H573 devices have all the available security features, including the hardware crypto accelerator. (Note: the Secure Manager is not supported for STM32H56x devices. The hardware crypto is not available.)
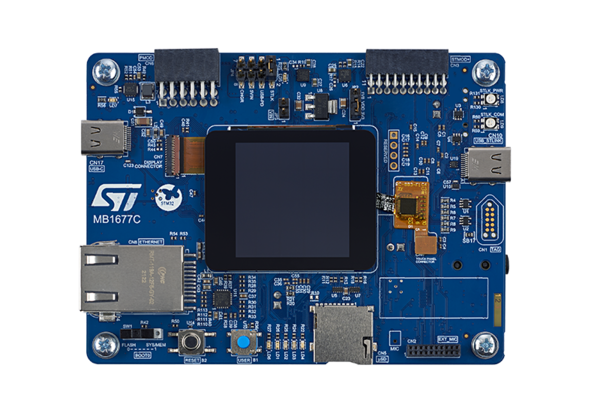
- Discovery MB1677- STM32H573 (USB Type-C cable not included)
- In case your board has already been used for other hands-on:
- Perform a regression in case the board is in another state than OPEN by using the script provided for the last hands-on done.
- If the board is in an OPEN state, verify that the SECBOOT_LOCK option byte is not set. You can use the STM32CubeProgrammer.
2.2. Required tools
- X-CUBE-SEC-M-H5_V2.1.0 available at the STM32TRUSTEE-SM. It contains the Secure Manager encrypted binaries (one per profile), the scripts to provision and install the Secure Manager, and examples and templates to develop a nonsecure application.
- STM32CubeProgrammer : V2.19.0 (with STM32TrustedPackageCreator (TPC) selected at installation).
- One of the supported IDE:
- EWARM (IAR) : V9.20.1 and the patch EWARMv9_STM32H5xx_V1.1.2 or later to support the STM32H5 series
- STM32CubeIDE : V1.18.0
- MDK_ARM : V5.38.0.0 and the patch Keil_STM32H5_DFP.1.3.2 or later to support the STM32H5 series
- Tera Term / Putty or equivalent UART terminal emulator.
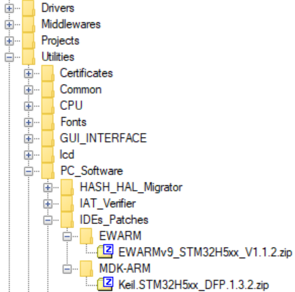
The IDE patches can be found in the X-CUBE-SEC-M-H5 Cube firmware:
2.3. X-CUBE-SEC-M-H5
- Download the X-CUBE-SEC-M-H5_V2.1.0 package
- A directory STM32H573I-DK is included in the Projects directory.
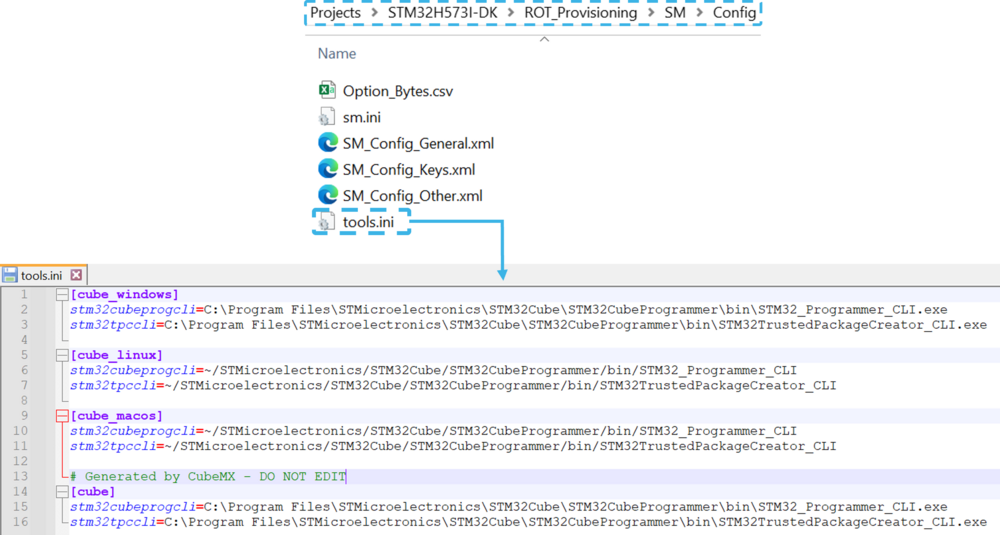
- If the STM32CubeProgrammer has not been installed in the default folder:
- C:\Program Files\STMicroelectronics\STM32Cube\STM32CubeProgrammer.
- The customized installation path needs to be updated for the operating system used in the variable: tools.ini (see the example in the figure below).
2.4. Python
- Download and install Python v3.10 (or later) available on https://www.python.org/. The python version can be verified with the following command:
$ python --version
Python 3.10.0
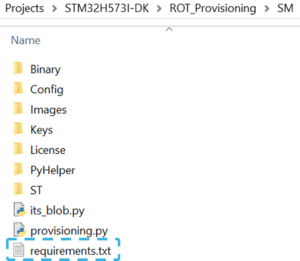
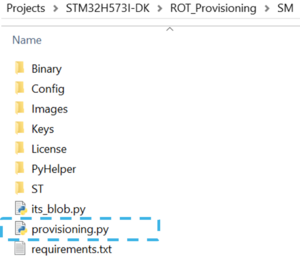
- Open a terminal in the folder Projects/STM32H573I-DK/ROT_Provisioning/SM/ and install required packages available in requirements.txt (see figure below) with the command:
$ python -m pip install -r requirements.txt
Note:
If you are behind a proxy, declare your proxy before using pip install with the command:
$ export PIP_PROXY=http://your.proxy.domain:port
- The packages installed can be verified with the command:
$ python -m pip list
Package       Version
------------- -------
click         8.1.3
colorlog      6.8.2
3. Secure Manager Profiles
Secure Manager is available in two profiles, tailored to different memory requirements:
- Large profile: Supports nonsecure applications up to 600KBytes. It uses only the user flash memory for the PSA firmware update service. This profile has been available since the X-CUBE-SEC-M-H5_V2.0.0 package.
- External Flash Profile: Supports larger nonsecure applications up to 1408 KB by using both user and external flash memory for the PSA firmware update service.
The user must select the profile based on their memory needs. A default configuration is provided for each profile.
3.1. Profile configuration
The Secure Manager profile selection is made in the sm.ini configuration file in Projects\STM32H573I-DK\ROT_Provisioning\SM\Config folder. By default, the Large profile is selected. To switch between profiles, update the profile section by choosing either large or external_flash, as shown in the picture below.
4. Step by step instructions
In the following, all commands are run with a terminal in Projects\STM32H573I-DK\ROT_Provisioning\SM folder
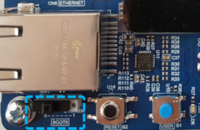
- On the STM32H573-DK, check that the switch (SW1) is set to 0 to boot from user flash.
- Connect the STM32H573-DK using the USB-C cable.
- Execute the command in a terminal:
$ python provisioning.py --sfi-gen --sfi-flash -a
This command runs two steps: the configuration and the installation of the Secure Manager Package. These steps are described in the following parts.
4.1. Script (provisioning.py) step 1
The step 1 of the script automatically generates all the needed files used for the device configuration.
When using the default configuration and keys, the script is executed up to step 2.
The step 1 of the script automatically generates all the files needed for the Secure Manager configuration.
As mentioned before, for more details about customized configuration, refer to How to start with Secure Manager customized config on STM32H5 article.
4.2. Script (provisioning.py) step 2
After completion of step 1, follow the indications of the script as shown in the figure below.
The step 2 of the script installs the Secure Manager and a nonsecure default application.
After installation you should see:
- The message saying the board is correctly confirmed.
- On the discovery board the led1, led2, led3 and led4 must blink. It is the default installed code by the script.
Note in case of issue:
- Check the provisioning.log file in the directory where the command has been run.
- Perform a regression (see chapter below) and restart at the beginning of this article.
5. Default installed code execution
As mentioned above, after the script execution completion, you should see the four LEDs blinking corresponding to the application code installed by default.
- Start Tera Term or another terminal emulator (see figure below)
- Select -> Serial -> select your COM port
- Setup -> Serial port -> set Speed to 115200 baud rate, data to 8 bit and stop bit to 1 bit -> New setting
- Press the reset button of the discovery board (B2 black button)
- The default-installed code makes four LEDs blink and outputs the information shown in the terminal (see figure below): the memory configuration, the Secure Manager version and the version of the installed ST updatable Root of Trust.
For more details about the Secure Manager updatable Root of Trust (SMuRoT), refer to the Secure Boot for STM32H5 article.
- Close the terminal window.
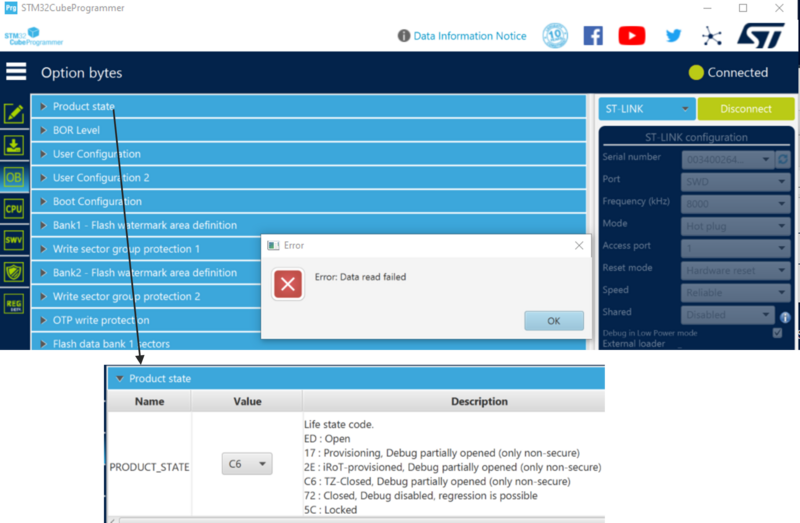
- Start STM32CubeProgrammer and try to connect (mode: Hot plug, Reset mode: Hardware reset, access port 1), see the figure below.
The following can be observed:
- The option byte readout shows that the script has set the device in TZ-Closed (TrustZone®-Closed). This leaves the nonsecure application open for debug. For more details about product states, refer to the New product state article
- The user flash at 0x08000000 is not accessible as it is a secure zone where the Secure Manager is installed.
- The user flash at 0x0805E400 for the Large profile and 0x08066400 for the External Flash profile is accessible and is used as the location of the nonsecure default installed application.
Notes:
- Do not modify the option bytes (regressions are not allowed, Closed state setting is allowed but do not do it for this tutorial as it closes the debug access for the nonsecure application).
- Before continuing to the next step, disconnect on STM32CubeProgrammer
- !! Important reminder: the Locked state closes definitively your device. It is a final state adding a further protection level, but the device cannot be changed or the debugger reopened anymore, by any method.
6. Develop your own application
As described above, the device is set in TZ-Closed by the installation script. This means that the device is still open for nonsecure application development.
An example of application that you can modify is included in the X-CUBE-SEC-M-H5. It is provided for the three supported IDE (EWARM, MDK-ARM and STM32CubeIDE).
- Open the application located at : X-CUBE-SEC-M-H5_VX.Y.Z\Projects\STM32H573I-DK\Applications\ROT\SMAK_Appli\
- The following example is shown using IAR (EWARM) project, you can use the other supported IDE (MDK-ARM, STM32CubeIDE) in the same way.
- You can make your own modifications to this code.
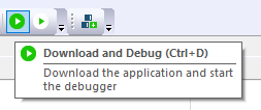
- To upload the code to the device, simply select: download and debug as shown in figure below (for IAR)
- Close the IDE and connect your terminal emulator according to the setting described in chapter Default installed code execution
- Press the reset button of the discovery board (B2 black button).
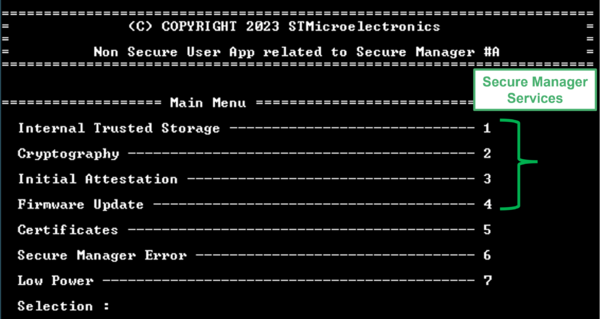
- The window shown below is displayed. The menu of the different services (API) of the Secure Manager are indicated in the displayed menu (for more details refer to How to start with Secure Manager customized config on STM32H5)
- Since the device is in TZ-Closed, it is open for nonsecure application development, a modification of the application running on the device is straightforward:
- Open the IDE, make your modifications and reload the modified application. For IAR select Make & Restart (see figure below)
- Press the reset button of the discovery board (B2 black button) and the new application code is executed.
7. Regression
Performing a full regression is reinitializing (back to virgin state) the device.
- The installed Secure Manager is removed.
- The complete user flash and OBKeys are erased.
- The memory mapping for nonsecure application is no longer fixed.
- The device is set in OPEN state.
For more explanations, see Secure Manager STM32H5 How to Intro article.
In the following, all commands are run with a terminal in Projects\STM32H573I-DK\ROT_Provisioning\SM folder.
The easiest way to make a regression is to run it from the provisioning.py:
- From a terminal, call the command:
$ python provisioning.py --regression -a
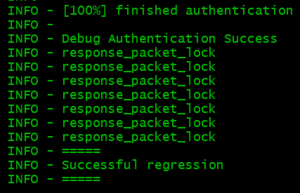
- When the regression is completed, the message below is displayed
Note:
- The option -a allows to run the script automatically.
- The option --regression can be called with the option --sfi-gen and/or --sfi-flash. The regression will be performed during the step 2, before the Secure Manager installation like (see the figure above).
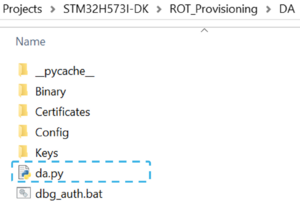
The regression script can also be performed from the da.py script:
- From a terminal, call the command:
$ python ../DA/da.py --regression
- When the regression is completed, the message below is displayed:
8. Troubleshooting
If the Secure Manager is used with the default configuration as described above, you must not have any issue as nothing can be wrongly configured.
If errors occur, refer to the dedicated chapter of the article
How to start with Secure Manager customized config on STM32H5.
