This article shows how to run FP-AI-VISION1 function pack projects on STM32H747I-DISCO Discovery kits by using the people counting demo as an example. For the STM32H747I-DISCO Discovery kits shipped with the version A09 of the MB1166 LCD daughterboard, an additional step to update the drivers is also described. Further, if you only get static on the LCD as shown below, this article might be helpful.

1. Prerequisites
1.1. Hardware
- A USB Type-A or USB Type-C® to Micro-B cable
- B-CAMS-OMV camera module bundle
- STM32H747I-DISCO Discovery kit with LCD daughterboard
1.2. Software
- STM32CubeIDE integrated development environment v1.13.1 or higher
- FP-AI-VISION1 function pack v3.1.0
2. Hardware setup
Connect the B-CAMS-OMV camera to the STM32H747I-DISCO Discovery kit using the flexible flat cable (FFC). Ensure that the FFC is securely attached to both ZIF connectors, and that the orientation is as shown in the figure below (highlighted in yellow).
Next, attach the USB cable to the USB port labelled "STLINK-V3E", as shown in the figure below (highlighted in blue).

3. Project import
If the goal is to run the project on the STM32H747I-DISCO without any modifications, simply drag and drop the file ..\FP-AI-VISION1_V3.1.0\Projects\STM32H747I-DISCO\Applications\PeopleCounting\Binary\STM32H747I-DISCO_PeopleCounting_Quant8_IntFps_IntFlash_V310.bin onto the STM32H747I-DISCO mass storage device as shown below.

3.1. Project import into STM32CubeIDE
The project can be imported into STM32CubeIDE by simply opening the .project file located at ..\FP-AI-VISION1_V3.1.0\Projects\STM32H747I-DISCO\Applications\PeopleCounting\STM32CubeIDE\.project and following the steps below:
- Double-click on the .project file
- STM32CubeIDE prompts for a workspace directory, as shown below. Select an appropriate location and press "Launch".
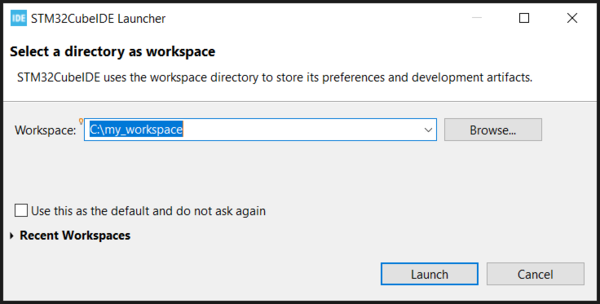 Figure 4: Select workspace
STM32CubeIDE prompts again once the project is successfully imported. Press "OK" to proceed.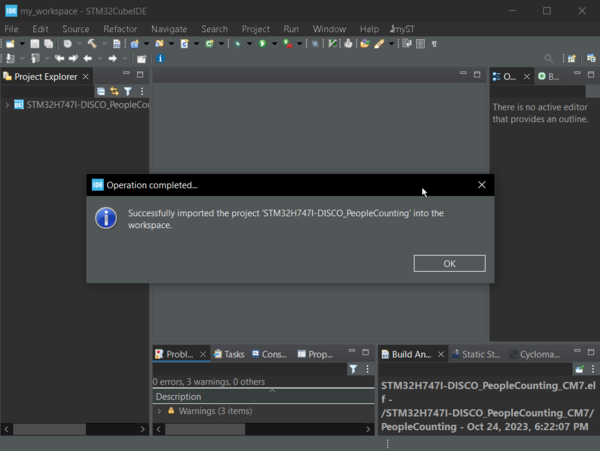 Figure 5: Prompt after successful import
 - The project is visible under the project explorer.


3.2. Directory overview
This project is being deployed on the STM32H747XI microcontroller, which is a dual-core Arm® Cortex®-M7 and Cortex®-M4 MCU. In this project, we only use the Cortex®-M7 core and therefore are only working with the CM7 directory. This directory contains the source code specific to the people counting project. Detailed information about the organization of this directory is available in the section 3.2 of the Artificial Intelligence (AI) and computer vision function pack for STM32H7 microcontrollers user manual UM2611.
4. Driver update (required only when using MB1166 version A09)
The drivers for the LCD daughterboard MB1166 version A09 (pictured below) are currently not included in the FP-AI-VISION1 function pack. To deploy the project on the STM32H747I-DISCO Discovery kits equipped with the version A09 of the MB1166 LCD daughterboard, follow the steps below to install the drivers.

- If you already have STM32CubeH7 v1.11.1 or above installed, locate the directory at
C:\users\<username>\STM32Cube\repository\STM32Cube_FW_H7_V1.11.1\Drivers\BSP\Components\nt35510and jump to step 3.
If it is not the case, download the drivers from the (1) STM32CubeH7 GitHub repo by clicking on (2) "Code", and then (3)"Download ZIP", as shown in the figurebelow.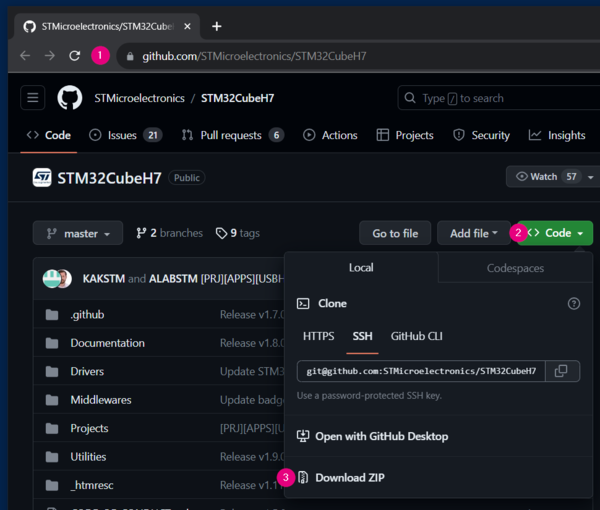 Figure 7: Download ZIP from GitHub
 - Extract the contents of
STM32CubeH7-master.zipto a local directory. - Copy the directory
..\STM32CubeH7-master\Drivers\BSP\Components\nt35510to..\FP-AI-VISION1_V3.1.0\Drivers\BSP\Components\ - Copy the files
..\STM32CubeH7-master\Drivers\BSP\STM32H747I-DISCO\stm32h747i_discovery_lcd.cand..\STM32CubeH7-master\Drivers\BSP\STM32H747I-DISCO\stm32h747i_discovery_lcd.h, and paste both files into the..\FP-AI-VISION1_V3.1.0\Drivers\BSP\STM32H747I-Discovery\directory - Use a text editor to open
..\FP-AI-VISION1_V3.1.0\Projects\STM32H747I-DISCO\Applications\Common\CM7\Inc\stm32h747i_discovery_conf.h. On line 34, add a #define for NT35510, and change the OTM8009A #define to 0, as follows:/* LCD controllers defines */ #define USE_LCD_CTRL_NT35510 1U #define USE_LCD_CTRL_OTM8009A 0U #define USE_LCD_CTRL_ADV7533 0U
- From the
FP-AI-VISION1_V3.1.0\Drivers\BSP\Components\nt35510directory, select the four source files as shown in the figure below. Then, drag and drop the selected files into the components directory in STM32CubeIDE.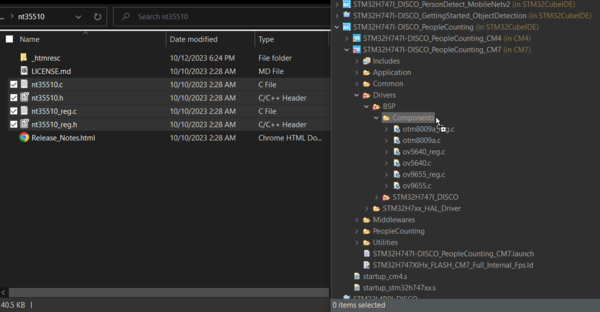 Figure 8: Drag and drop all four files into components directory
- Then, in the pop-up window, keep “Link to files” and click "OK".
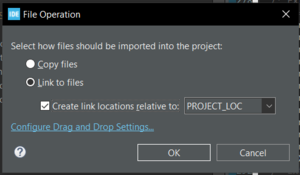 Figure 9: Select "Link to files" and click "OK"
 - The drivers are now indexed into the project
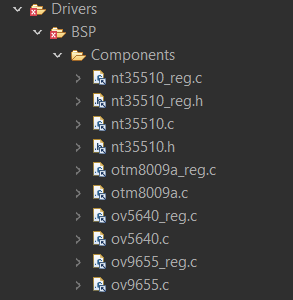 Figure 10: Drivers are indexed
- Then, in the pop-up window, keep “Link to files” and click "OK".


5. Building and programming
Right-click the project, then (1) clean and (2) build the project. It is now possible to click on the (3) run icon to program and execute the project.

Once the execution starts, the screen displays a live output from the camera along with the number of people detected in the frame, as shown below.

6. References
Vision Pack Video Application Notes
UM2611: Artificial Intelligence (AI) and computer vision function pack for STM32H7 microcontrollers