How to start with DA access on STM32H573-TrustZone disabled![]() 60min
60min
Target description
Through this practical example the user will learn how to perform the following operations
- Perform the provisioning and install the firmware files
- Execute the installed firmware
- Perform a full regression with Password Authentication method
This DA Step by step tutorial is divided in four steps
- Step 1 : Debug Authentication Configuration
- Step 2 : Initial Option Bytes programming
- Step 3 : Code image generation and flashing
- Step 4 : Full regression
Prerequisites
- Introduction to Debug Authentication for STM32H5 MCUs
- RM0481 STM32H5x3/562 Reference Manual
- knowledge of STM32CubeProgrammer
- knowledge of JTAG / SWD interface
Hardware
- Discovery board STM32H573I-DK. (or NUCLEO board NUCLEO-H563ZI)
Required tools
- STM32CubeProgrammer[1] Software programming tool for STM32 (v2.13.0 min)
- Including STM32TrustedPackageCreator
- STM32Cube_FW_H5_V1.0.0 [2] or upper
- IAR Embedded Workbench v9.20.1 or upper
- Tera Term or equivalent UART Terminal emulator
Literature
- Introduction to Debug Authentication for STM32H5 MCUs
- RM0481 STM32H5x3/562 Reference Manual
- UM2237 STM32CubeProgrammer software description
- UM2238 STM32 Trusted Package Creator tool software description
- AN5054 Secure programming using STM32CubeProgrammer
- AN2606 STM32 microcontroller system memory boot mode
Environment setup
Before starting, the first step is to prepare the environment to be able to go through the DA process.
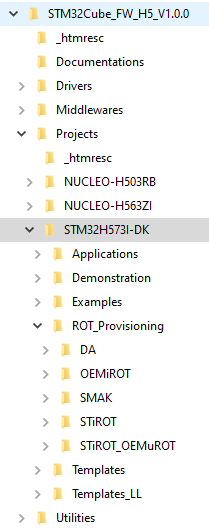
- Download the STM32CubeH5 package and install it
An STM32H573I-DK directory is included in the Projects directory:
1. Introduction
This article shows an example of Debug Authentication use case for STM32H573 devices with TrustZone disabled.
This article is based on the STM32CubeH5 package example for STM32H573 MCUs.
2. DA Step by step : Provisioning script
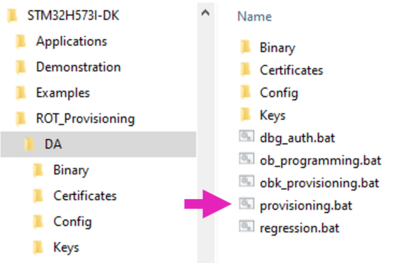
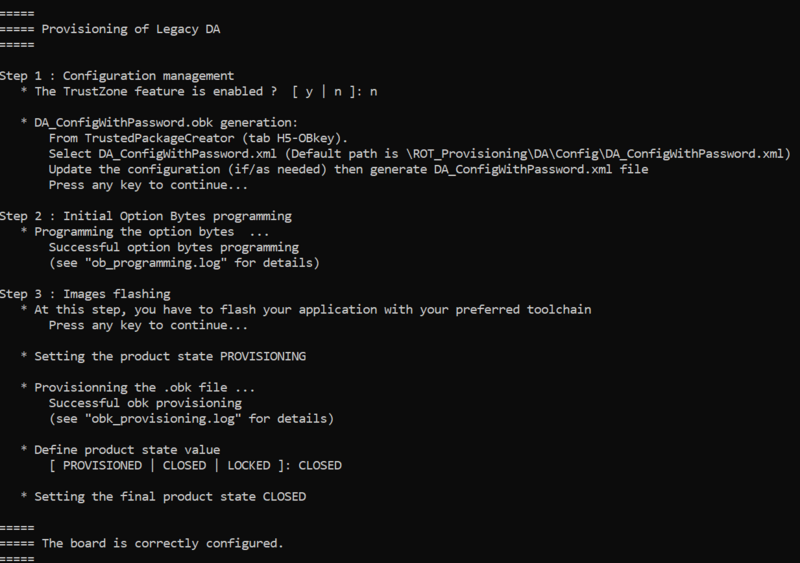
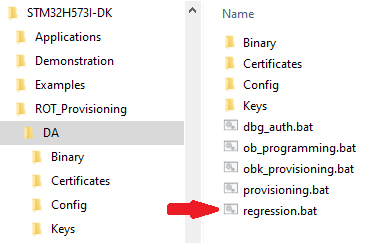
In this chapter we will run the provisioning.bat script located in
Projects\STM32H573I-DK\ROT_Provisioning\DA
The provided provisioning script will
- Configure the DA on the device
- Set the option bytes of the device
- Set the final chosen product state according user selection
- Connect the board and verify with STM32CubeProgrammer that TZ is disabled, and product state is Open
- Run the provided provisioning.bat script (double click)
- Note: For Linux and Mac operating systems, the end users may have to change manually the attribute of .sh scripts to executable.
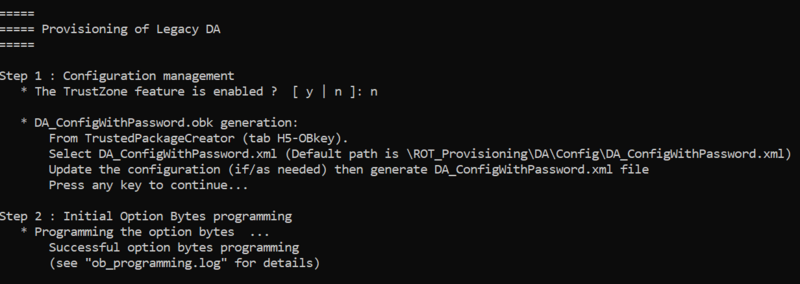
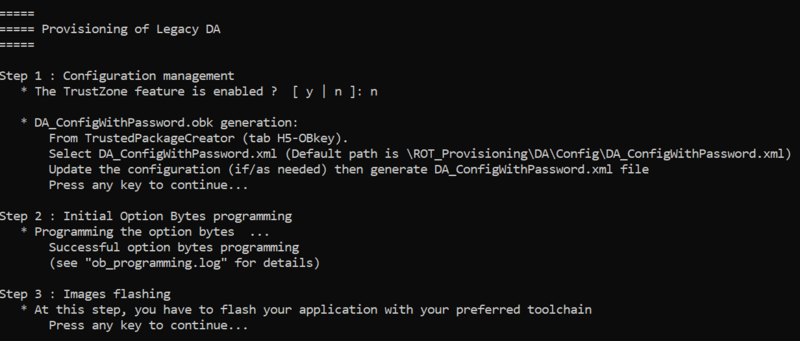
- The script asks if Trustzone feature is enabled : answer no
The next step to be done is indicated: Debug Authentication configuration. The following paragraph describes how to complete this step .
2.1. Step 1 : Debug Authentication configuration
At this step the file DA_ConfigWithPassword.obk will be generated in DA\Binary folder. This file is used to configure the conditions to trig regression of production state from PROVISIONNED/CLOSED to OPEN. A default file is provided in the STM32CubeFW_H5 example that can be used without modification for a first trial.
Trusted Package Creator will be used to setup this file using the DA_ConfigWithPassword.xml as input located in Projects\STM32H573I-DK\ROT_Provisioning\DA\Config path.
In this case Trustzone is disabled which means that configuration is based on password. You have the possibility to update the password at this step if you want.
To generate a customized configuration file, proceed as follows:
- Open Trusted Package Creator and select H5
- Open Obkey tab
- Select the DA_ConfigWithPassword.xml file
- Update the password if needed
- For a commercial product it's mandatory to define your own password
- Two files are generated :
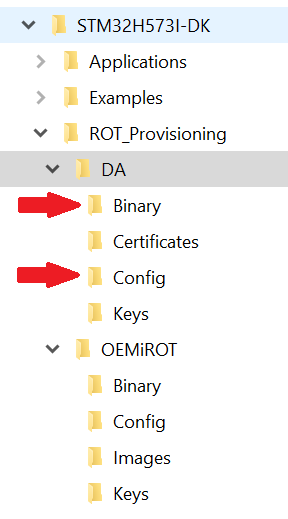
- DA_ConfigWithPassword.obk in Projects\STM32H573I-DK\ROT_Provisioning\DA\Binary folder for provisioning
- password.bin in Projects\STM32H573I-DK\ROT_Provisioning\DA\Config folder used to open the DA access for regression
You get the success message:
2.2. Step 2 :Option Bytes programming
Go back to provisioning script window and press a key to continue procedure. The script will proceed with the option byte programming :
- remove all protections
- Erase User Flash
2.3. Step 3 :Code image generation and flashing
Once OB successful programmed the script ask to flash your application :
For this example, we use GPIO_IOToggle application located in STM32Cube_FW_H5
Once the firmware downloaded the Leds will blink.
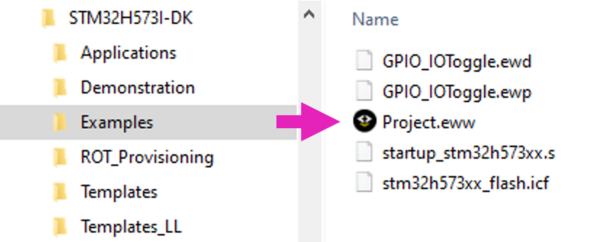
- Open the Project.eww located in the EWARM directory :
Projects\STM32H573I-DK\Examples\GPIO\GPIO_IOToggle
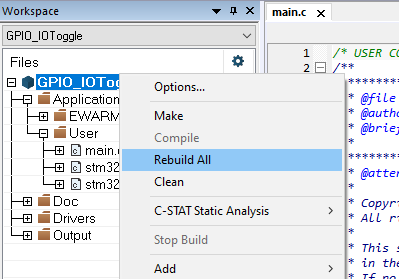
- Perform: Project -> Rebuild all
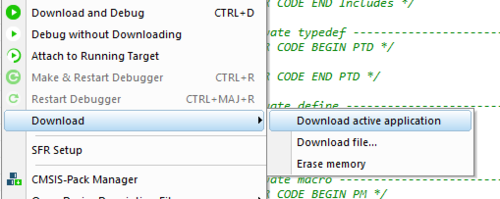
- Once project correctly builded, connect the board and select Project->Download->Download active application
- Reset the board (black button) ant leds must now blink
- Go back to provisioning script window and press a key to continue procedure
- Follow the script and choose the product state (PROVISIONED or CLOSED)
Make a first trial setting the product in CLOSED state : the installed code must run and the led blink.
3. DA Step by step : Full regression
- A full regression will erase the user stored contents and secrets.
- Erase the user flash content
- Set the product in open state
- If the product is in Open state, a full regression is not needed since the device is not secured and changes can be done without any authentication. In case the regression script is executed, it will indicate some errors
- If the product is not in Open state, the only way to change the product state is to first do a full regression
3.1. Full regression using script (included in the STM32CubeFW)
The regression can be done using the provided script or using CubeProgrammer
To preform a full regression
- Launch the regression script
- Note: For Linux and Mac operating systems, the end users may have to change manually the attribute of .sh scripts to executable.
- “The Trustzone feature is enabled?” answer “No”
- Connect STM32CubeProgrammer. Check that the flash content is well erased and that the option bytes and product state are at default values.
3.2. Full regression using STM32CubeProgrammer
- Disconnect STM32CubeProgrammer
- Redo the exercise starting at step1, set the “closed” state
- Click
 in CubeProgrammer and select “Debug Authentication”
 - Click “Discover” the information window will be filled
- Enter the password.bin file located in ROT_Provisioning\DA\Config
- Click Full regression and you have the Success Message :
- Check with CubeProgrammer that the flash content is well erased and that the product state and option bytes are at default values thanks ST link SWD.
4. References

