This article describes how to install the X-CUBE-AI Expansion Package through STM32CubeMX.
X-CUBE-AI is an STM32Cube Expansion Package that expands the capabilities of STM32CubeMX and is a part of the STM32Cube.AI ecosystem. It offers the automatic conversion of pretrained artificial intelligence algorithms, which include neural network and classical machine learning models. Additionally, it integrates a generated optimized library into the user's project.
1. Prerequisites
- STM32CubeMX (v6.9.1 or higher) installed on your computer
- myST account
- Internet access to download the X-CUBE-AI package
- Proxy configuration (optional)
2. Proxy configuration (optional)
If the PC running STM32CubeMX is connected to a computer network using a proxy server, STM32CubeMX must connect to that server. When the connection is established, STM32CubeMX can access the internet, get self-updates, and download firmware packages. Proxy configuration is typically (but not always) required on enterprise networks.
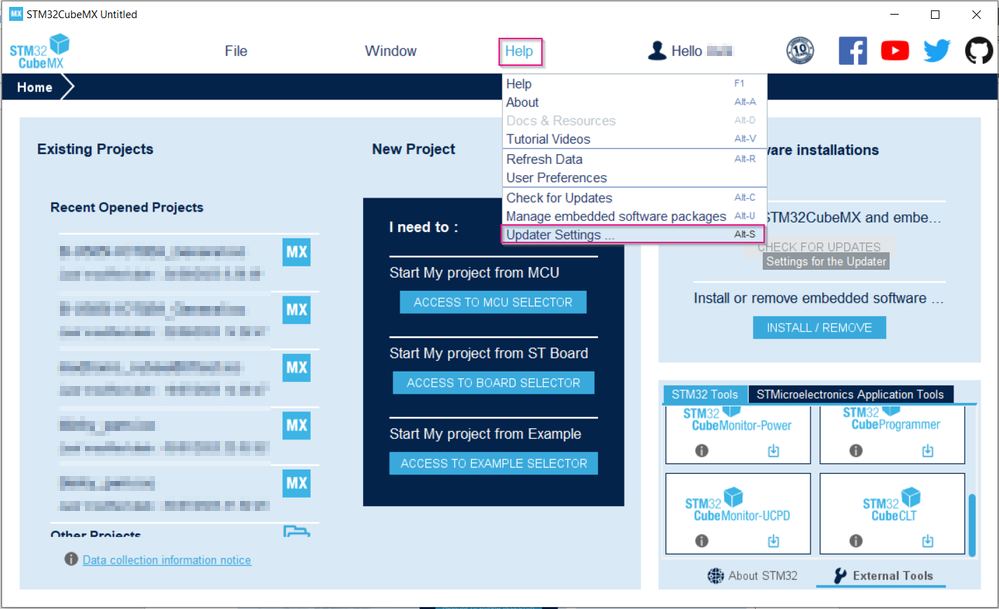
1. Launch STM32CubeMX and click [Help] > [Updater Settings]
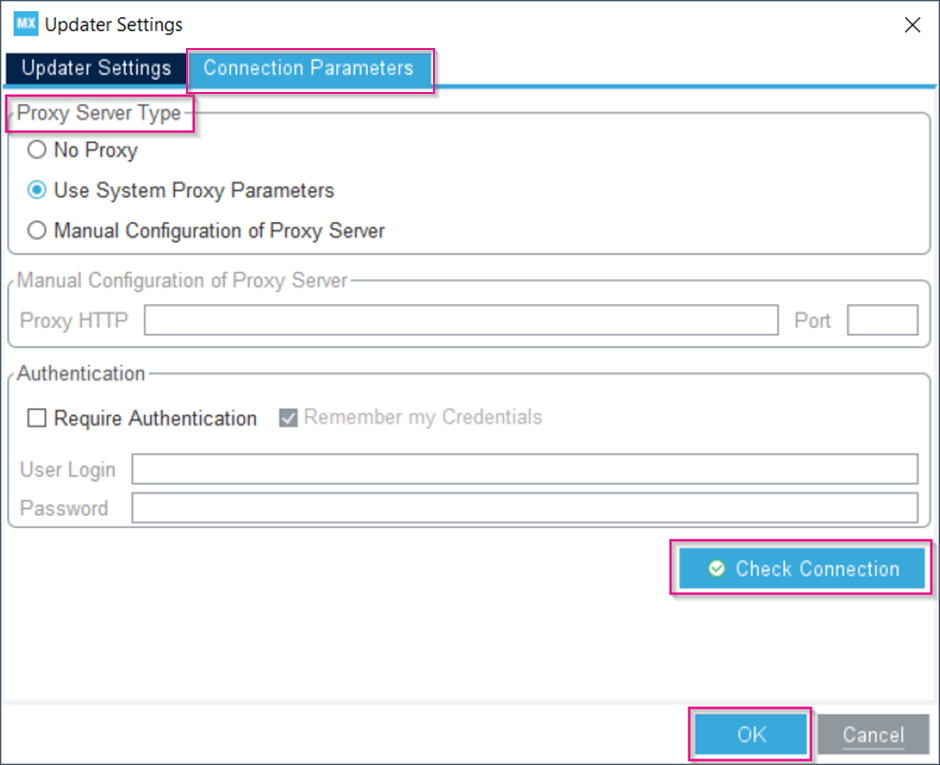
2. Under the Connection Parameters tab, choose the appropriate Proxy Server Type
Fill in the proxy information, if needed. To ensure that STM32CubeMX can access the internet through the configured proxy, press [Check Connection]. Once the connection has been verified, press [OK].
If needed, contact your IT administrator for proxy information (proxy type, http address, port). For detailed information about connection parameters, see the section 3.4.2 in STM32CubeMX user manual[1].
3. X-CUBE-AI installation
Once the STM32CubeMX installation is complete and STM32CubeMX can access the internet, follow these steps to install the X-CUBE-AI package:
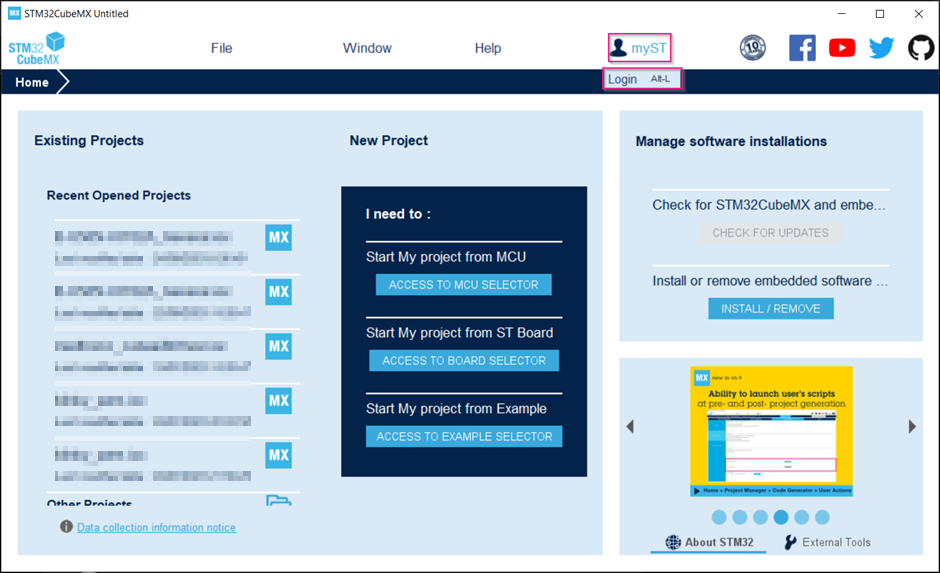
1. Launch STM32CubeMX and press [myST] -> [Login]
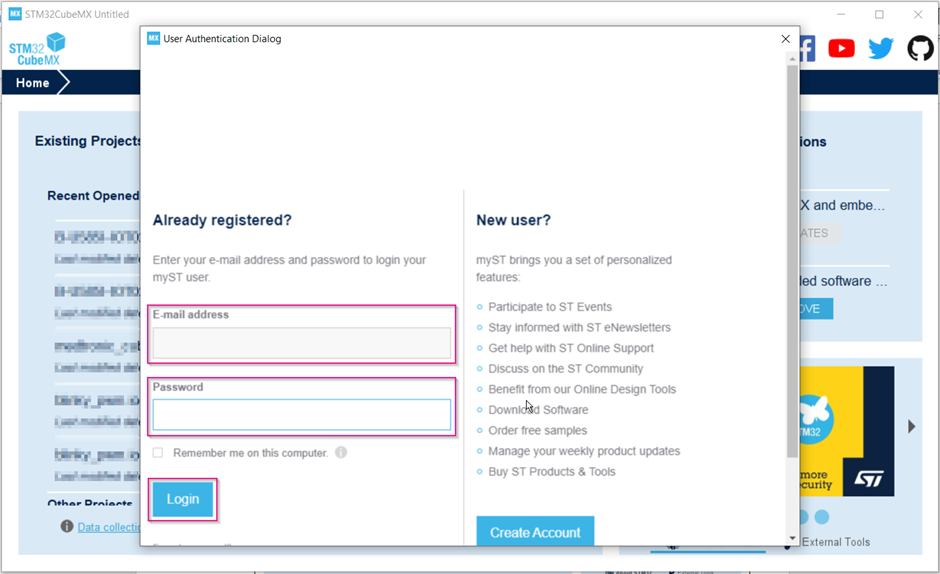
2. Enter your myST account email address and password, and press [Login]
If you do not have a myST account, press [Create Account] to make one'.
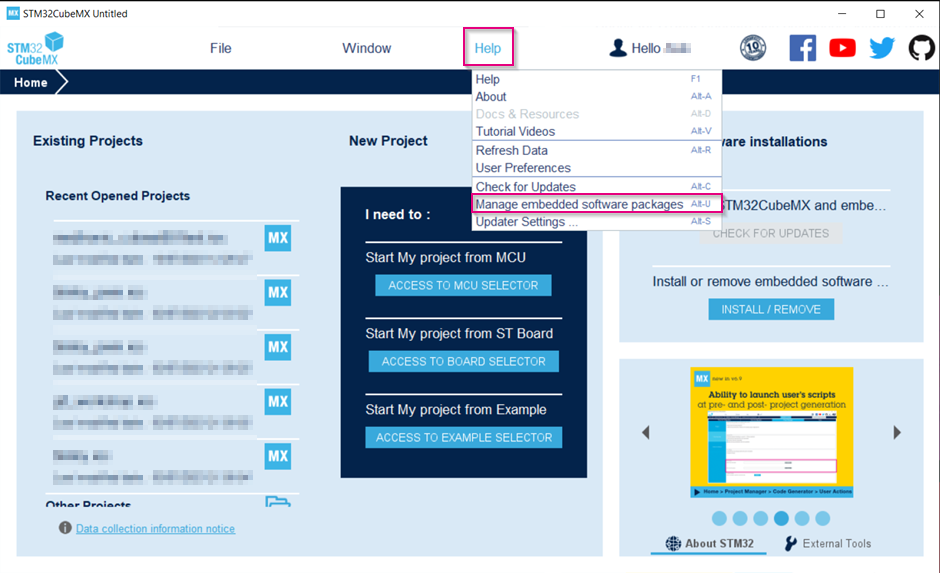
3. Once you are logged in successfully, press [Help] -> [Manage embedded software packages]
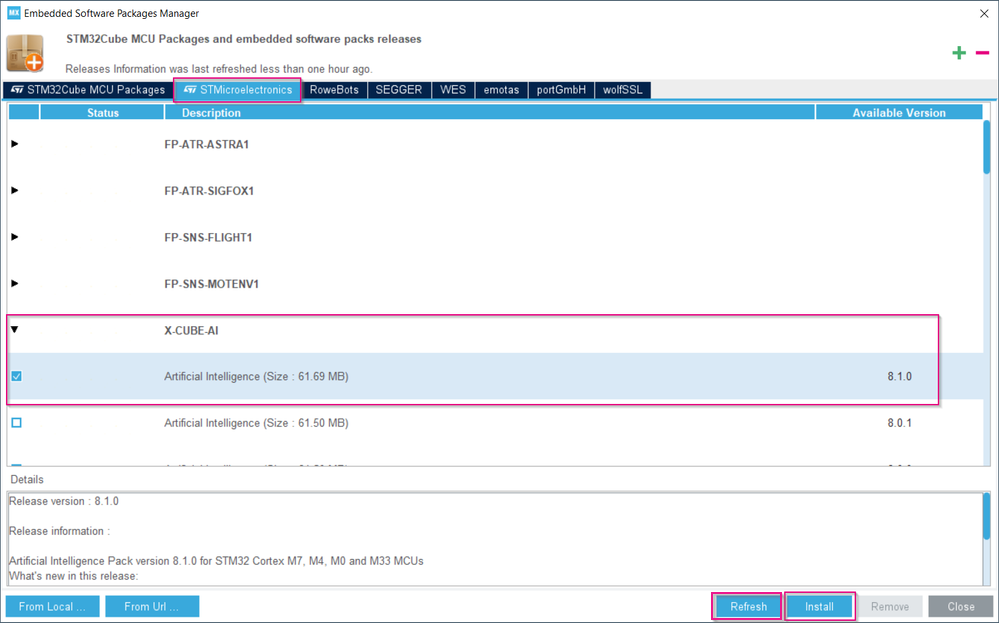
4. Open the Embedded Software Packages Manager window
Press the [Refresh] button to get an updated list of add-on packs. Go to the [STMicroelectronics] Tab, press [X-CUBE-AI], select the [Artificial Intelligence] package version you wish to install, and click the [Install] button.
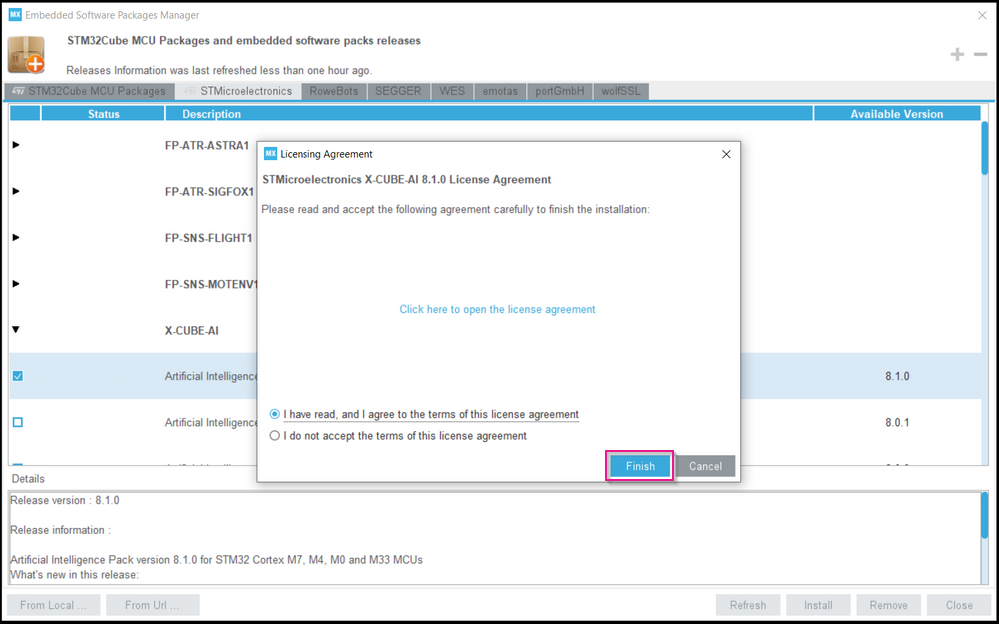
5. Follow the installation steps on the screen and click [Finish]
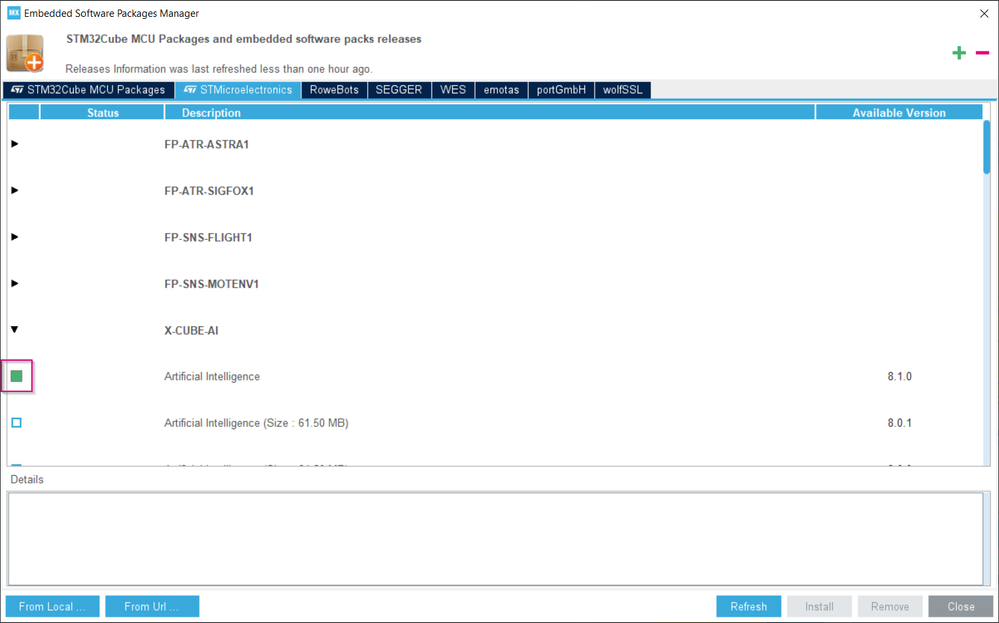
6. Once the installation is successful, the X-CUBE-AI Artificial Intelligence package is marked with a green box
Click [Close] before proceeding.
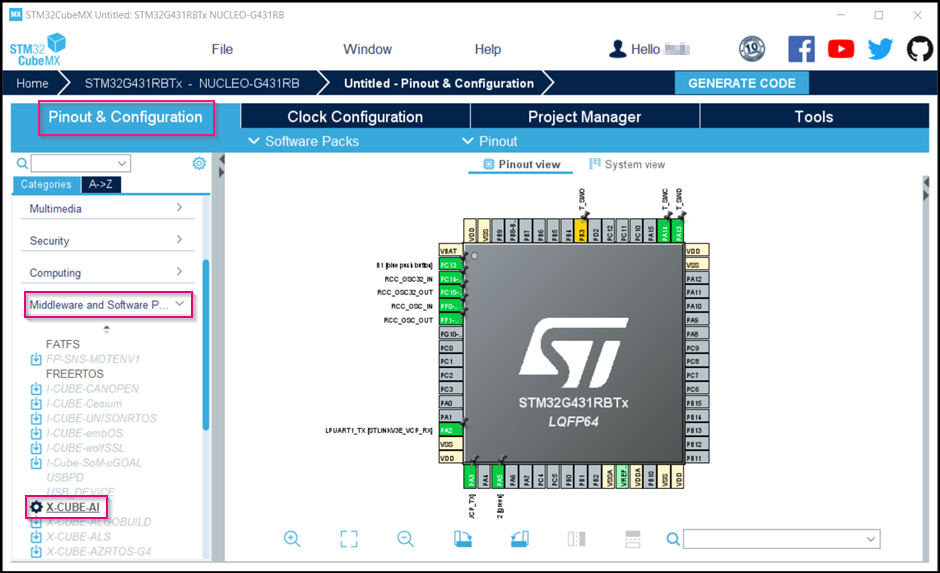
7. In STM32CubeMX, click [File] > [New Project] and select your preferred MCU from the [MCU/MPU Selector] tab, or select your preferred board from the [Board Selector] tab
Then, under the [Pinout & Configuration] tab, press [Middleware and Software packages], and then select [X-CUBE-AI].
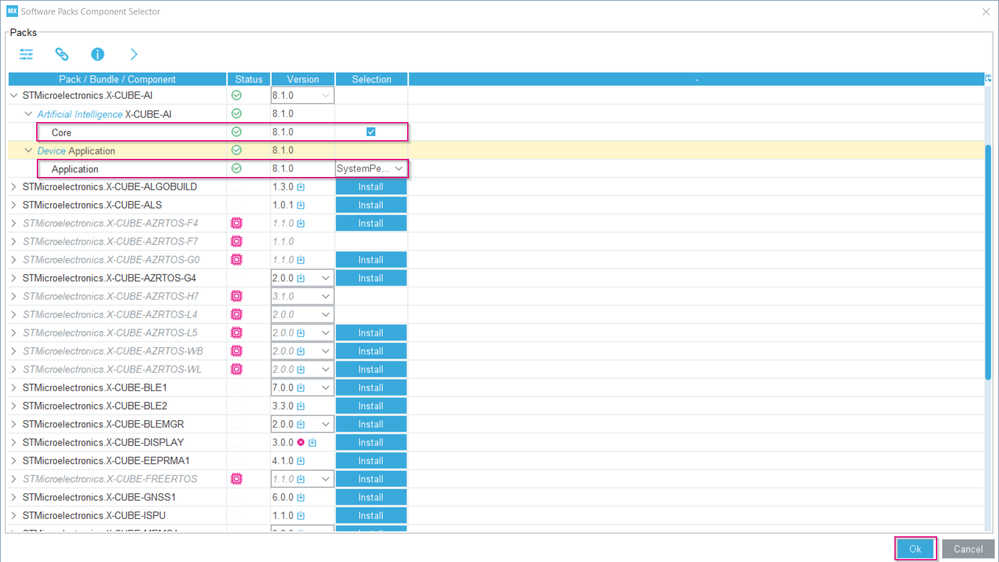
8. In the Software Packs Component Selector window, select STMicroelectronics.X-CUBE-AI
Then enable Core: Artificial Intelligence X-CUBE-AI -> Core -> Enable Finally, select the application type: Device Application -> Application -> Select "SystemPerformance". Click on [Ok] when done in the Software Packs Component Selector window.
Note that X-CUBE-AI currently supports three application types, namely SystemPerformance, Validation, and ApplicationTemplate. See the sections 9, 10, and 11 in X-CUBE-AI getting started manual[2] for more details.
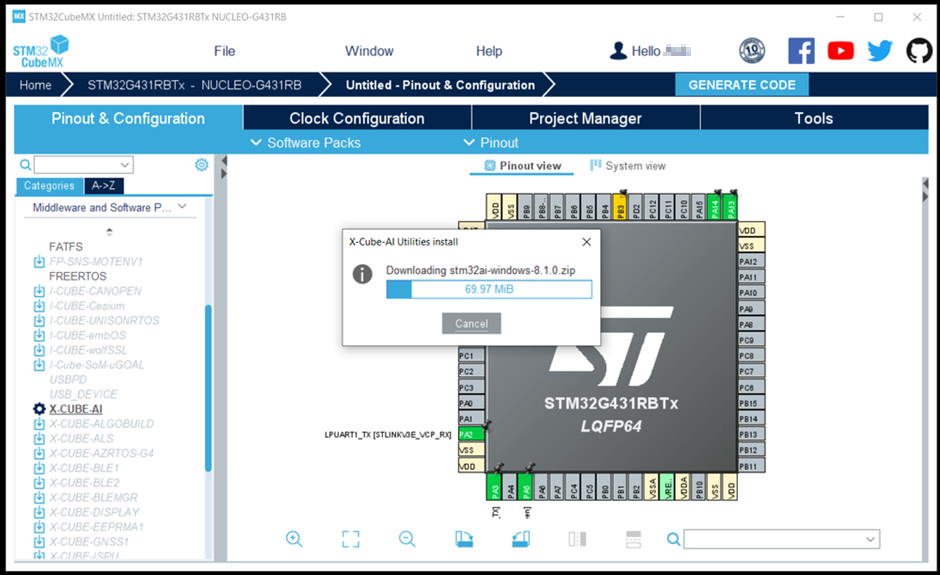
Since this is the first use of the X-CUBE-AI Expansion Package, an OS-specific part of the package is downloaded and installed automatically.
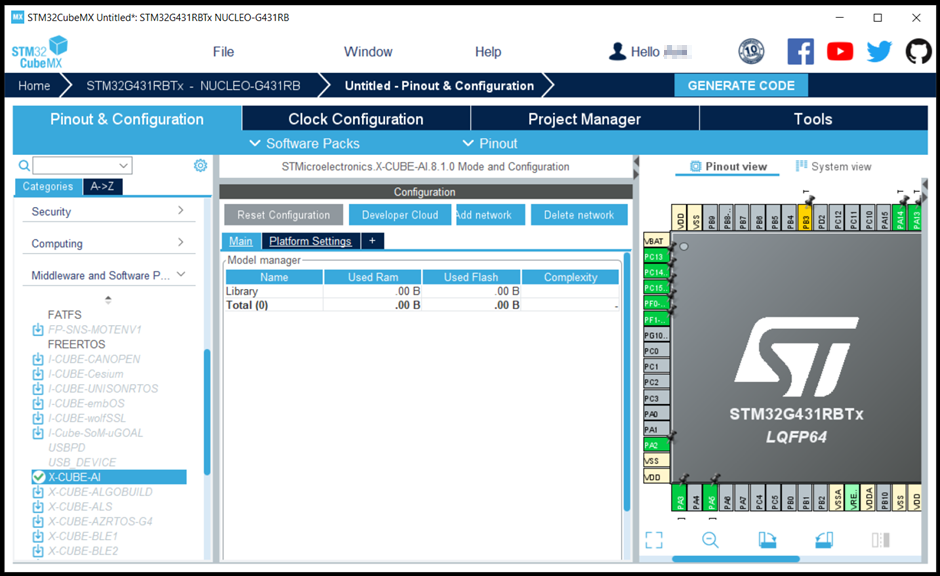
9. Once the download is complete, X-CUBE-AI is ready for use in your project
For more information on how to use X-CUBE-AI in your project, refer to the section 3 in X-CUBE-AI getting started manual[2].
4. References
