Literature
- UM2237 STM32CubeProgrammer software description
Target description
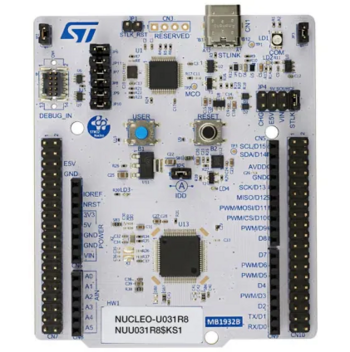
The purpose of this article is to explain step by step how to use the STM32CubeFW example provided by ST, for OEMiSB, using the Nucleo-STM32U031R8 board.
- How to use the script provided by ST and perform all the required steps.
- How to install and run the user application example which is provided.
Introduction
A theoretical introduction article is available here.
The example solution is provided with the STM32CubeU0 package and consists of 2 parts:
- Firmware/Projects/NUCLEO-U031R8/Application/ROT/OEMiSB_Boot
- Firmware/Projects/NUCLEO-U031R8/ Application/ROT/OEMiSB_Appli (a simple WRP demo)
Prerequisites
- Hardware
- STM32U031 Nucleo board: the STM32U031 does not support a hardware crypto accelerator.
- USB-C cable
- STM32U031 Nucleo board: the STM32U031 does not support a hardware crypto accelerator.
- Required tools
- STM32Cube_FW_U0_V1.0.0 or later
- STM32CubeProgrammer_rev2.16.0 or more recent.
- IAR Embedded Workbench® rev 9.20.4 or later.
- Tera Term / Putty or equivalent terminal emulator.
- STM32Cube firmware
- Download the STM32Cube_FW_U0 Cube firmware (avoid long paths in the firmware location)
- Check that the STM32U0 IAR™ provided patch is correctly installed in your IAR Embedded Workbench®.
- A directory NUCLEO-U031R8 is included in "STM32Cube_FW_U0_V1.x.x\Projects"
- Open the env.bat file in the ROT_Provisioning subfolder
- 1- If the STM32CubeProgrammer has not been installed in the default folder:
- 1- If the STM32CubeProgrammer has not been installed in the default folder:
C:\Program Files\STMicroelectronics\STM32Cube\STM32CubeProgrammer, the customized installation path needs to be updated.
- 2- Check that the OEMiSB_Appli path is OK
1. Example configuration
This chapter explains how to start with the provisioning script.
It is used to configure the OEMiSB and generate the binary image.
1.1. Example contents
The example for IAR Embedded Workbench® consists of two parts:
- OEMiSB_Boot corresponds to the secure boot.
It performs an integrity check of the project firmware and verifies that the security settings such as WRP and HDP are in place.
- OEMiSB_Appli is an example of an application protected by OEMiSB
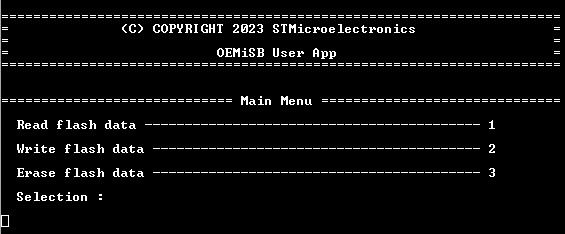
It displays the menu using the virtual COM port console.
1.2. OEMiSB project configuration
To ease the example generation and loading, a script is provided in the STM32Cube package. The script called “provisioning” is available in \Projects\NUCLEO-U031R8\ROT_Provisioning\OEMiSB.
The following steps configure the example:
1.2.1. Configuration management
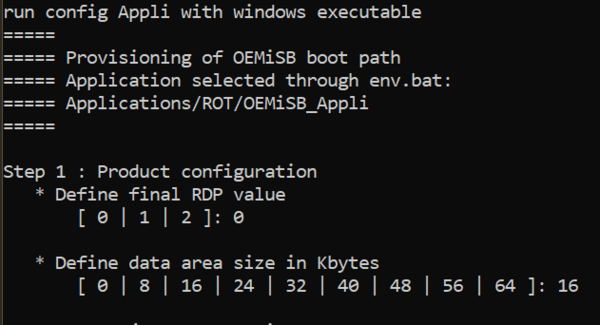
- RDP selection (Do not use 2 unless you are certain about the OEM2 password correctly set in prior, see Using RDP regression on the STM32U0 for more information)
- Data size selection
- Batch modifies header files automatically.
1.2.2. OEMiSB_Boot project build
The step 2 of the script is the generation of the firmware images.
- Open the Project.eww located in the EWARM directory: Projects\NUCLEO-U031R8\Applications\ROT\OEMiSB_Boot\EWARM
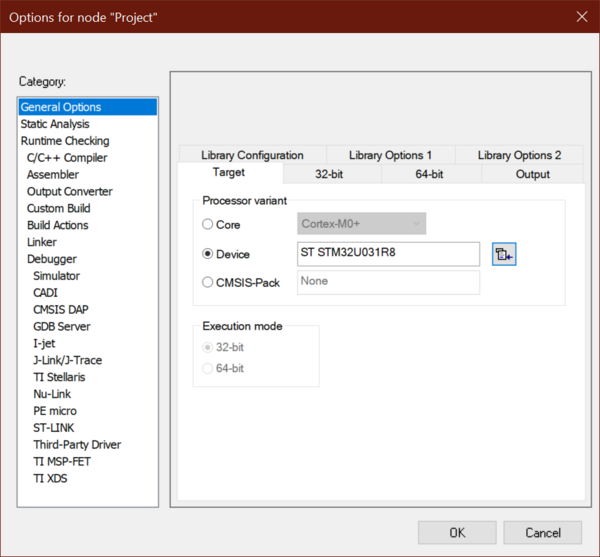
- Open Project ⇒ Option ⇒ General Options: The device and CPU core should be automatically recognized and you should see the following window:
If the device is not recognized, check that the STM32U0 IAR™ provided patch is correctly installed, and check that your IAR Embedded Workbench® version is recent enough.
- Perform: Project ⇒ Rebuild all (do not upload the code, only perform a compilation)
The following binary is created: Projects\NUCLEO-U031R8\Applications\ROT\OEMiSB_Boot\Binary\OEMiSB_Boot.bin
Return to the window where the batch is executed and press a key to continue.
1.2.3. OEMiSB_Appli project compilation
The provisioning batch passes the configuration (like selected data size) to the application source files. It is necessary to rebuild it to have the binary up-to-date and synced with the boot project.
- Open the Project.eww located in the EWARM directory:
Projects\NUCLEO-U031R8\Applications\ROT\OEMiSB_Appli\EWARM
- Open Project ⇒ Option ⇒ General Options
The device and CPU core should be automatically recognized.
- Perform: Project ⇒ Rebuild all (do not upload the code, only perform a compilation)
The following binary is created:
Projects\NUCLEO-U031R8\Applications\ROT\OEMiSB_Appli\Binary\OEMiSB_Appli.bin
The script computes also the application hash and generate a hash area binary.
You do not need to close the EWARM project.
This is the state of the batch execution at this point. Press the key to let the execution continue.
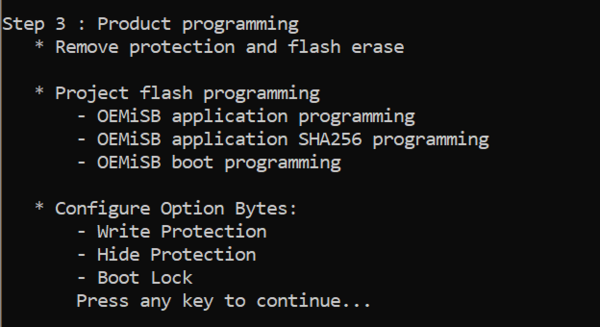
1.2.4. Provisioning
In the final phase, the batch execution shall:
- Remove old protections and initialize option bytes.
- Perform mass erase.
- Download application, boot, and hash.
- Engage security hardening by enabling HDP and WRP.
- Lastly the preselected RDP level is programmed in the OB.
A scripted approach is useful to automate hash generation, which would have to be manually imported into the binary on each build. Application hash checked by the immutable secure boot is an important part of the root of trust.
1.3. OEMiSB application execution
- Close the script
- Launch the Tera Term (or equivalent)
- File ⇒ New connection
- The COM port number should be the same as indicated by your Windows device manager
- Setup ⇒ Serial port ⇒ update to 115200 (and see the figure below for other configurations) ⇒ New Setting
- Press the reset button (black button of the discovery board)
- The OEMiSB application is executed (figure below)
Though the menu items may suggest there is actual data being sent or written, there are none. The meaning of the demo is rather to provide an example of determining the ceiling of the write protection.
