Target description
The purpose of this article is to explain step by step how to use the Secure Manager provided in the STM32Cube_FW-H5, using the STM32H57 discovery board.
This how to start is using the default configuration provided in the STM32Cube_FW_H5.
If you want to modify the default configuration, please refer to the How_to_start_with_Secure_Manager_customized_config_on_STM32H5 article.
But it is strongly advised to start with this practical example before starting to customize your solution.
Especially if you want to regenerate some keys, you need to understand the implications and store these keys preciously.
1. Introduction
- Start by reading the Secure_Manager_STM32H5_How_to_Intro article.
- For technical background, please refer to the Secure_Manager_for_STM32H5 article.
2. Prerequisites
- Hardware
- STM32H573 discovery board: the STM32H573 devices have all the available security features, including the HW crypto accelerator. (Note: the Secure Manager is not supported for STM32H56x devices, the HW crypto is not available)
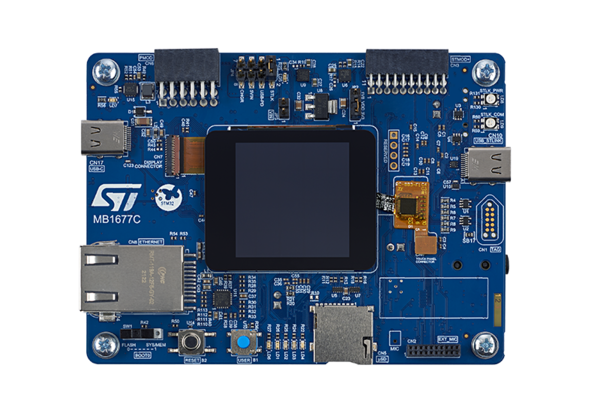
- Discovery MB1677- STM32H573 (need USB-C cable)
- STM32H573 discovery board: the STM32H573 devices have all the available security features, including the HW crypto accelerator. (Note: the Secure Manager is not supported for STM32H56x devices, the HW crypto is not available)
- Required tools
- STM32Cube_H5_V1.1.0 with Le STM32Cube_H5_V1.1.1 patch, or later
- STM32CubeProgrammer_rev2.14.0 or more recent (with STM32TrustedPackageCreator (TPC) selected at installation).
- One of the supported IDE: EWARM, MDK_ARM or STM32CubeIDE
- Tera Term / Putty or equivalent UART terminal emulator.
- STM32Cube Firmware
- Download the STM32CubeFW_H5 Cube firmware
- With STM32Cube_H5_V1.1.0 you need to download also the STM32Cube_H5_V1.1.1 patch and copy all files into V1.1.0
- For later STM32Cube_H5_V1.1.x, when available, it is delivered as a single zip file.
- A directory STM32H573I-DK is included in the “Projects” directory
- If the STM32CubeProgrammer has not been installed in the default folder:
- C:\Program Files\STMicroelectronics\STM32Cube\STM32CubeProgrammer.
- The customized installation path needs to be updated in the environment variable: env.bat (see the example in the figure below).
- Download the STM32CubeFW_H5 Cube firmware
3. Step by step instructions
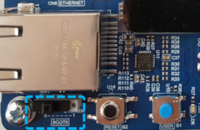
- On the STM32H573-DK, check that the switch (SW1) is set to 0 to boot from user flash
- Connect the STM32H573-DK using the USB-C cable
- Execute the provisioning_auto.bat script
Note:
In the figure above two scripts are shown:
- The provisioning_auto.bat to install the default configuration (used in this article).
- The provisioning.bat to customize the configuration (used in the How_to_start_with_Secure_Manager_customized_config_on_STM32H5 article
3.1. Script (provisioning_auto.bat) step 1
The step 1 of the script generates automatically all the needed files used for the device confguration.
Using the default configuration and keys, the script is executed straightforward till step 2.
The step 1 of the script is generating automatically all the files needed for the Secure Manager configuration.
As mentioned above, for more details about customized configuration, please refer to How_to_start_with_Secure_Manager_customized_config_on_STM32H5 article.
Note:
The figure above shows the Debug Authentication (DA) configuration. For all trials it is advised to use the default keys provided by ST. In case new keys are generated and the device is set in another state than open, it will not be possible to reopen the debugger and to make a regression in case these new keys are lost.
3.2. Script (provisioning_auto.bat) step 2
After completion of step 1, follow the indications of the script as shown in the figure below.
The step 2 of the script installs the Secure Manager and a nonsecure default application.
After installation you should see:
- The message that the board is correctly confirmed
- On the discovery board the led1, led2, led3 and led4 should blink (default installed code by the script)
Note in case of issue:
- Check the provisioning.log file (in directory: \Projects\STM32H573I-DK\ROT_Provisioning\SM).
- Peform a regression (see chapter below) and restart at the beginning of this article.
4. Default installed code execution
As mentioned above, after script execution completion, you should see the four led blinking.
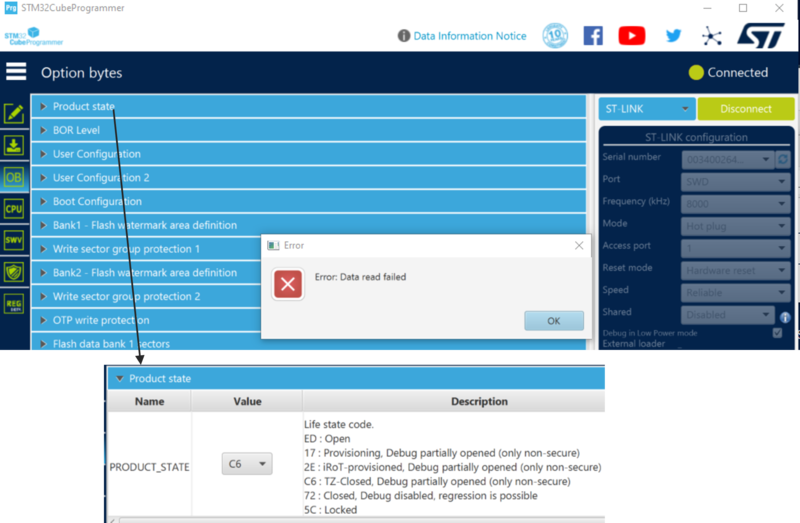
Start STM32CubeProgrammer and try to connect, see the figure below
You can observe:
- The user flash content is not accessible
- The user Option Bytes can be readout and it can be seen that the script has set the device in TZ-Closed.
- Don't modify the Option Bytes
Note: !! Never set your device in Locked state, it's a final state that can't be anymore changed by any method.
For more details about the product states, refer New_product_state article


