This article describes how to automatize machine learning model code generation and validation through X-CUBE-AI Command Line Interface (CLI). The example is provided for Windows thanks using batch script, however it can be easily adapted to other operating system or through Python. More information on CLI can be found in the embedded documentation.
1. Requirements & installations
- X-CUBE-AI latest version (latest tested v7.2)
- STM32CubeIDE latest version (latest tested v1.10.0)
- A STM32 evaluation board, for this example: NUCLEO-H723ZG
- A model (Keras .h5, tensorflow lite .tflite or ONNX). For this example we used a MobileNet v1 0.25 quantized with input of image input of 128x128x3.
You can download the model: mobilenet_v1_0.25_128_quantized.tflite.
Once X-CUBE-AI is X-CUBE-AI installed as well as STM32CubeIDE, please note the installation paths, usually by default on Windows (replacing username by your Windows user account name and adapting to your tool version):
- For X-CUBE-AI: C:\Users\username\STM32Cube\Repository\Packs\STMicroelectronics\X-CUBE-AI\7.2.0
- For STM32CubeIDE: C:\ST\STM32CubeIDE_1.10.0\STM32CubeIDE\
2. Validation application generation
In order to generate the initial validation project for the targeted board, we are using the STM32CubeMX with X-CUBE-AI plugin.
2.1. Create a new project
Open STM32CubeMX and start the project using the board selector:
Select the board to use, in our case the NUCLEO-H723ZG, and create a project without initializing all peripherals with their default Mode:
2.2. Add X-CUBE-AI software pack
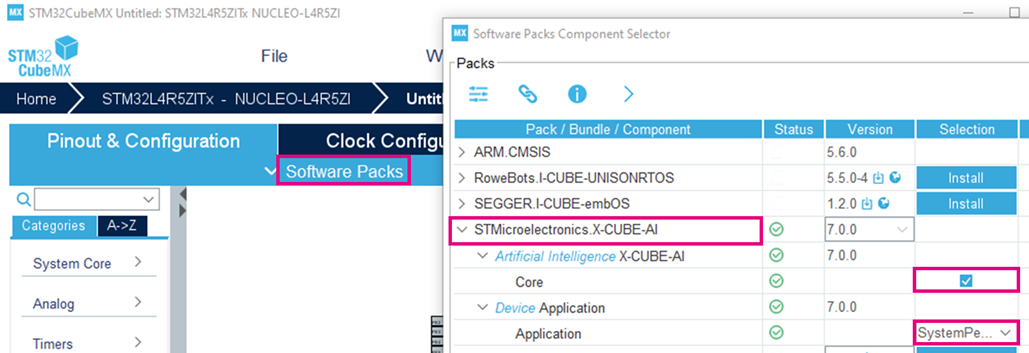
Select X-CUBE-AI software pack Core and Validation application:
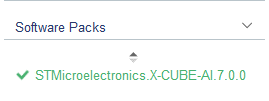
Click on X-CUBE-AI software pack:
If by default the peripherals parameters are not set for the best performance, the system warns you of this. Select 'yes' to make sure that the maximal frequency is used.
X-CUBE-AI configures default parameters to set the best performance as well as configuring the UART used to report performances.
You can check which UART is used by X-CUBE-AI to communicate with the board. It is the UART connected to the STLink embedded device which is seen from the PC as a Virtual Com Port once connected by USB. To do so open the Platform Settings panel:
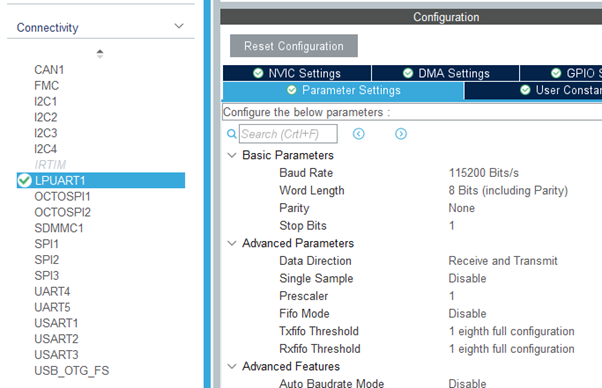
For the NUCLEO-L4R5ZI it is the LPUART1. You can also check the settings used by X-CUBE-AI for the specified UART in the Connectivity panel / Parameter Settings:
These settings must be used on PC the hyper terminal to communicate with the board when the system-performance application is running.
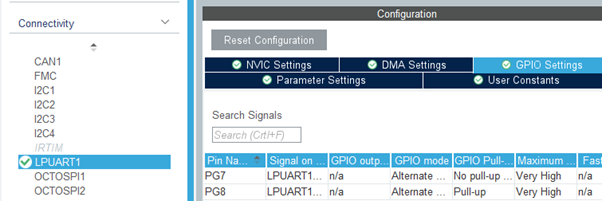
Identify the GPIOs used by the UART in the GPIO Settings panel:
For the NUCLEO-H723ZG, it is the PG7 and PG8 (Pin 7 and 8 of bank G).


