How to start with OEM-iROT on STM32H573 - TrustZone enabled![]() 85min
85min
Target description
Through this practical example the user will learn how to perform the following operations
- Run the OEMiROT example of the CubeFW
- Provisioning preparation
- Code and data compilation and encrypted image generation
- Perform the provisioning and install the firmware and data files
- Execute the installed firmware
- Perform a full regression
- Debug Authentication
- Create a certificate chain
- Perform a regression using the leaf certificate of the certificate chain
- Debug opening (Secure and non Secure) using root certificate
- Attach CubeProgrammer and attach an IDE once debugger is open
- Read Secure and non secure firmware
- Perform a partial regression and download new code and data non secure
This OEMiROT Step by step tutorial is divided in two main parts
- Provisioning
- Configuration
- Device Provisioning
- Application code execution
- Full regression
- Debug Authentication
- Certificate chain
- Debug opening (Secure and Non Secure)
- Regression (partial and full)
Prerequisites
- knowledge of STM32CubeProgrammer
- knowledge of JTAG / SWD interface
Hardware
- Discovery board STM32H573I-DK.
Required tools
- STM32Cube_FW_H5_1.0.0 or later
- STM32CubeProgrammer_rev2.13.0 or more recent with STM32TrustedPackageCreator selected at installation
- IAR Embedded Workbench rev 9.20.1 or later
- Tera Term / Putty or equivalent terminal emulator
Literature
- UM2237 STM32CubeProgrammer software description
- UM2238 STM32TrustedPackageCreator tool software description
- AN5054 Secure programming using STM32CubeProgrammer
- AN2606 STM32 microcontroller system memory boot mode
Environment setup
Before starting, the first step is to prepare the environment to be able to go through the OEM-iROT process.
- Download the STM32CubeFW_H5 Cube firmware
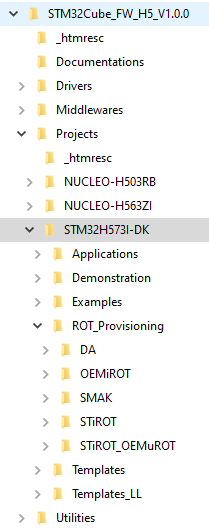
A directory STM32H573I-DK is included in the Projects directory
- STM32CubeProgrammer default folder is : C:\Program Files\STMicroelectronics\STM32Cube\STM32CubeProgrammer
In case the STM32CubeProgrammer has not been installed in the default folder, the customized installation paths need to be updated in the following script :Projects\STM32H573I-DK\ROT_Provisioning\env.bat
:: ==============================================================================
::                               General
:: ==============================================================================
:: Configure tools installation path
set stm32programmercli="C:\Program Files\STMicroelectronics\STM32Cube\STM32CubeProgrammer\bin\STM32_Programmer_CLI.exe"
set stm32tpccli="C:\Program Files\STMicroelectronics\STM32Cube\STM32CubeProgrammer\bin\STM32TrustedPackageCreator_CLI.exe"
1. OEMiROT Step by step : Provisioning / Code execution / Regression
1.1. Step 1 : OEMiROT and Debug Authentication configuration
1.1.1. OEMiROT configuration
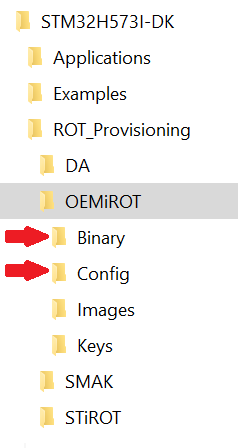
At this step the file (OEMiRoT_Config.obk) used to configure the OEMiROT will be generated. A default file is provided in the example that can be used without modification for a first trial in this path : Projects\STM32H573I-DK\ROT_Provisioning\OEMiROT\Binary
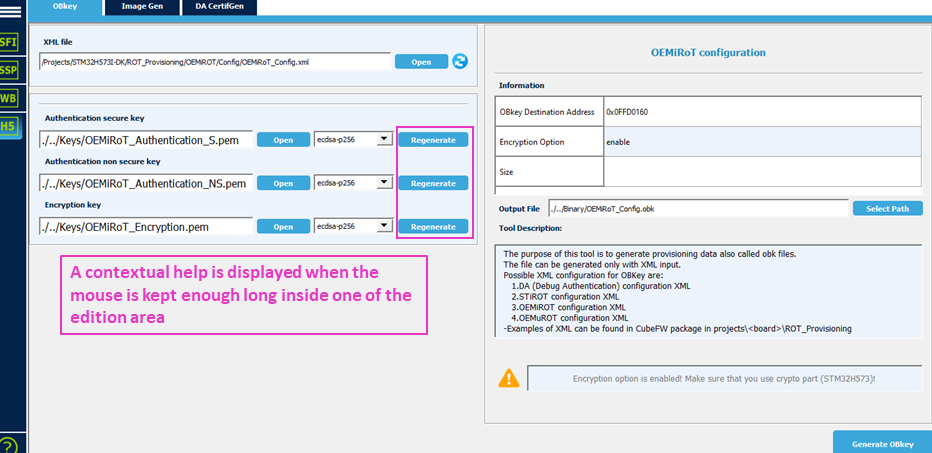
STM32TrustedPackageCreator will be used to setup this file using the OEMiRoT_Config.xml as input located in Config folder : Projects\STM32H573I-DK\ROT_Provisioning\OEMiROT\Config
The following parameters can be defined at this step:
- ECDSA-256 encryption key
- ECDSA-256 authentication secure key
- ECDSA-256 authentication non secure key
To generate a customized configuration file proceed as follow:
- Open STM32TrustedPackageCreator and select H5
- Open Obkey tab
- Select the OEMiROT_Config.xml file in folder ROT_Provisioning\OEMiROT\Config
- Update the parameters if needed
- The default keys can be regenerated
- Generate the file :
The OEMiROT_Config.obk file is generated. The modified parameters are saved in Binary \OEMiROT_Config.obk
1.1.2. Debug Authentication configuration
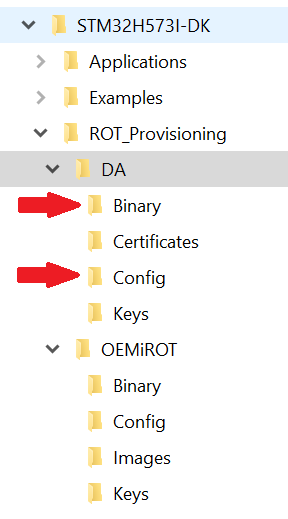
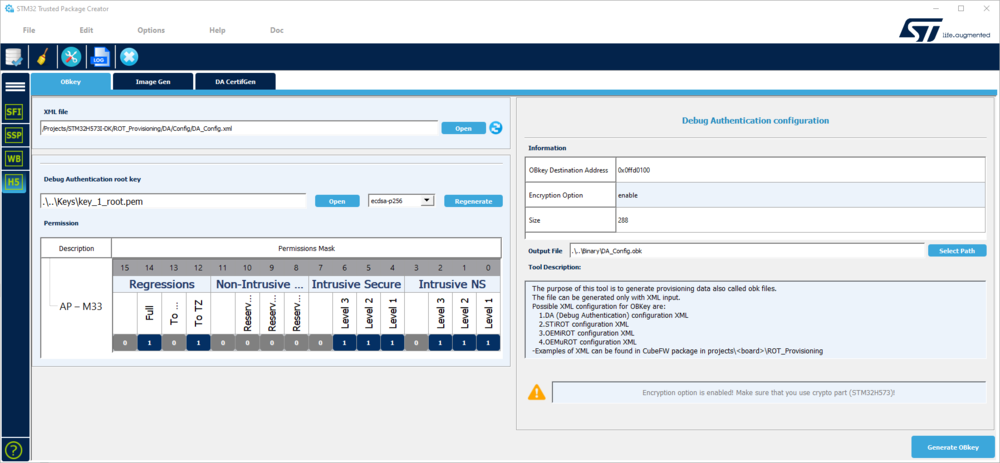
At this step the file DA_Config.obk will be generated in DA\Binary folder. This file is used to configure the conditions to reopen a protected device and the debugger. A default file is provided in the STM32CubeFW_H5 example that can be used without modification for a first trial.
STM32TrustedPackageCreator will be used to setup this file using the DA_Config.xml as input located in DA\Config path.
The following parameters can be defined at this step
- Hash (SHA256) of the root public key
- Permissions list (full regression, partial regression, debug opening (HDPL1 S/NS, HDPL2 S/NS, HDPL3)
Two files are included in the DA directory:
- DA_Config.xml : configuration based on certificates for H5 crypto parts (this file is used for this tutorial)
- DA_ConfigWithPassword : configuration based on password : when TrustZone is disabled
To generate a customized configuration file, proceed as follow:
- Open STM32TrustedPackageCreator and select H5
- Open Obkey tab
- Select the DA_Config.xml file
- Update the parameters if needed. For a first trial we recommend to keep the default key, because in the regression step we will use the default certificate that is linked to the default DA keys.
1.2. Step 2 : Code and data image generation
1.2.1. STM32CubeFW provided code compilation
1.2.2. Firmware and data encrypted image generation
1.2.2.1. Code compilation
Check that the STM32H5 IAR provided patch is correctly installed and check that your IAR Embedded Workbench version is recent enough.
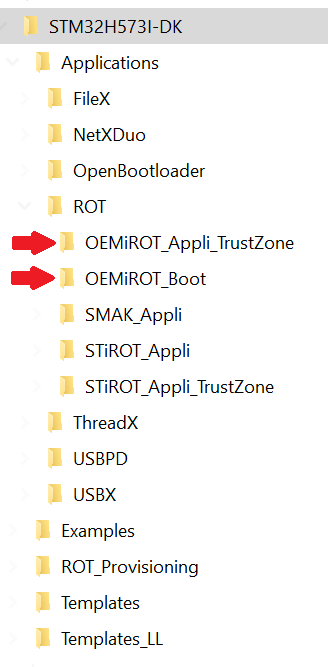
Two code examples for IAR Embedded Workbench are provided
- OEMiROT_Boot corresponds to the Secure Boot.
It performs authenticity and integrity checks of the project firmware and data images.
- OEMiROT_Appli_TrustZone is an example of secure and non secure application managed by OEMiROT
OEMiROT_Boot project compilation
- Open the Project.eww located in the EWARM directory : ..\Projects\STM32H573I-DK\Applications\ROT\OEMiROT_Boot\EWARM
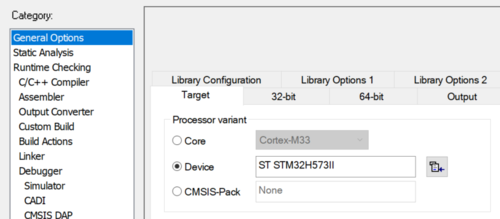
- Open Project -> Option -> General Options : The device and CPU core should be automatically recognized and you should see the following windows
If the device is not recognized, check that the STM32H5 IAR provided patch is correctly installed check that your IAR Embedded Workbench version is recent enough
- Perform: Project -> Rebuild all (don’t upload the code, only perform a compilation)
The following binary is created:…..\Projects\STM32H573I-DK\Applications\ROT\OEMiROT_Boot\EWARM\STM32H573I_DK\Exe\Project.bin
OEMiROT_Appli_TrustZone project compilation –Secure Project
- Open the Project.eww located in the EWARM directory :
..\Projects\STM32H573I-DK\Applications\ROT\OEMiROT_Appli_TrustZone\EWARM
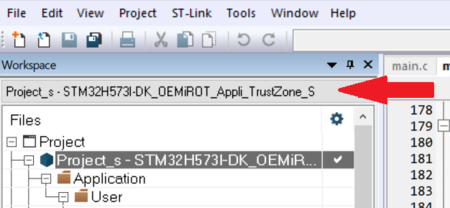
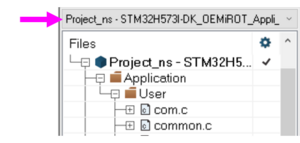
- Select the Project secure :
- Open Project -> Option -> General Options
The device and CPU core should be automatically recognized.
- Open Project -> Option -> Build Actions
Here is the command line which will create an image of the code with STM32TrustedPackageCreator:
- Perform: Project -> Rebuild all (don’t upload the code, only perform a compilation)
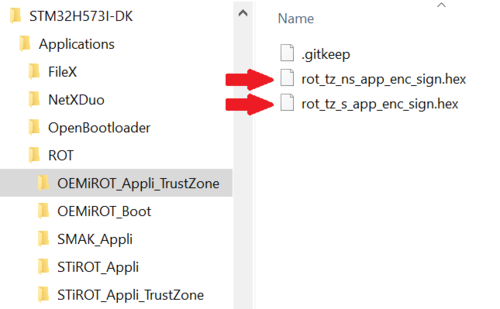
The following image is created: …..\ Projects\STM32H573I-DK\Applications\ROT\OEMiROT_Appli_TrustZone\Binary\rot_tz_s_app_enc_sign.hex Don’t close the EWARM project .
OEMiROT_Appli_TrustZone project compilation –Non-Secure Project
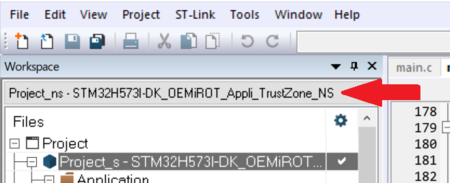
- Select Non Secure Project
- Open Project -> Option -> Build Actions Check the correct paths for the command line
This postbuild command will create an image of the compiled non secure code thanks to STM32TrustedPackageCreator.
- Perform: Project -> Rebuild all (don’t upload the code, only perform a compilation)
The following image is created:…..\ Projects\STM32H573I-DK\Applications\ROT\OEMiROT_Appli_TrustZone\Binary\rot_tz_ns_app_enc_sign.hex
1.2.2.2. Code image generation
During this step two image files will be created from secure and non secure binary code files.
In the previous steps secure and non secure code images have been created directly from EWARM post build command (rot_tz_ns_app_enc_sign.hex and rot_tz_s_app_enc_sign.hex), but you can also create code images manually:
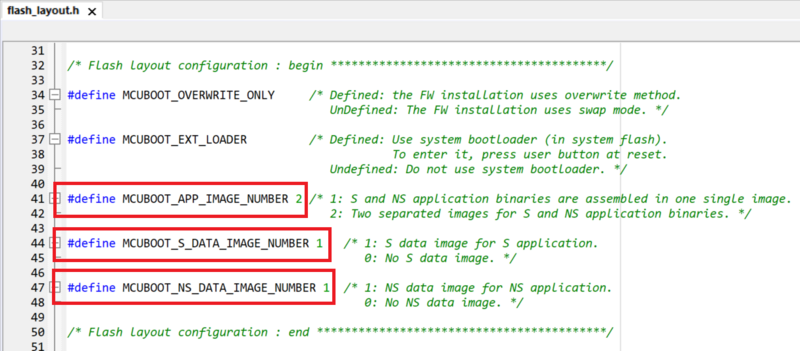
This tutorial shows an example for two code two data images installation, but other configurations are also possible.
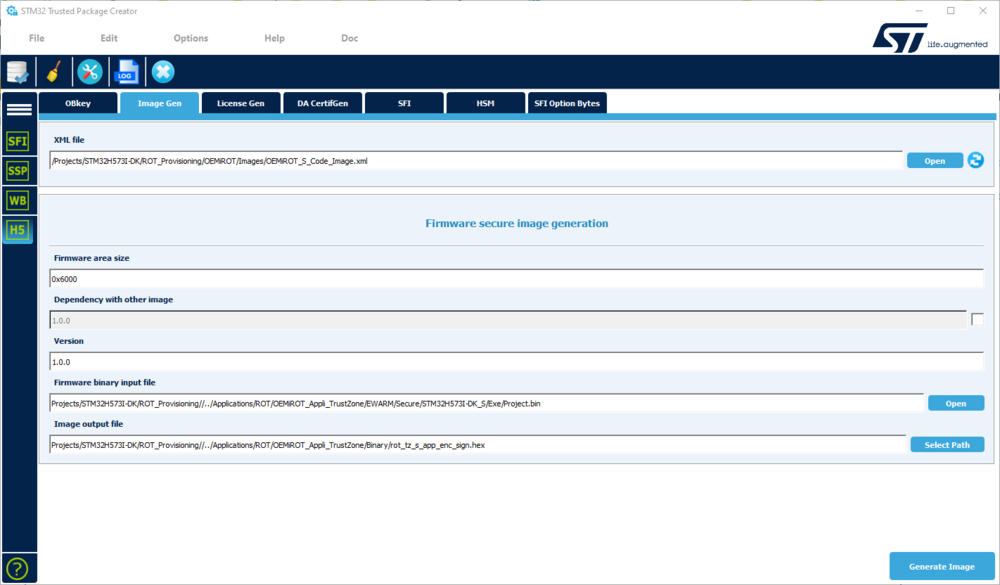
We show here how to perform manually an encrypted / signed code image (equivalent to what the postbuid command has executed)
- Open STM32TrustedPackageCreator select H5
- Open tab ImageGen
- Select the template for the relevant image: OEMiRoT_S_Code_Image.xml (ROT_Provisioning\OEMiROT\Images directory)
- Update the default configuration if required
- Update the Firmware area size
- Update the version number
- Enable the dependency with the other (Data) image when simultaneous installation is required for compatibility reasons.
- Select the binary file to be used as input file
- Select the output file to be filled with the signed and encrypted binary (hex format)
- Launch the generation
- An encrypted signed file will be created : rot_tz_s_app_enc_sign.hex
Resume to 1. and select OEMiRoT_NS_Code_Image.xml template in order to generate rot_tz_ns_app_enc_sign.hex image.
1.2.2.3. Data image generation
During this step two image files will be created from secure and non secure data files.
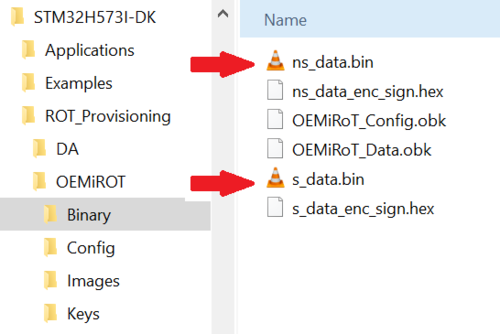
The provided data files s_data.bin and ns_data.bin are just example files for this tutorial but have no meaning and not used for the code execution.
This tutorial shows an example for two code two data images installation, but other configurations are also possible.
To generate images of secure and non secure data you must :
- Open STM32TrustedPackageCreator select H5
- Open tab ImageGen
- Select the template for the relevant image: OEMiRoT_S_Data_Image.xml (ROT_Provisioning\OEMiROT\Images directory)
- Update the default configuration if required
- Update the version number
- Enable the dependency with the other Data image when simultaneous installation is required for compatibility reasons.
- Select the binary file to be used as input file
- Select the output file to be filled with the signed and encrypted binary (hex format)
- Launch the generation
- An encrypted signed file will be created : s_data_enc_sign.hex
Resume to 3. and select OEMiRoT_NS_Data_Image.xml template in order to generate ns_data_enc_sign.hex image.
1.3. Step 3 : Device provisioning, code and data image download into Flash, product state setting
The provided “provisioning” script will
- Set the option bytes of the device
- Configure the OEMiROT and the DA on the device
- Install the images (code and data)
- Set the final chosen product state according user selection
Before launching the script , connect STM32CubeProgrammer and check that the device is in open state.

If it’s not the case refer to the step 5 explaining the regression. If the flash is not erased, the provisioning script will anyway erase it.
- Connect the board, with BOOT0 pin not connected to VDD (check that the CubeProgrammer is disconnected)
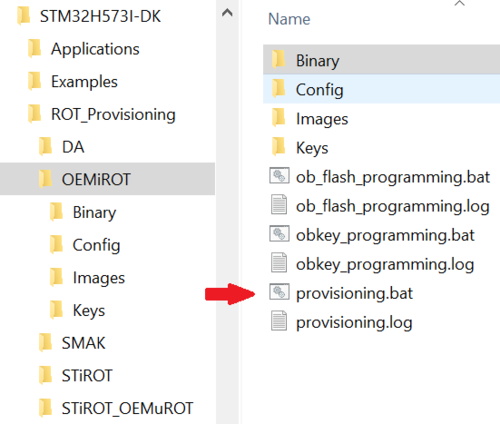
- Open folder OEMiROT in : Projects\STM32H573I-DK\ROT_Provisioning\OEMiROT
- Run the provided provisioning.bat script (double click)
- Steps 1 and step 2 have been previously executed : press any key to continue until Step 3
- Step 3 : The script will proceed with the option byte programming and flashing the code and data image
The product state can be chosen (OPEN or PROVISIONED or TZ-CLOSED or CLOSED or LOCKED) Before setting the product state to TZ-CLOSED/CLOSED or LOCKED, it is advised to set the PROVISIONED state and to try out the regression. Then to redo the complete provisioning starting step by step from the beginning and only then set one of the more closed states.
Make a first trial setting the product in PROVISIONED state and complete the tutorial till the end.
1.4. Step 4 : Execute the installed firmware
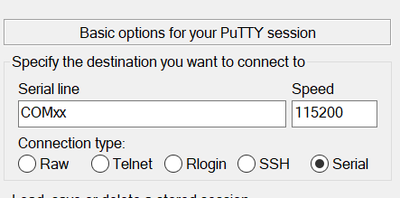
- Open PUTTY(or another terminal emulator)
- Select “Serial" and the COMxx port
- Set speed to 115200
- Click: Open
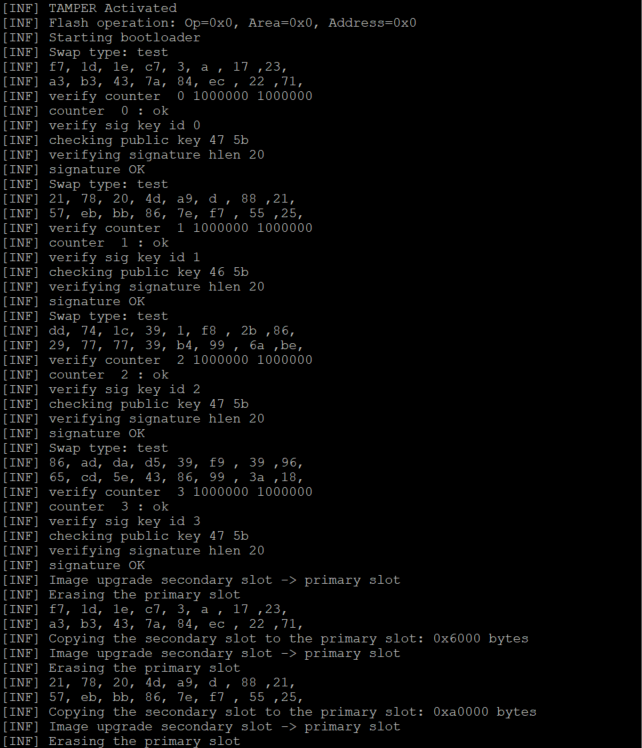
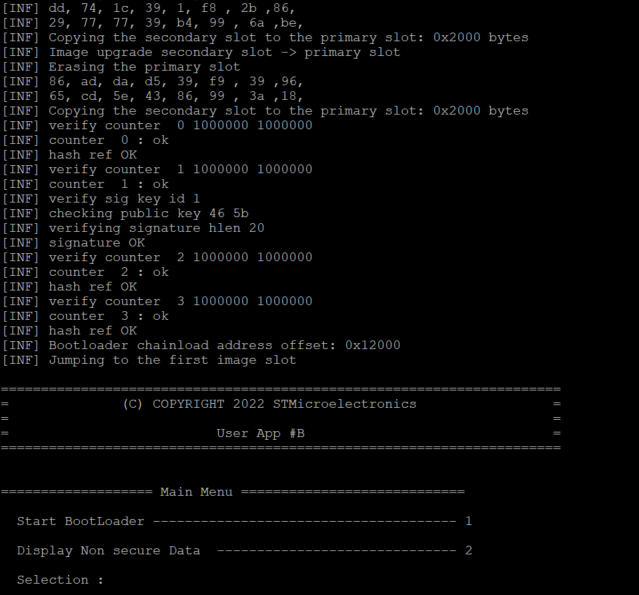
Reset the board (SW reset button on the board) : The code installed during previous steps will be executed
The menu of the installed code has two options
- The menu 1 will launch the standard bootloader located in the system flash
- The menu 2 will display the first 8 bytes and the last 8 bytes of the ns_data.bin
1.5. Flash new User application in CLOSED state
In the Terminal emulator choose Start Bootloader : Write 1
--> This message is displayed :
- Close/disconnect the terminal emulator
- Open the project Project.eww in OEMiROT_Appli_TrustZone folder : .\Projects\STM32H573I-DK\Applications\ROT\OEMiROT_Appli_TrustZone\EWARM
- Select non secure project and change const uint8_t UserAppId = 'A' line 61 in main.c file by :
const uint8_t UserAppId = ‘B’;
- Select: Project-> Rebuild all
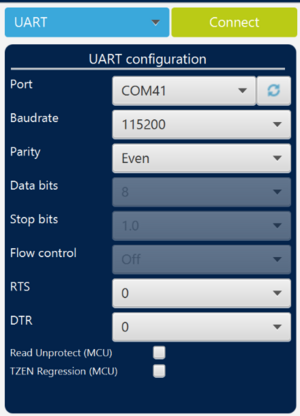
- Connect the board via UART on STM32CubeProgrammer without performing any reset or power OFF power ON (don't disconnect the board from your laptop)
- Select
 “Erasing & Programming” tab
 - Browse non secure encrypted code image .hex file that we previously generated in folder Application\ROT\OEMiROT_Appli_TrustZone\Binary
- Click Start Programming
- Disconnect STM32CubeProgrammer
- Open PUTTY(or another terminal emulator)
- Select “Serial" and the COMxx port
- Set speed to 115200
- Click: Open
- Reset the board (SW reset button on the board)
- Boot Code and new firmware are displayed
1.6. Step 5 : Regression
- A full regression will erase the user stored contents and secrets.
- Erase the user flash content
- Erase the obkeys
- Reset the secure option bytes to their default value
- Set the product in open state
- If the product is in Open state, a full regression is not needed since the device is not secured and changes can be done without any authentication. In case the regression script is executed, it will indicate some errors
- If the product is not in Open state, the only way to change the OEMiROT is to first do a full regression
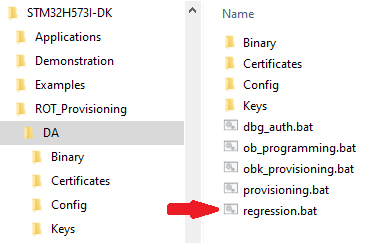
1.6.1. Full regression from Provisioned state using script (included in the STM32CubeFW)
The regression can be done using the provided script or using CubeProgrammer
To preform a full regression
- Launch the regression script
- “The Trustzone feature is enabled?” answer “Yes”
- If the regression has succeeded the following message should be displayed :
- Connect STM32CubeProgrammer. Check that the flash content is well erased and that the option bytes and product state are at default values.
1.6.2. Full regression from Closed state using STM32CubeProgrammer
- Disconnect STM32CubeProgrammer
- Redo the exercise starting at step3, set the “closed” state
- Click
 in CubeProgrammer and select “Debug Authentication”
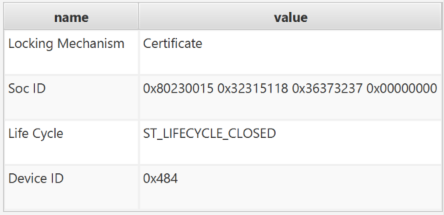
 - Click “Discover” the information window will be filled
- Enter the path for the key and the certificate(example with a certificate chain will be shown later, in this example only a single certificate is used (ROOT)):
- Click Continue
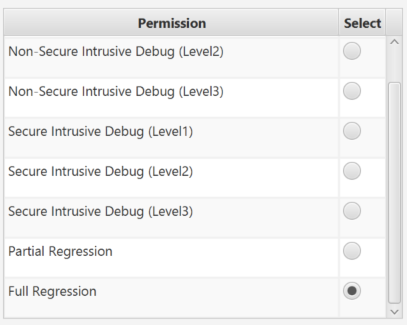
- The opening method and permission are selected. Only the opening method defined by the certificate mask (during provisioning) will be possible
- Click Execute and you have the Success Message :
- Check with CubeProgrammer that the flash content is well erased and that the option bytes and product state are at default values.
- The TZ will stay enabled and can be disabled using CubeProgrammer
2. OEMiROT Step by step : Debug Authentication
2.1. Certificate chain generation
- Perform a full regression (if not already done at step 5), disconnect/reconnect the USB cable
- Check Step 0 and do/redo Step 1.1
- Open STM32TrustedPackageCreator, select H5 and select the tab DA CertifGen
- The example is provided with one root, one intermediate and one leaf key pair
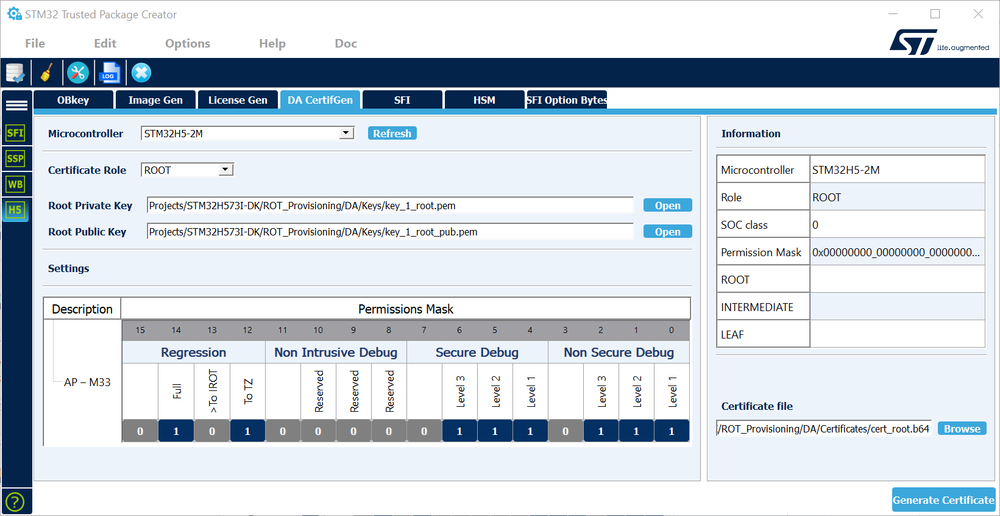
- The first certificate to generate is the ROOT certificate
- This certificate defines the permission defined by the owner generating the certificates.
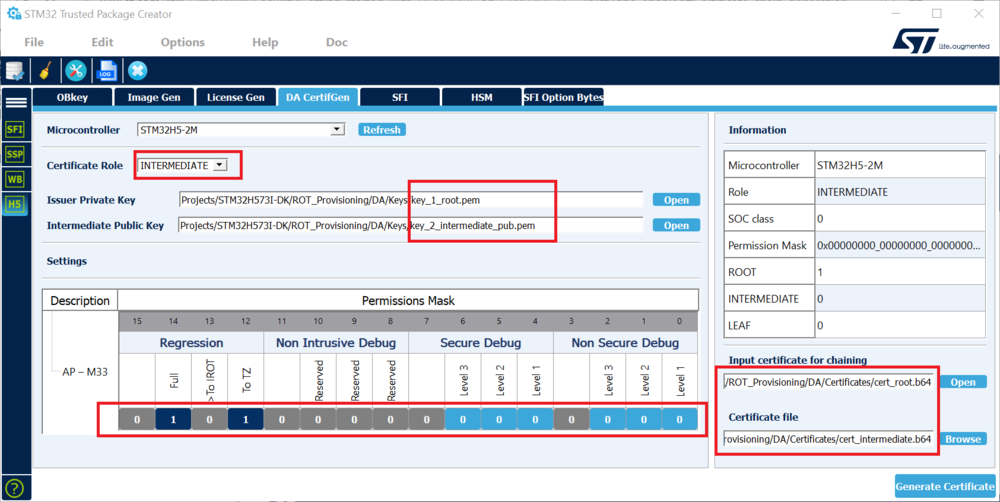
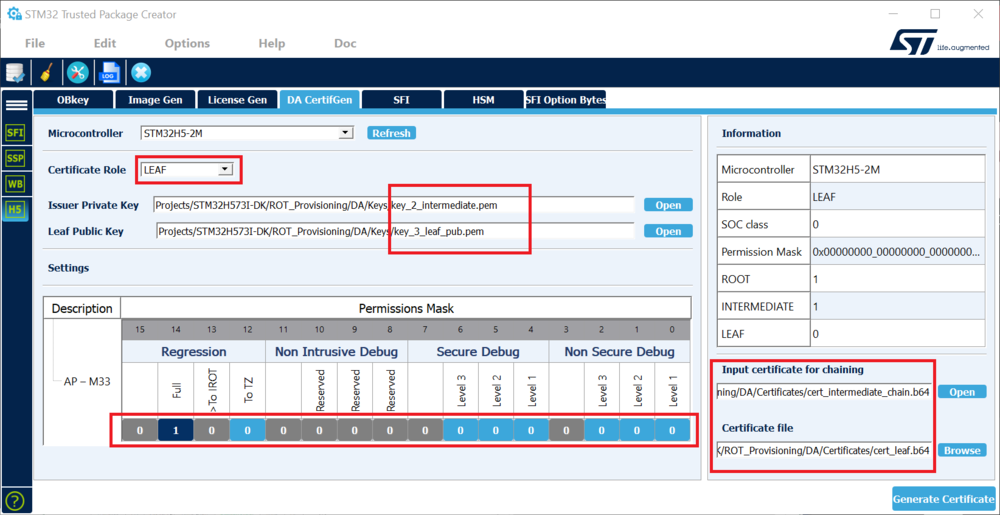
The second certificate to generate is the intermediate certificate, chained with the ROOT certificate The owner for instance an OEM is defining the permission of this intermediate certificate The last certificate to generate is the leaf certificate, chained with the intermediate certificate To use the certificate chain for debug opening or regression, the Leaf certificate is used as input for STM32CubeProgrammer (since this certificate is the last of the chain), but the permission is defined by the aggregation of all mask permissions. For instance, if the debug opening in L3 is not allowed in one of the mask of the chain, this debug opening will not be allowed (even if allowed in the leaf mask) The root certificate can also be used by the owner of the root key for debug opening or regression according to the permission defined during the root certificate generation
Certificate Chain generation (ROOT certificate) using STM32TrustedPackageCreator
- Select STM32H5 and ROOT; enter the path for the private key, the public root key and where the certificate will be stored (overwrite the default stored certificate)
- Set the permission mask for the ROOT : Setting 1 will give the permission
Certificate Chain generation (INTERMEDIATE certificate)
- Select INTERMEDIATE and enter the path for the private root key and the intermediate public keys.
One intermediate certificate for this example, but the same step can be done several time to add several intermediate certificates, each with his own key pair and permission mask
- Set the permission mask for the INTERMEDIATE certificate;
Certificate Chain generation (LEAF certificate)
- Select LEAF and enter the path for the private intermediate key and the for the public leaf key.
This certificate is the last of the chain
- Set the permission mask for the LEAF certificate;
- Click120px|middle
2.2. Secure Debug Opening
- Redo the exercise starting at step3, set the “closed” state
- Click
 in CubeProgrammer and select “Debug Authentication”
 - Click “Discover” the information window will be filled
- Enter the path for the key and the certificate(example with a certificate chain will be shown later, in this example only a single certificate is used (ROOT)):
- Click Continue
2.2.1. Secure Debug opening using STM32CubeProgrammer and ROOT certificate
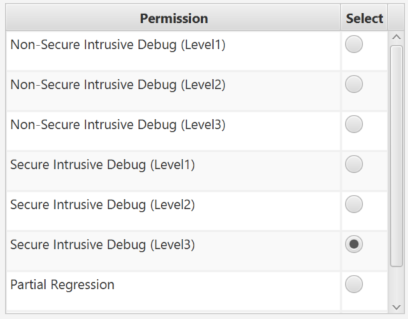
- Select Secure Intrusive Debug (level 3)
- Click Execute and you have the Success Message :
- Disconnect STM32CubeProgrammer
- Now that the debug is open the secure flash content can be read out
- With STM32CubeProgrammer : Connect the board
- Secure part of the flash is now visible @0x0C012400
2.2.2. Secure Debug opening, attach IAR, read flash content and code execution
To attach an IDE:
- Disconnect STM32CubeProgrammer
- Open the Project.eww located in the EWARM directory :
..\Projects\STM32H573I-DK\Applications\ROT\OEMiROT_Appli_TrustZone\EWARM
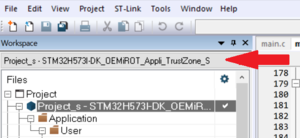
- Select the Project secure :
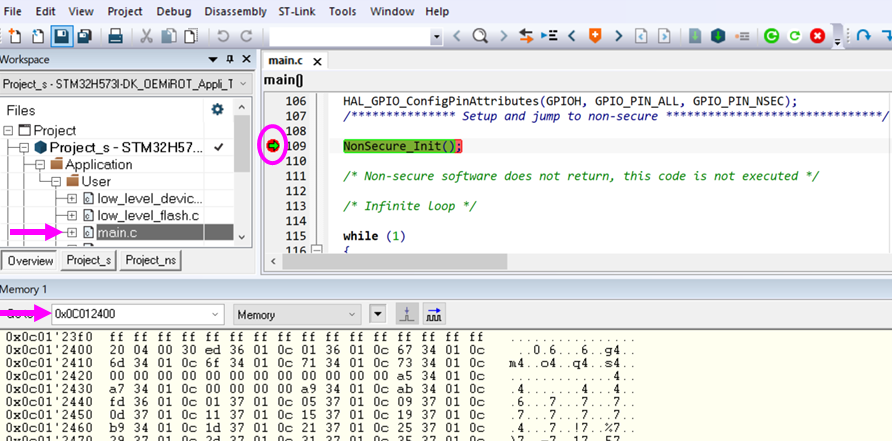
- Select: Project -> Attach to running target
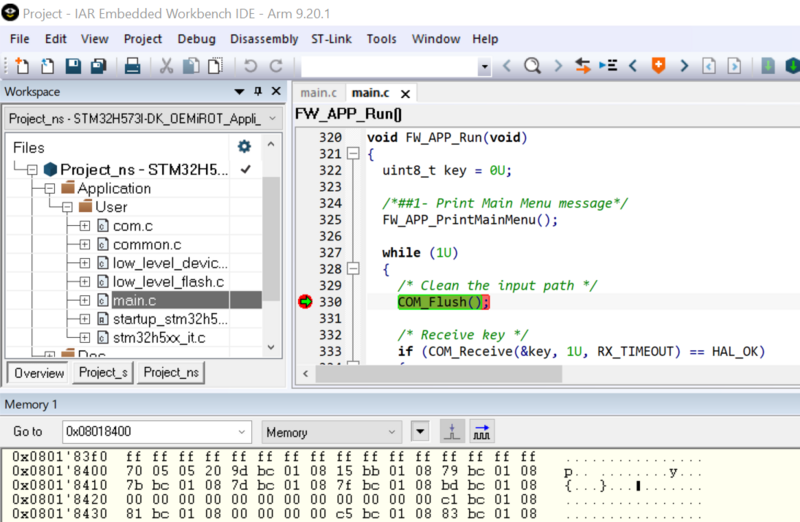
- Open the main.c
- Set a break point, the execution will stop at this point
- Reset the board (SW reset, black button)
- Select: View Memory1 -> enter the flash address
- Secure code visible @ 0x0C012400
2.2.3. Close the debugger through hardware reset
- Close the debug in IAR

- Disconnect/reconnect the USB cable / A hardware reset will close again the debugger
- Click
 in CubeProgrammer and select “Debug Authentication”
 - Click “Discover” the information window is filled again showing that the state is closed.
2.3. Non Secure Debug Opening
2.3.1. Non Secure Debug opening using STM32CubeProgrammer and ROOT certificate
- Enter the path for the root private key and certificate
- Click Continue
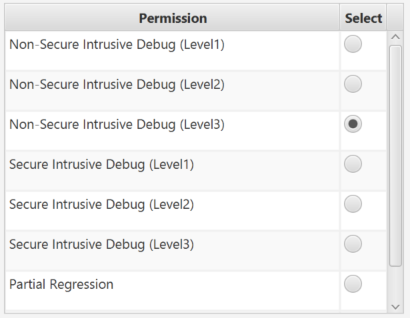
- Select Non Secure Intrusive debug (level 3)
- Click execute and you have the success message :
- Now that the debug is open the secure flash content can be read out
- Connect the board to STM32CubeProgrammer if it has not been automatically done
- The Non Secure part of the flash is now visible @ 0x08018400
2.3.2. Non Secure Debug opening, attach IAR, read flash content and code execution
To attach an IDE:
- Disconnect STM32CubeProgrammer
- Open the Project.eww located in the EWARM
- Select Non Secure project
- Select: Project -> Attach to running target
- Open the main.c
- Set a break point, the execution will stop at this point
- Select: View->Memory-> Memory1 and enter the flash address => Non secure code is visible @ 0x08018400
2.3.3. Close the debugger through hardware reset
- Close the debug in IAR

- Disconnect/reconnect the USB cable / A hardware reset will close again the debugger
- Click
 in CubeProgrammer and select “Debug Authentication”
 - Click “Discover” the information window is filled again showing that the state is closed.
2.4. Partial Regression
2.4.1. Partial Regression using the leaf key and certificate chain
- Enter the path for the leaf private key and leaf chain certificate
- Click Continue
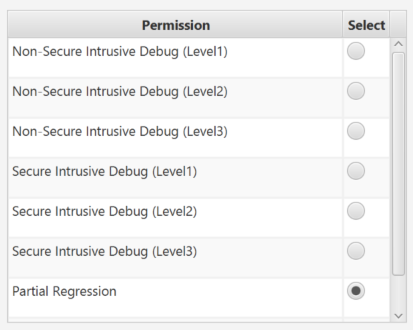
- Select Partial regression
- Click Execute
The partial regression has not been allowed by the leaf mask (only a full regression allowed) and you have the Error Message :
- Click on “Discover” the window state is filled again
2.4.2. Partial Regression using the root key and certificate
2.4.2.1. Partial regression ->TZ-CLOSED State
- Enter the path for the root private key and certificate
- Click Continue
- Select Partial regression
- Click execute and you have the success message :
- Disconnect from CubeProgrammer.
The product is now in TZ-CLOSED
2.4.2.2. Run the code
- Open PUTTY(or another terminal emulator)
- Select “Serial" and the COMxx port
- Set speed to 115200
- Click: Open
- Reset the board (SW reset button on the board)
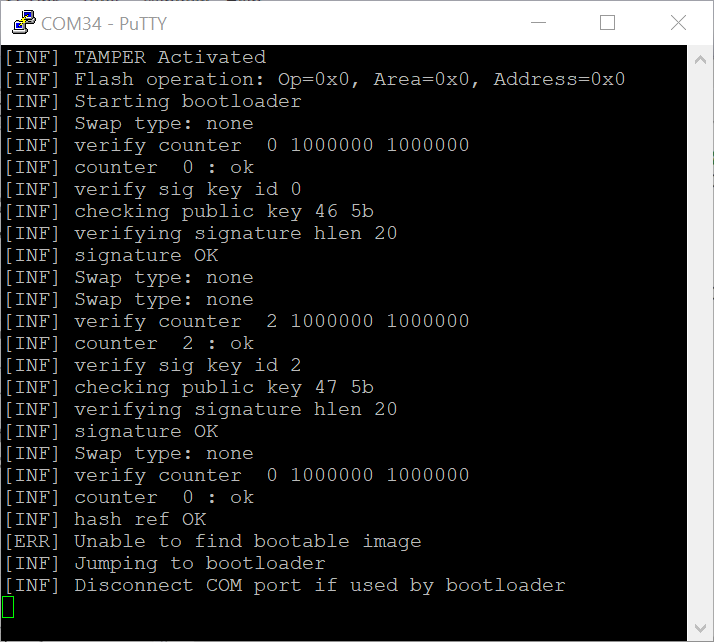
-> Only the Boot code is displayed :
- Non Secure code and data have been erased during partial regression
- Debug is not possible anymore
- New code and datas can be downloaded
2.4.2.3. Download a new application code
- Open the project OEMiROT_Appli_TrustZone
- Select Non Secure project
- Change const uint8_t UserAppId = 'A' line 61 in main.c file by :
const uint8_t UserAppId = ‘B’;
- Select: Project-> Rebuild all
- Open CubeProgrammer and Connect the board
- Select
 “Erasing & Programming” tab
 - Browse non secure encrypted code image .hex file that we previously generated in folder Application\ROT\OEMiROT_Appli_TrustZone\Binary
- Click Start Programming
- Browse non secure encrypted data image .hex file in folder ROT_Provisioning\OEMiROT\Binary
- Click Start Programming
- Disconnect STM32CubeProgrammer
- Open PUTTY(or another terminal emulator)
- Select “Serial" and the COMxx port
- Set speed to 115200
- Click: Open
- Reset the board (SW reset button on the board)
- Boot Code and new firmware are displayed
- Non secure debug is possible
Non secure debug :
- Disconnect STM32CubeProgrammer
- Open the Project.eww located in the EWARM
- Select Non Secure project
- Select: Project -> Attach to running target
- Open the main.c
- Set a break point, the execution will stop at this point
- Select: View->Memory-> Memory1 and enter the flash address => Non secure code is visible @ 0x08018400
2.5. Full Regression using leaf key and certificate
- Close the debug in IAR

- Click
 in CubeProgrammer and select “Debug Authentication”
 - Click “Discover”
- Enter the path for the leaf private key and leaf chain certificate
- Click Continue
- Select Full Regression :
- Click Execute and you have the Success Message :
- Check with CubeProgrammer that the flash content is well erased and that the option bytes and product state are at default values.

