1. Article purpose[edit source]
The purpose of this article is to explain how to integrate Amazon Web Service (AWS) IoT Greengrass [1] on top of OpenSTLinux, including the security part that enables the connection to a hardware security module (TPMv2.0).
This article explains step by step
- how to add the yocto "meta-st-stm32mpu-app-aws" layer on top of OpenSTLinux distribution,
- how to configure, build and install the image,
- how to execute the AWS Greengrass certification testing and configure the target for a secure connection with the AWS cloud.
The main point of this wiki page is the integration of the TPM for the AWS greengrass.
If we don't need the security part the AWS Greengrass can be integrated easily on top on Discovery kit and refer to this article How to integrate AWS IoT Greengrass.
2. Prerequisites[edit source]
Knowledge of the AWS IoT Greengrass and AWS cloud account configuration is required. Follow the process described in "AWS amazon site"[2].
2.1. Hardware prerequisites[edit source]
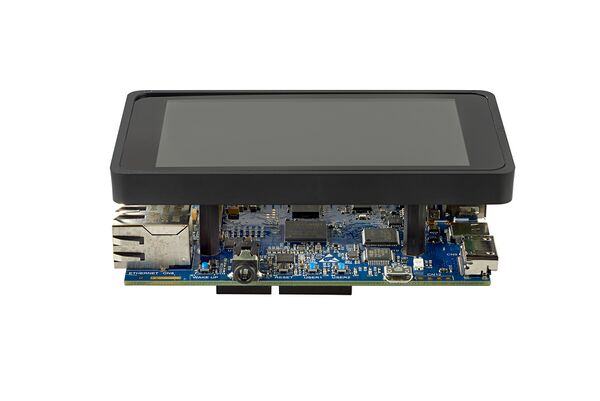
The process has been verified with the STM32MP157C-DK2 Discovery kit ![]() and STM32MP157F-DK2 Discovery kit
and STM32MP157F-DK2 Discovery kit ![]() .
.
- STM32MP157C-DK2
For more information about this STM32 Discovery board and how to start using it, jump to section Getting started with STM32MP157x-DK2
- STPM4RasPI Expansion board[3]

The STPM4RasPI is an official Extension board to connect the ST33 TPM products to the Raspberry Pi® device. It is designed for development, proof of concept or demonstration activities. The board is shipped with one trusted platform module soldered, the ST33TPHF20SPI, that implement TPM V2.0 specification.
2.2. Software prerequisites[edit source]
The STM32MP1 Distribution Package must be installed on your host. The process has been verified with ecosystem release v2.0.0 ![]() of the OpenSTlinux distribution.
of the OpenSTlinux distribution.
3. Software update with meta-st-stm32mpu-app-aws[edit source]
.
.
1.Clone the following STMicroelectronics git repository
 cd [your STM32MP1 Distribution path]/layers/meta-st
 git clone https://github.com/STMicroelectronics/meta-st-stm32mpu-app-aws.git
 cd meta-st-stm32mpu-app-aws
 git checkout remotes/origin/dunfell
2. Add TPM2 recipes
 cd [your STM32MP1 Distribution path]/layers
 git clone git://git.yoctoproject.org/meta-security
 cd meta-security
 git checkout remotes/origin/dunfell
3.Setup the build environment
Execute the following command on the host:
cd [your STM32MP1 Distribution path]
DISTRO=openstlinux-weston MACHINE=stm32mp1-demo-aws source layers/meta-st/scripts/envsetup.sh
4.Enable TPM build
Apply the following patch in the file ([your STM32MP1 Distribution path]/layers/meta-st/meta-st-openstlinux/conf/distro/include/openstlinux.in)
DISTRO_FEATURES_append = " tpm2 "
5.Add Virtualization (docker) to the OpenSTLinux distribution
Execute the following command on the host:
cd [your STM32MP1 Distribution path]/layers
git clone git://git.yoctoproject.org/meta-virtualization
git checkout remotes/origin/dunfell
cd [your STM32MP1 Distribution path]/build-openstlinuxweston-stm32mp1-demo-aws
bitbake-layers add-layer [your STM32MP1 Distribution path]/layers/meta-virtualization
Update the file ([your STM32MP1 Distribution path]/layers/meta-st/meta-st-openstlinux/conf/distro/openstlinux-weston.conf)
DISTRO_FEATURES_append = "virtualization"
6.Add Java-jdk
To do this, follow the installation process described in the article How to install JAVA JDK.
7.Increase the Rootfs partition size
Update the file ([your STM32MP1 Distribution path]/ layers/meta-st/meta-st-stm32mp/conf/machine/include/st-machine-common-stm32mp.inc)
IMAGE_ROOTFS_MAXSIZE = "2097152"
8.Build the image
In the folder ([your STM32MP1 Distribution path]/build-openstlinuxweston-stm32mp1-demo-aws), execute the following command :
bitbake st-image-demo-aws
9.Flash the SDcard
Use the programmer tool STM32CubeProgrammer.
For example, the tsv file (FlashLayout_sdcard_ stm32mp157c-demo-aws-mx-trusted.tsv) is located in ([your STM32MP1 Distribution path]/build-openstlinuxweston-stm32mp1-demo-aws/tmp-glibc/deploy/images/stm32mp1-demo-aws/flashlayout_st-image-demo-aws)
4. AWS Greengrass target initialization[edit source]
1. WiFi configuration
An internet connection is required on the target. Refer to the article How to setup wifi connection for how to configure and activate the WiFi in order to connect the target to your WiFi access point.
2.Configuration of the target
If extra target configurations are required, run the following scripts (to be executed only once after the first boot):
source /greengrass/tpm_update.sh
If the image has been configured for the execution of the AWS Greengrass certification testing:
source /greengrass/awsgreengrass_certif.sh
3.TPM token initialization
Note: If something goes wrong, reset the TPM and PKCS11 store using the following commands:
cd /usr/bin
./tpm2_clear -Q
rm -rf /usr/local/pkcs11_tpm/*
Execute the commands below on the target:
cd /tools
./tpm2_ptool init --primary-auth=123456 --path=$TPM2_PKCS11_STORE
./tpm2_ptool addtoken --pid=1 --sopin=123456 --userpin=123456 --label=greengrass --path $TPM2_PKCS11_STORE
./tpm2_ptool addkey --algorithm=rsa2048 --label="greengrass" --userpin=123456 --key-label=greenkey --path=$TPM2_PKCS11_STORE
Verify the toke using pkcs11-tool (optional)
Execute the following command on the target to verify the token created.
pkcs11-tool --module /usr/lib/libtpm2_pkcs11.so.0 -L
Example of expected output:
Available slots:
   Slot 0 (0x1): greengrass STMicro
     token label        : greengrass
     token manufacturer : STMicro
     token model        :
    token flags        : login required, rng, token initialized, PIN initialized
     hardware version   : 1.38
     firmware version   : 74.8
     serial num         : 0000000000000000
     pin min/max        : 5/128
AT THIS STEP, THE CONFIGURATION OF THE BOARD IS COMPLETE AND READY TO BE USED:
- with AWS IoT Device Tester to perform the AWS Greengrass certification testing (see Process to execute the AWS Greengrass certification testing)
- for a secure connection with AWS cloud (see Process to create a Certificat Signature Request using the hardware-protected private key)
5. Process for executing the AWS Greengrass certification testing[edit source]
1.Install the AWS IoT Device Tester
On the AWS Amazon site, go to [AWS IoT Device Tester for AWS IoT Greengrass Versions] [4]
2.Configure your ssh connection (ssh keys)
Go to AWS Amazon website and to the page [Configure Your Host Computer to Access Your Device Under Test][5].
3.Configure the IDT
  Example of install config folder for Windows:
  C:\devicetester_greengrass_win\devicetester_greengrass_win\configs\
Go to the AWS Amazon website and to the page [Setting Configuration to Run the AWS IoT Greengrass Qualification Suite][6].
  There is a  IDT configuration file example installed on your Host:
  /[your STM32MP1 Distribution path]/layers/meta-st/meta-st-demo-aws/recipes-aws/greengrasstests/greengrasstests/device-hsm.json
Note: In the above example, root certification tests are performed.
4.Execute the tests
Go to the AWS Amazon website and to the page [Running Tests][7].
6. Process for creating a Certificate Signing Request using the hardware-protected private key[edit source]
1.Update openssl configuration to use module tpm2_pkcs11
Add the following lines in /etc/ssl/openssl.cnf at the beginning of the file (after "HOME = . ")
openssl_conf = openssl_init
[openssl_init]
engines=engine_section
[engine_section]
pkcs11 = pkcs11_section
[pkcs11_section]
engine_id = pkcs11
dynamic_path = /usr/lib/engines-1.1/pkcs11.so
MODULE_PATH = /usr/lib/libtpm2_pkcs11.so.0
init = 0
2. To create an CSR "Certificat Signing Request" with openssl (openssl must be installed), execute the following command on the target:
openssl req -engine pkcs11 -new -key "pkcs11:token=greengrass;object=greenkey;type=private;pin-value=123456" -keyform engine -out /usr/local/req.csr
This CSR "/usr/local/req.csr" is used to create client certificates on the AWS Amazon Cloud to be stored on the board.
Start from the Greengrass configuration file example available on the target /greengrass/config/config_secu_example.json and update it with your AWS account parameter and certificates.
Then download the root CA from Amazon website and save it on the target greengrass/certs/root.ca.pem.
For more information about HSM (hardware secure module) integration for AWS Greengrass, go to AWS Amazon website [Hardware Security Integration][8]
3.Connect to Amazon cloud
Before starting the Greengrass core on the target, set the TPM2_PKCS11_STORE environment variable.
Execute the following commands on the target:
export TPM2_PKCS11_STORE=/usr/local/pkcs11_tpm
cd /greengrass/ggc/core/
./greengrassd start
7. References[edit source]
- ↑ https://aws.amazon.com/fr/greengrass/
- ↑ What is AWS IoT Greengrass?
- ↑ STPM4RasPI expansion board
- ↑ Supported versions of AWS IoT Device Tester for AWS IoT Greengrass
- ↑ Configure your host computer to access your device under test
- ↑ Setting configuration to run the AWS IoT Greengrass qualification suite
- ↑ Running tests
- ↑ Hardware security integration