1. Article purpose[edit source]
The purpose of this article is to explain how to integrate the X-NUCLEO-NFC05A1[1] expansion board with STM32MP157C-DK2 Discovery kit ![]() . An OpenSTLinux software expansion package is provided that runs on the ARM® Cortex® A7-based core of the STM32MP1 microprocessor on the STM32MP157C-DK2 discovery kit to demonstrate RFAL-based NFC application.
. An OpenSTLinux software expansion package is provided that runs on the ARM® Cortex® A7-based core of the STM32MP1 microprocessor on the STM32MP157C-DK2 discovery kit to demonstrate RFAL-based NFC application.
2. Prerequisites[edit source]
Needed material :
- an STM32MP157C-DK2 Discovery kit

- a X-NUCLEO-NFC05A1: Nucleo extension board featuring NFC front end IC ST25R3911B
- a Linux PC with Ubuntu installed will be required for development. Please refer to the page for Linux PC required configuration : PC prerequisites
- All the dependencies defined in Getting_started/STM32MP1_boards/STM32MP157x-DK2 should be installed
- SDK must be installed and also enabled. See Getting_started/STM32MP1_boards/STM32MP157x-DK2/Develop_on_Arm®_Cortex®-A7/Install_the_SDK
- Starter Package must be flashed onto SD card and board should boot up successfully.
- X-LINUX-NFC5 software package [1]
3. Hardware setup[edit source]
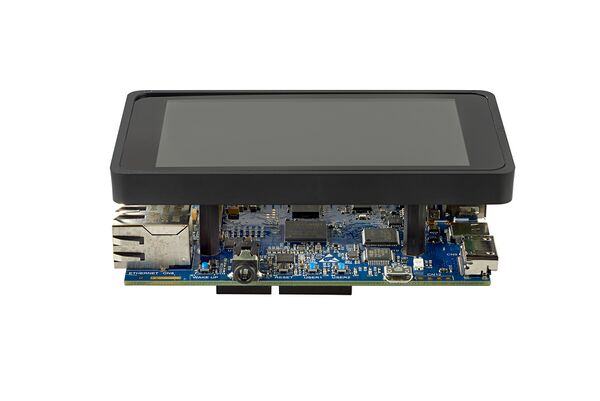
The X-NUCLEO-NFC005A1 is docked onto the Arduino connector present on the back side of the STM32MP157C-DK2 ![]() board as shown in below figure.
board as shown in below figure.

4. Software setup, build and run[edit source]
4.1. Booting STM32MP157C-DK2 with Starter Package[edit source]
Instructions for booting the board using Starter Package are available for reference on wiki page: Getting_started/STM32MP1_boards/STM32MP157x-DK2/Let's_start/Populate_the_target_and_boot_the_image
4.2. Software platform configuration for running the application[edit source]
Before running the application, platform configuration needs to be updated. User needs to download the Developer Package and update device tree for enabling the relevant peripheral configuration.
For quick evaluation of the software, user can refer to section Steps for quick evaluation of software, uses the pre-built images and easily has got the application running on STM32MP157C-DK2 ![]() .
.
In case the user wants a full-fledged development environment, detailed description of how to modify the device tree and build updated kernel images is mentioned in section "Updating platform configuration in Developer Package"
Note: In this article, the STM32MP157C-DK2 ![]() is accessed from host PC via the TCP/IP network (using ssh and scp commands). Another method to access the board could be through serial link (UART / USB) using tools such as ‘minicom’ (on Linux PC) or ‘Tera-term’ (on Windows PC). For more details, please refer to wiki page: How to get Terminal.
is accessed from host PC via the TCP/IP network (using ssh and scp commands). Another method to access the board could be through serial link (UART / USB) using tools such as ‘minicom’ (on Linux PC) or ‘Tera-term’ (on Windows PC). For more details, please refer to wiki page: How to get Terminal.
4.2.1. Steps for quick evaluation of software[edit source]
In order to speed-up the development process and quickly evaluate the software, please follow below mentioned steps
- Please follow instructions in the link : STM32MP157C-DK2 Let's start to flash the Starter Package on the SD card.
- Boot the board with Starter Package.
- Enable internet connectivity on the board via Ethernet or WiFi. Refer to wiki pages for help.
- Download the X-LINUX-NFC5 software package [1] and follow below mentioned steps.
- Use below commands to copy the device tree blob and update the new platform configuration
PC $> cd X-LINUX-NFC5_V1.0.0/STM32MP157C-DK2_DeviceTree/Binaries
PC $> scp stm32mp157c-dk2.dtb root@<ip address of board>:/boot/
PC $> ssh root@<ip address of board>
Board $> /sbin/depmod –a
Board $> sync
Board $> reboot
Note: In case network connectivity is not available, please refer to section: How to transfer files using ‘Tera Term’(on Windows PC) to Discovery Kit for doing file transfer locally.
- After the board boots up, copy the application binary and the shared lib to STM32MP157C-DK2
PC $> cd X-LINUX-NFC5_V1.0.0/NFCPollerApplication/Binaries
PC $> scp ./* root@<ip address of board>:/usr/local
PC $> ssh root@<ip address of board>
Board $> cd /usr/local
Board $> export LD_LIBRARY_PATH=/usr/local/:$LD_LIBRARY_PATH
Board $> chmod +x nfc_poller_st25r3911
Board $> ./nfc_poller_st25r3911
The application should start running once the above mentioned commands are executed.
4.2.2. Updating platform configuration in Developer Package[edit source]
In order to set up the development platform, please follow below mentioned steps
- Download STM32MP1 Developer Package
- Install the SDK in the default folder structure on your Ubuntu machine. Please follow : Getting_started/STM32MP1_boards/STM32MP157x-DK2/Develop_on_Arm®_Cortex®-A7/Install_the_SDK
- Update the device tree as mentioned below to enable and configure the SPI4 driver interface. Open the device tree file ‘stm32mp157c-dk2.dts’ in the Developer Package source code and add below code snippet (given as example) to the file
&pinctrl{
	spi4_pins_a: spi4-0 {
			pins1 {
				pinmux = <STM32_PINMUX('E', 12, AF5)>, /* SPI4_SCK */
				<STM32_PINMUX('E', 14, AF5)>; /* SPI4_MOSI */
				bias-disable;
				drive-push-pull;
				slew-rate = <1>;
			};

			pins2 {
				pinmux = <STM32_PINMUX('E', 13, AF5)>; /* SPI4_MISO */
				bias-disable;
			};
	};
	spi4_sleep_pins_a: spi4-sleep-0 {
			pins {
				pinmux = <STM32_PINMUX('E', 12, ANALOG)>, /* SPI4_SCK */
				<STM32_PINMUX('E', 13, ANALOG)>, /* SPI4_MISO */
				<STM32_PINMUX('E', 14, ANALOG)>; /* SPI4_MOSI */
			};
	};
};
&spi4 {
	pinctrl-names = "default", "sleep";
	pinctrl-0 = <&spi4_pins_a>;
	pinctrl-1 = <&spi4_sleep_pins_a>;
	/*status = "disabled";*/
	cs-gpios = <&gpioe 11 0>;
	status = "okay";

	spidev@0 {
		compatible = "semtech,sx1301";
		spi-max-frequency = <5000000>;
		reg = <0>;
	};
};
- Compile the Developer package to get the stm32mp157c-dk2.dtb file. Please refer to following link for help. Getting_started/STM32MP1_boards/STM32MP157x-DK2/Develop_on_Arm®_Cortex®-A7/Modify,_rebuild_and_reload_the_Linux®_kernel
- Please refer to Steps for quick evaluation of software chapter for pushing the compiled device tree blob onto the STM32MP157C-DK2 .
4.2.3. Build the RFAL Linux application code[edit source]
- SDK must be downloaded, installed and enabled. This should already be in place if you executed step #1 of "Updating platform configuration in Developer Package" chapter
- Download the X-LINUX-NFC5 software package from web : [1]
- Follow below commands to cross-compile the code
 sudo apt-get install cmake
 cd X-LINUX-NFC5_V1.0.0/NFCPollerApplication/Source/Linux_RFAL_st25r3911_v2.2.0/linux_demo/build
 cmake ..
 make
- The above mentioned commands would build following files
The example application: "X-LINUX-NFC5_V1.0.0/NFCPollerApplication/Source/Linux_RFAL_st25r3911_v2.2.0/linux_demo/build/nfc_poller/nfc_poller_st25r3911"
The shared library : "X-LINUX-NFC5_V1.0.0/NFCPollerApplication/Source/Linux_RFAL_st25r3911_v2.2.0/linux_demo/build/rfal/st25r3911/librfal_st25r3911.so"
4.2.4. Run the RFAL Linux application on STM32MP157C-DK2[edit source]
Copy generated binaries onto the STM32MP157C-DK2 ![]() using below commands
using below commands
 scp X-LINUX-NFC5_V1.0.0/NFCPollerApplication/Source/Linux_RFAL_st25r3911_v2.2.0/linux_demo/build/nfc_poller/nfc_poller_st25r3911 root@<board ip address>:/usr/local
 scp X-LINUX-NFC5_V1.0.0/NFCPollerApplication/Source/Linux_RFAL_st25r3911_v2.2.0/linux_demo/build/rfal/st25r3911/librfal_st25r3911.so root@<board ip address>:/usr/local
Open terminal on the STM32MP157C-DK2 ![]() or use ssh login and run the application using below commands.
or use ssh login and run the application using below commands.
ssh root@<board ip address>
Export the shared lib to the environment
export LD_LIBRARY_PATH=/usr/local:$LD_LIBRARY_PATH
Enter the directory where binaries were copied
cd /usr/local
RUN the application
./nfc_poller_st25r3911
The user will see the below message on the screen
“Welcome to the ST25R3911B NFC Poller Demo on Linux.
Scanning for NFC Technologies ...........”
When an NFC tag is brought near the reader antenna, the communication is established between the tag and reader and the UID is displayed on the screen.
5. References[edit source]
Cite error: Invalid parameter in <references> tag