This article explains what DAC is and how to use it through examples.
1. What is a digital to analog converter (DAC)?
A digital to analog converter is a system that converts a digital input signal or a value into an analog signal. It takes in a digital number or value as an input and converts it into an analog voltage. The voltage level corresponds to the binary number in the DAC output register.
In this article, we focus on the STM32L4 DAC.
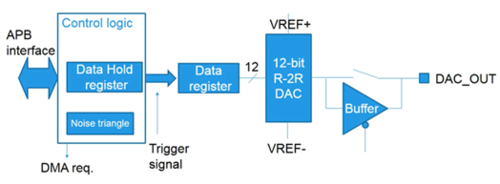
1.1. Simplified block diagram
1.2. DAC main features
- 8 or 12 bit mode: The DAC can support different input formats:
- 8-bit right aligned data format (in yellow in the image below).
- 8-bit + 8-bit in dual mode, to provide input data for two DACs.
- 12-bit mode (in red in the image below): either in right or left aligned mode.
- Buffered output: the DAC output can have a low impedance buffer to drive external loads.
- Sample and Hold mode to reduce power consumption.
- Synchronized update capability.
- DMA capability to offload CPU.
- Several trigger inputs: a timer, an external trigger, or a software trigger can update the DAC output data.
- Signal generation: DAC integrates small logic to generate noise waves as well as triangle waves.
2. Configuring DAC to generate a wave
2.1. Objectives
- Learning how to set up the DAC as wave generator in STM32CubeMX.
- Generating code in STM32CubeMX and using HAL functions.
- Creating a simple application to test the DAC.
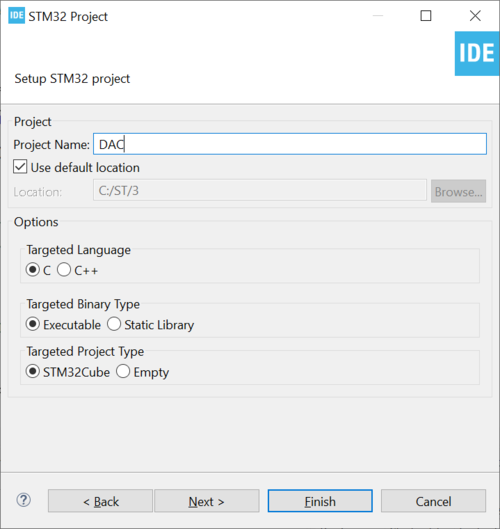
2.2. Creating the project in STM32CubeIDE
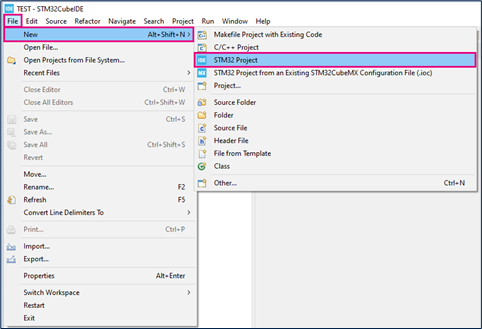
- File > New > STM32 Project in main panel.
 .
.
This example uses the NUCLEO-L476RG board.
- Select NUCLEO-L476RG board using Board selector as shown in the figure below:
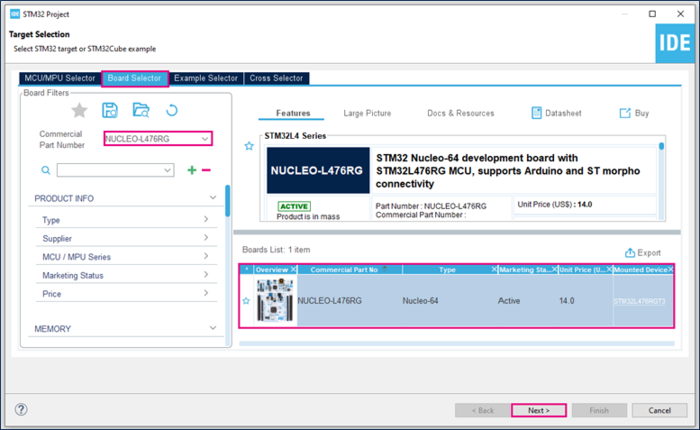
If you did not download the STM32L476 Cube library, it will automatically be downloaded. This can take some time.
- Save the project:
2.3. Configuring DAC
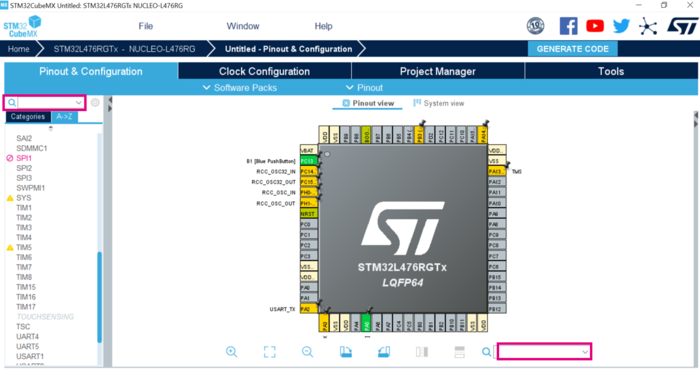
- Search for DAC1 in the left search field.
We will use PA5 as the DAC's output.
As it is configured as GPIO Output by default, we need to reset it first.
- Search for PA5 in the bottom right search field, then click Reset_State.
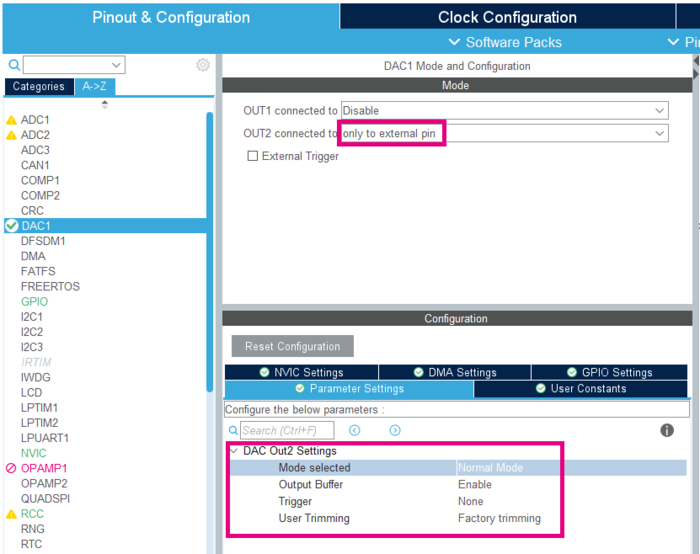
- Connect OUT2 only to external pin. Notice how PA5 is automatically set to DAC1_OUT2 on the pinout view.
- Parameter Settings should be set up as in the below example: normal mode, buffer enabled and no trigger.
2.4. Generating the project and editing main.c
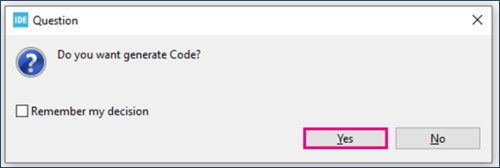
- Click Ctrl+S to generate the project:
- Edit main.c:
/* USER CODE BEGIN PV */
uint16_t dac_value=0;
/* USER CODE END PV */
/* USER CODE BEGIN 2 */
HAL_DAC_Start(&hdac1, DAC_CHANNEL_2);
/* USER CODE END 2 */
/* USER CODE BEGIN 3 */
HAL_DAC_SetValue(&hdac1, DAC_CHANNEL_2, DAC_ALIGN_12B_R, dac_value);
if (dac_value < 4095) {
	dac_value++;
} else {
	dac_value=0;
}
HAL_Delay(1);
/* USER CODE END 3 */
- Explanation
Inside the if conditional statement, we check if dac_value is lower than 4095 (0xFFF) which is the maximum output value for a 12-bit resolution DAC:
- If the value is lower than the maximum value, it is incremented.
- If not, it is reset back to zero.
- Then, we add a 1ms delay in order to have a stable output value.
This will be running in the infinite loop. Therefore, the code will sweep through all the possible DAC output values, and then reset it to zero restarting the process all over again.
2.5. Compiling and flashing
- Click the Build button

- Click the Debug button to run it step by step

- Or click the Run button to execute it

2.6. Building a simple signal generator
- On NUCLEO-L476RG, PA5 is connected to the user LED LD2. As a consequence, the DAC's output voltage is driving LD2. Notice how it progressively lights up before being switched off when the DAC's output is reset to 0.
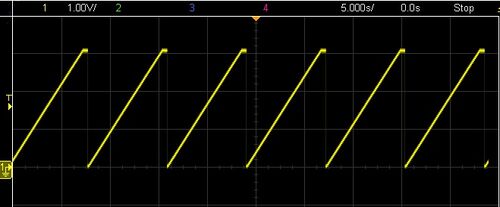
- Connect your multimeter or oscilloscope to the PA5 pin, the DAC output voltage gradually increases up to a maximum output value, which is 3V. Then, it is reset to 0, drawing a sawtooth wave.
- Explore further possibilities such as:
3. References
