Template:ArticleMainWriter Template:ArticleFirstDraftVersion
1. Article purpose[edit source]
This article explains step by step how to create your own The Things Network LoRaWan gateway based on the STM32MP1. You will be able to choose between two different applications:
- The first uses only the Cortex-A7 for all the process.
- The second divides the work in two parts. The Cortex-A7 to exchange with a server and the Cortex-M4 to manage the LoRaWAN concentrator.
2. Hardware needed[edit source]
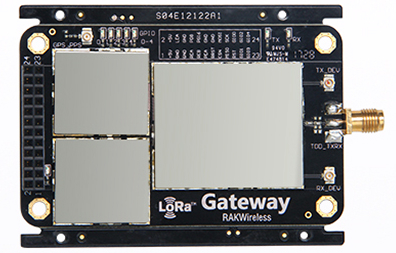
The concentrator LoRaWan RAK831
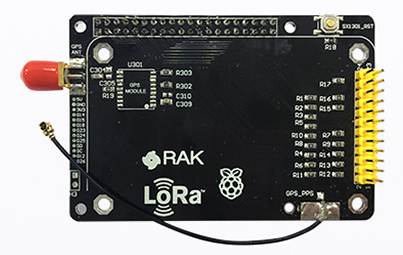
The converter board
This bundle allows to start with all the hardware needed. (pick your geographic area)
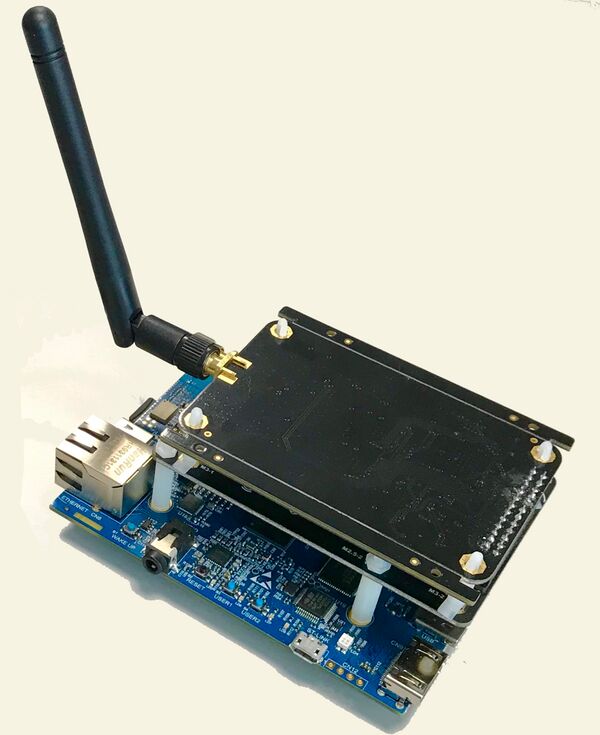
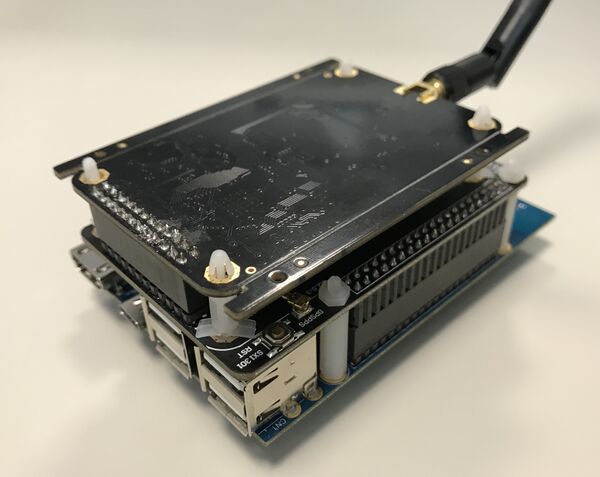
You can now assemble the modules to the board.
This is how it should look:
3. Prerequisites[edit source]
The prerequisites from Installing the OpenSTLinux distribution must be executed.
4. How to create the LoRaWan gateway layer[edit source]
To start you need to add the LoRaWan gateway layer to your Distribution Package environment.
 cd <working directory path of distribution>/openstlinux-4.19-thud-mp1-19-02-20/layers/meta-st
 git clone https://gerrit.st.com/stm32mpuapp/meta/meta-st-stm32mpu-app-lorawan -b thud
5. The LoRaWAN gateway with only the Cortex-A7[edit source]
5.1. How to build the binaries[edit source]
The next step is to create the build for the LoRaWan gateway
 cd <working directory path of distribution>/openstlinux-4.19-thud-mp1-19-02-20
 DISTRO=openstlinux-weston MACHINE=stm32mp1-lorawan-a7 source layers/meta-st/scripts/envsetup.sh
 bitbake st-image-lorawan
This may take some time.
5.2. How to create the SD card[edit source]
The final step is to 'populate the SD card with the binaries compiled previously:
 cd <working directory path of distribution>/openstlinux-4.19-thud-mp1-19-02-20/build-openstlinuxwestonextra-stm32mp1-lorawan-a7
 cd tmp-glibc/deploy/images/stm32mp1-lorawan-a7/scripts/
 ./create_sdcard_from_flashlayout.sh ../flashlayout_st-image-lorawan/FlashLayout_sdcard_stm32mp1-lorawan-a7-mx-trusted.tsv
 sudo umount `lsblk --list | grep mmcblk0 | grep part | gawk '{ print $7 }' | tr '\n' ' '`
 sudo dd if=../flashlayout_st-image-lorawan/../flashlayout_st-image-lorawan_FlashLayout_sdcard_stm32mp1-lorawan-a7-mx-trusted.raw of=/dev/mmcblk0 bs=8M conv=fdatasync status=progress
(more informations in the How to populate the SD card with dd command page)
5.3. Launching the binaries on the board[edit source]
This part explains how to launch the LoRaWan service on the board.
cd /usr/local/lorawan-gateway/
For the next command, you need to indicate if your board is connected to the internet with WiFi or Ethernet.
./LoRaWan_gateway_launcher.sh wifi | ethernet
- During the launcher script, enter your preferred server, up and down ports when it is asked.
- Important: copy your EUI before the restart of the gateway
All those informations can be found or changed manually in the global_conf.json and local_conf.json files in /usr/local/lorawan-gateway/ on the board.
To change those informations, refer to How_to_setup_wifi_connection
6. The LoRaWAN gateway with the Cortex-A7 and the Cortex-M4[edit source]
6.1. How to build the binaries[edit source]
The next step is to create the build for the LoRaWan gateway
 cd <working directory path of distribution>/openstlinux-4.19-thud-mp1-19-02-20
 DISTRO=openstlinux-weston MACHINE=stm32mp1-lorawan-m4 source layers/meta-st/scripts/envsetup.sh
 bitbake st-image-lorawan
This may take some time.
6.2. How to create the SD card[edit source]
The final step is to 'populate the SD card with the binaries compiled previously:
 cd <working directory path of distribution>/openstlinux-4.19-thud-mp1-19-02-20/build-openstlinuxwestonextra-stm32mp1-lorawan-m4
 cd tmp-glibc/deploy/images/stm32mp1-lorawan-m4/scripts/
 ./create_sdcard_from_flashlayout.sh ../flashlayout_st-image-lorawan/FlashLayout_sdcard_stm32mp157c-lorawan-m4-mx-trusted.tsv
 sudo umount `lsblk --list | grep mmcblk0 | grep part | gawk '{ print $7 }' | tr '\n' ' '`
 sudo dd if=../flashlayout_st-image-lorawan/../flashlayout_st-image-lorawan_FlashLayout_sdcard_stm32mp157c-lorawan-m4-mx-trusted.raw of=/dev/mmcblk0 bs=8M conv=fdatasync status=progress
(more informations in the How to populate the SD card with dd command page)
6.3. Launching the binaries on the board[edit source]
This part explains how to launch the LoRaWan service on the board.
cd /usr/local/lorawan-gateway/
For the next command, you need to indicate if your board is connected to the internet with WiFi or Ethernet.
./LoRaWan_gateway_m4_launcher.sh wifi | ethernet
- During the launcher script, enter your prefered server, up and down ports when it is asked.
- Important: copy your EUI before the restart of the gateway
All those informations can be found or changed manually in the global_conf.json and local_conf.json files in /usr/local/lorawan-gateway/ on the board.
To change those informations, refer to How_to_setup_wifi_connection
6.4. To Modify the firmware running on the M4[edit source]
If you want to access or modify the code of the firmware running on the M4
 cd <working directory>
 repo init -u https://gerrit.st.com/stm32mpuapp/fw/manifests -b lorawan -m default.xml
 repo sync
7. How to proceed on The Things Network[edit source]
Login or create an account on https://www.thethingsnetwork.org
- Go into your CONSOLE.
- Clic on GATEWAYS.
- Clic on register gateway.
- Check I'm using the legacy packet forwarder and enter your EUI you previously copied.
- Enter a description of the gateway, this is the name you can see on the map of the site.
- Select your Frequency Plan.
- Select your Router (for europe choose ttn-router-eu).
- You can place your gateway on the map by clicking on it or by entering directly the precise coordinates.
- Tell if your antenna is indoor or outdoor.
- For creating a test device.
Be careful with your applications, the duty cycle is [1] by governments.