Template:ArticleMainWriter Template:ArticleFirstDraftVersion
1. Article purpose[edit source]
This article explains step by step how to create your own The Things Network LoRaWan gateway based on the STM32MP1.
2. Prerequisites[edit source]
The prerequisites from Installing the OpenSTLinux distribution must be executed.
The board and the host machine are connected through an Ethernet link, and a remote terminal program is started on the host machine: see How to get Terminal.
The target is started, and its IP address (<board ip address>) is known.
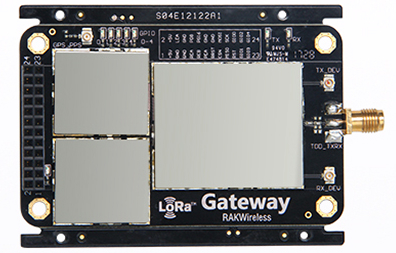
This LoRaWan gateway is based on the RAK831
3. Creation of the LoRaWan gateway build[edit source]
To start you need to add the LoRaWan gateway layer to your Distribution Package environment.
 cd <working directory path of distribution>/openstlinux-4.19-thud-mp1-19-02-20/layers/meta-st
 git clone "https://gerrit.st.com/stm32mpuapp/meta/meta-st-stm32mpu-app-lorawan"
The next step is to create the build for the LoRaWan gateway
 cd <working directory path of distribution>/openstlinux-4.19-thud-mp1-19-02-20
 DISTRO=openstlinux-weston-extra MACHINE=stm32mp1-lorawan-a7 source layers/meta-st/scripts/envsetup.sh
 bitbake st-image-lorawan
This may take some time.
The final step is to populate the SD card: (more informations in the How to populate the SD card with dd command page)
 cd <working directory path of distribution>/openstlinux-4.19-thud-mp1-19-02-20/build-openstlinuxwestonextra-stm32mp1-lorawan-a7
 cd tmp-glibc/deploy/images/stm32mp1-lorawan-a7/scripts/
 ./create_sdcard_from_flashlayout.sh ../flashlayout_st-image-lorawan/FlashLayout_sdcard_stm32mp157c-lorawan-a7-mx-trusted.tsv
 sudo umount `lsblk --list | grep mmcblk0 | grep part | gawk '{ print $7 }' | tr '\n' ' '`
 sudo dd if=../flashlayout_st-image-lorawan/../flashlayout_st-image-lorawan_FlashLayout_sdcard_stm32mp157c-lorawan-a7-mx-trusted.raw of=/dev/mmcblk0 bs=8M conv=fdatasync status=progress
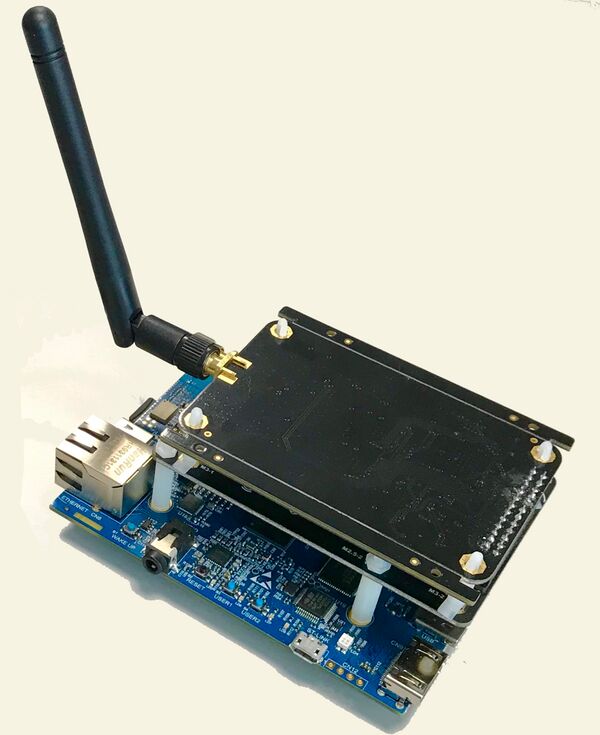
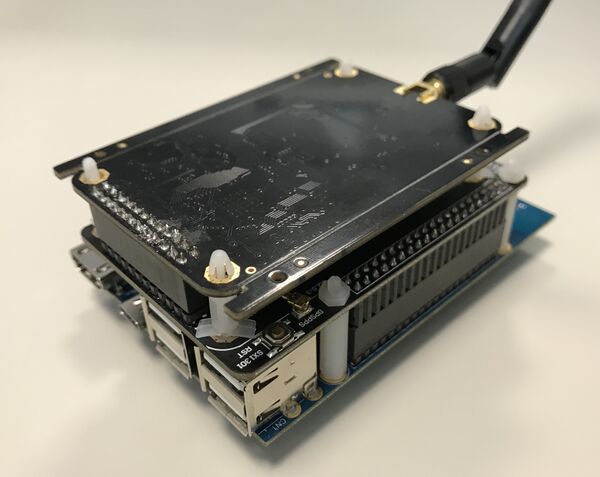
You can now assemble the modules to the board.
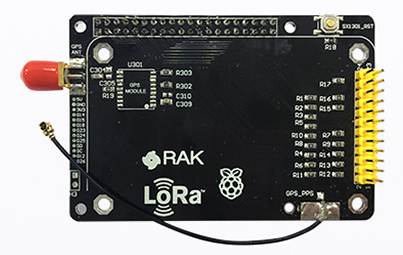
This are the different parts you will need:
Using the converter board is recommended to avoid any trouble with the GPIO's management.
This is how it should look:
4. Launching the binaries on the board[edit source]
This part explains how to launch the LoRaWan service on the board.
 cd /usr/local/lorawan-gateway/
 ./LoRaWan_gateway_launcher.sh
- During the launcher script, enter your prefered server, up and down ports when it is asked.
- Important: at the end of the script, copy your EUI before the restart of the gateway
In any case, all those informations can be found or changed manually in the global_conf.json and local_conf.json files in /usr/local/lorawan-gateway/ on the board.
4.1. How to proceed on The Things Network[edit source]
Login or create an account on https://www.thethingsnetwork.org
- Go into your Console.
- Clic on GATEWAYS.
- Clic on register gateway.
- Check I'm using the legacy packet forwarder and enter your EUI you previously copied.
- Enter a description of the gateway, this is the name you can see on the map of the site.
- Select your Frequency Plan.
- Select your Router (for europe choose ttn-router-eu).
- You can place your gateway on the map by clicking on it or by entering directly the precise coordinates.
- Tell if your antenna is indoor or outdoor.