Template:ArticleMainWriter Template:ArticleFirstDraftVersion
This LoRaWAN The Things Network gateway package contains the frameworks to enable a LoRaWAN gateway that could be run on STM32MP1 Series.
This package consists in an OpenEmbedded meta layer, named meta-st-stm32mpu-app-lorawan, to be added on top of the STM32MP1 Distribution Package. It brings a complete and coherent, easy to build / install LoRaWAN gateway on STM32MP1 Series.
The meta layer contains frameworks, tools and applications to run The LoRaWAN The Things Network gateway. Different images are available targeting different use cases such as the single use of the Cortex-A7, the use of the Cortex-A7 and Cortex-M4 side by side and the possibility to choose between an Ethernet or a wifi connection.
1. Hardware needed[edit source]
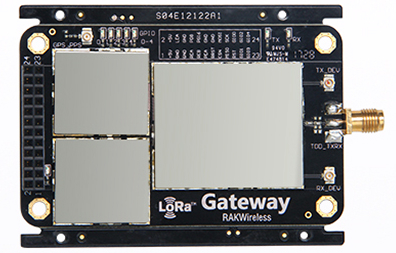
The concentrator LoRaWan RAK831
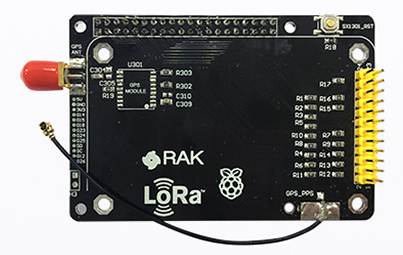
The converter board
This bundle allows to start with all the hardware needed. (pick your geographic area)
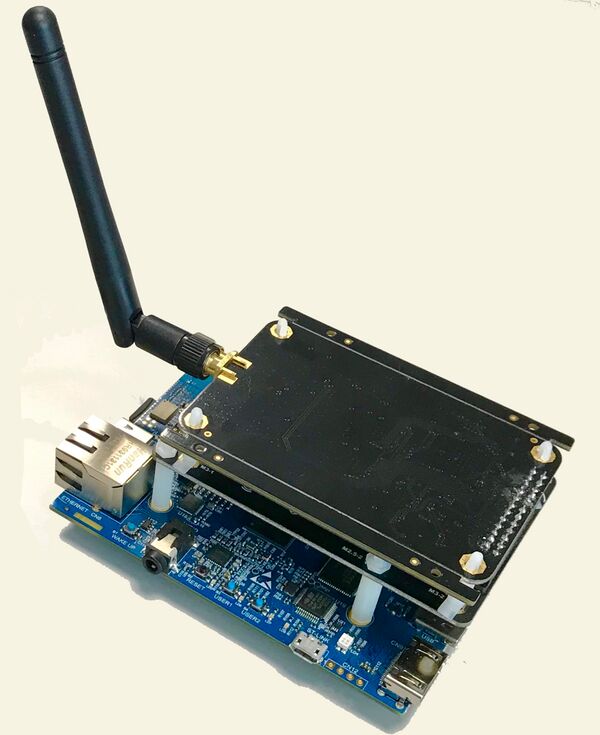
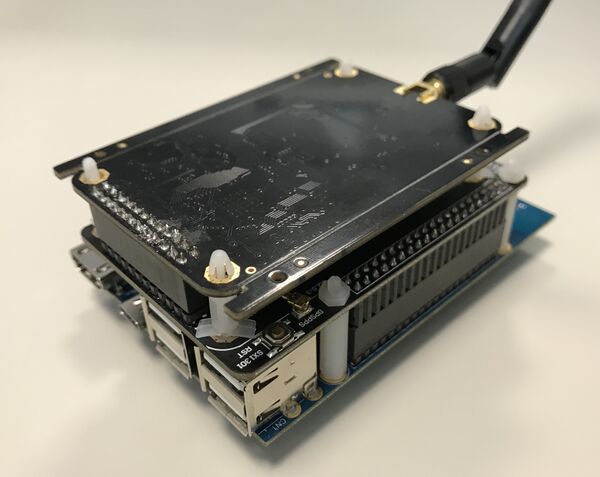
You can now assemble the modules to the board.
This is how it should look:
2. Prerequisites[edit source]
Install the STM32MP1 Distribution Package, but do not initialize the OpenEmbedded environment (sourcing the envsetup.sh) before having installed the meta-st-stm32mpu-app-lorawan meta layer (see next chapter).
3. Installation of the meta layer[edit source]
- To start you need to clone the git repositories to <Distribution Package installation directory>/layers/meta-st.
 cd <Distribution Package installation directory>/layers/meta-st
 git clone https://gerrit.st.com/stm32mpuapp/meta/meta-st-stm32mpu-app-lorawan -b thud
4. Build the software image[edit source]
Setup for the LoRaWan gateway build environment
cd <Distribution Package installation directory>
Different OpenSTLinux expansion packages are available to target different use cases. The following commands need to be executed in the build environment.
You can choose between two different machines:
- stm32mp1-lorawan-a7 to only use the Cortex-A7 for the whole application's process
 DISTRO=openstlinux-weston MACHINE=stm32mp1-lorawan-a7 source layers/meta-st/scripts/envsetup.sh
 bitbake st-image-lorawan
- stm32mp1-lorawan-m4 to use the Cortex-A7 and the Cortex-M4 side by side. The Cortex-A7 to manage the communication with The Things Network's server and the Cortex-M4 to communicate in real time with the concentrator.
 DISTRO=openstlinux-weston MACHINE=stm32mp1-lorawan-m4 source layers/meta-st/scripts/envsetup.sh
 bitbake st-image-lorawan
5. Flash the built image[edit source]
Follow this link to know how to flash the built image.
6. Launch the LoRaWAN gateway's software connected to The Things Network[edit source]
- Power the board
- The launcher
- Connect the ethernet cable
cd /usr/local/lorawan-gateway/
./LoRaWAN_gateway_launcher.sh
- If you want to easily switch between ethernet and wifi
cd /usr/local/lorawan-gateway/
./LoRaWAN_gateway_launcher.sh wifi
- During the launcher script, enter your preferred server, up and down ports when it is asked.
- Important: copy your EUI before the restart of the gateway
All those informations can be found or changed manually in the global_conf.json and local_conf.json files in /usr/local/lorawan-gateway/ on the board.
Your gateway will reboot and after a short time, you we will be able to receive or transmit informations through LoRaWAN.
7. Source code of the firmware running on the M4[edit source]
If you want to access or modify the code of the firmware running on the M4
 cd <working directory>
 repo init -u https://gerrit.st.com/stm32mpuapp/fw/manifests -b lorawan -m default.xml
 repo sync
8. How to proceed on The Things Network[edit source]
Login or create an account on https://www.thethingsnetwork.org
- Go into your CONSOLE.
- Clic on GATEWAYS.
- Clic on register gateway.
- Check I'm using the legacy packet forwarder and enter your EUI you previously copied.
- Enter a description of the gateway, this is the name you can see on the map of the site.
- Select your Frequency Plan.
- Select your Router (for europe choose ttn-router-eu).
- You can place your gateway on the map by clicking on it or by entering directly the precise coordinates.
- Tell if your antenna is indoor or outdoor.
- For creating a test device. Be careful with your end node’s applications, the duty cycle is regulated by governments. This one is regulated so that it can send a new LoRaWAN message minimum every 3 minutes with this low amount of data. But you can change the APP_TX_DUTYCYCLE variable if you want to lengthen the delay between two dispatch.
- Not mandatory: for your application's devices, you can use cayenne, this is a framework that store the data and you can easily visualize them.