| Coming soon |
This article explains what is SPI and how to use it through examples
1. What is a serial peripheral interface (SPI)?
The Serial Peripheral Interface (SPI) is a synchronous serial communication interface specification used for short-distance communication, primarily in embedded systems. The interface was developed by Motorola in the mid-1980s and has become a de facto standard. SPI devices communicate in full duplex mode using a master-slave architecture usually with a single master. The master (controller) device originates the frame for reading and writing. Multiple slave-devices may be supported through selection with individual chip select (CS), sometimes called slave select (SS) lines.
2. Configure the SPI to communicate between 2 boards
2.1. Objective
In this example, the objective is to set up communication through SPI between two NUCLEO-L476RG and learn how to use SPI in different modes.
2.2. Create project in STM32CubeIDE
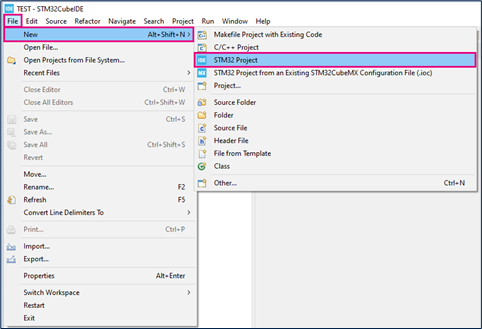
- File>New>STM32 Project in main panel.

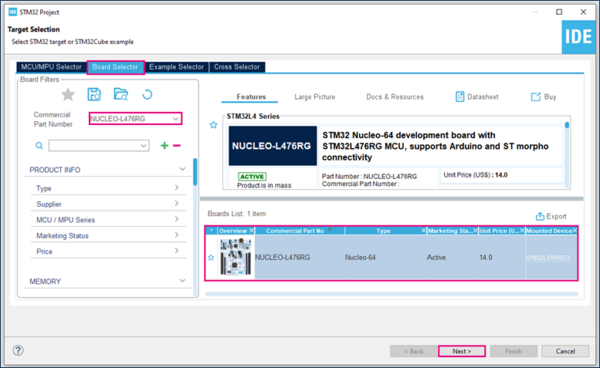
In this example the NUCLEO-L476RG board is used to test SPI in different modes.
- Select NUCLEO-L476RG board using Board Selector as shown in the below figure.

In case you haven't downloaded the STM32L476 Cube library, it will be downloaded automatically, it may take some time.
- Save the project.
2.3. Configure SPI
- Open the STM32CubeMX project from the workspace.
2.3.1. SPI settings
- Under Connectivity, select SPI1.
- Select the Full-Duplex Master mode.
2.3.2. GPIO settings
2.3.3. NVIC and DMA settings
2.4. Generate source code and edit main.c
2.4.1. On master board
2.4.2. On slave board
2.5. Compile and flash
2.6. Project workspace
[[category:Getting_started_with_STM32_system_peripherals | 40]]