1. Develop a basic motor control using ST Motor Profiler
![]() 30min
30min
Target description
This tutorial enables you to use ST Motor Profiler and after applying it you will be able to :
- Connect the motor control pack to your computer.
- Start the motor and monitor its speed.
Prerequisites
- Computer with Windows 7 (or higher)
- ST-Link utility installed
Hardware
- P-Nucleo-IHM03 pack
- Standard-A -to- Mini-B USB cable + power source
Software
- ST Motor Profiler
Literature
- P-Nucleo-IHM03 user manual
- UM2374 STM32 motor control SDK.user manual.
1.1. Install ST Motor Profiler
To install the Motor Profiler, the STM32 Motor Control Software Development Kit should be installed on your computer, using the following link
It will get installed automatically with the MotorControl Workbench while following the installation steps.

1.2. Connect the package to the computer
In this tutorial we will be working the P-NUCLEO-IHM03 Motor Control package and to start our application we should contact our pack to the computer.
After setting up the boards and motor properly, let us launch the Motor Profiler application.
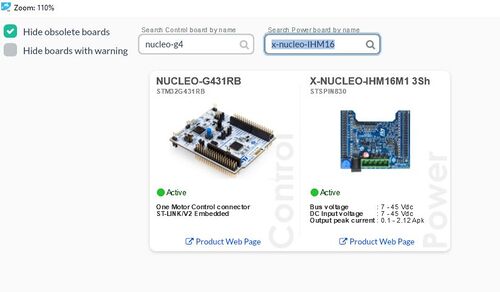
- The first step to do is to select the boards we are using by clicking on Select Boards button
- By referring to the user manual, the following parameters regarding the motor characteristics can be defined: Pole Pairs, Max Speed, Max Current, VBus.
- After defining the values, the next step is to click on “Connect” button and check the motor working correctly.
Please make sure to upgrade the ST-Link version so to not have problems with launching the application.
1.3. Start the test
After finishing the connection between the boards and the computer, it is now the time to start the test.
- Click on Start Profile button.
When clicking, the motor will start rotating in a high speed and the electrical as well as the mechanical models will get established as shown in the following photo.

1.4. Monitor the speed
After checking that the motor is connected and working properly, the next step is to make it work while controlling its speed.
- Click on Play button and the following window appears.
- By moving the cursor, the speed can be monitored
Now you are able to:
- Start your own motor application
- Use properly the ST Motor Control pack
2. Start the motor using ST Motor Control Workbench
![]() 45min
45min
Target description
This tutorial enables you to use ST Motor Control Workbench and after applying it you will be able to :
- Connect the motor control pack to your computer.
- Start the motor
Prerequisites
- Computer with Windows 7 (or higher)
- ST-Link utility installed
Hardware
- P-Nucleo-IHM03 pack
- Standard-A -to- Mini-B USB cable + power source
Software
Literature
- P-Nucleo-IHM03 data brief
- UM2374 STM32 motor control SDK.user manual.
