This article explains what Start from board is and how to use it through a detailed example.
1. What is Start From Board?
Start from board is a functionality of STM32CubeMX simplifying the creation of a project on a board
A project can quickly be generated and uploaded to a board.
The working generated skeleton allows a faster understanding of the ins and outs of the board workings.
Main features:
- A fully function application can be generated in a few clicks.
- All required board support packages (BSPs) of drivers and configuration settings that allows a kernel image to boot up the board will be included in a few clicks.
This article uses the STM32U031R8Tx - NUCLEO-U031R8 device as an example.
| Supported boards | NUCLEO-U031R8 | NUCLEO-H533RE | NUCLEO-C031C6 | NUCLEO-U5A5ZJ-Q | NUCLEO-H563ZI |
1.1. Objectives
- Learning how to easily generate a project to execute on a board.
- Creating a simple project illustrating the start from board functionality.
2. Creating the project in STM32CubeMX
The example below uses the NUCLEO-U031R8 board
[1] .
We are going to create a project with the following functionalities.
- A green led will go on and off when the user presses the button.
- A message will be sent to the UART associated to ST link.
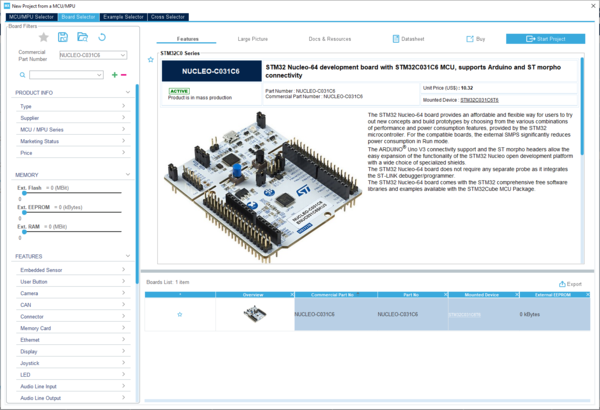
Select the NUCLEO-U031R8 board using the Board Selector, as shown in the figure below:

- Double click on the board or press the start project button.
- By default the "Generate demonstration code" is not set.
- We need it to be checked in in order to generate code allowing the user to interact with the board via the "User Button" located on the card.
- Check the "Generate demonstration code" box.
- Click on the left arrow on the right hand of Human Machine interface to reveal the list of available BSP drivers.
File:Start from board generate code for all.png
- Each of the check box under the "Human Machine Interface" allow the inclusion of the corresponding BSP drivers.
File:Start from board default.png
- The list of the available BSPs is presented and some are checked.
- This indicates that STM32CubeMX will generate the code using the corresponding BSP drivers.
- Press the OK button.
3. On the Pinout & Configuration view
Locate the "Bsp" section on the left hand side of the '"Pinout & Configuration view" view
Click on the Bsp chevron to show the list of boards being configured
Click on the NUCLEO-U031R8 board
The mode and configuration panels are opened with the data previously configure din the wizard.
Note that:
- You can adjust the settings in the "Mode and Configuration" panels.
- You cannot enable or disable the "demonstration code" generation.
Limitation:
If you press the "Reset button" you will not be able to interact with the "Generate demonstration code" option, it will be set to "do not generate".
3.1. Generating the project
Go to the Project Manager tab.
- Give a name to your project.
- Select your prefered toolchain / IDE
- Press the "GENERATE CODE" button.
3.2. Moving the code to the board
You can now locate the generated code on your file system. Compile using the appropriate toolchain. Transfer the code to the board. Using the user button you can start and stop the led blinking process. Using a debugger, you can see the data being sent to the UART associated to ST link.
4. Limitations
The functionality is not compatible with software packs implementing BSP drivers.
