This article aims to give the following information:
- How to use the X-LINUX-QT Developer Package to build Qt applications for the STM32 microprocessor series.
1. Prerequisites[edit | edit source]
Check detailed prerequisites here.
2. Update the SDK environment for CMake[edit | edit source]
| The OE_CMAKE_TOOLCHAIN_FILE variable needs to be set to allow building CMake projects with the installed SDK |
Please follow below steps if you need to add the missing OE_CMAKE_TOOLCHAIN_FILE variable to your SDK configuration
- Open terminal and load the environment setup
source /opt/st/stm32mp2/4.2.4-openstlinux-6.1-yocto-mickledore-mpu-v24.06.26/environment-setup-cortexa35-ostl-linux
- Add the missing OE_CMAKE_TOOLCHAIN_FILE variable to the qt6 environment file
echo "export OE_CMAKE_TOOLCHAIN_FILE=\"\$OECORE_NATIVE_SYSROOT/usr/lib/cmake/Qt6/qt.toolchain.cmake\"" >> $OECORE_NATIVE_SYSROOT/environment-setup.d/qt6.sh
3. Install the STM32CubeIDE[edit | edit source]
- Please follow instructions from here to know how to install and use the STM32CubeIDE.
4. Select the updated OpenSTLinux SDK by the X-LINUX-QT Developer Package[edit | edit source]
- Please follow instructions from here to know how to install the STM32MPU OpenSTLinux Developper Package for the STM32CubeIDE.
- Please select the updated STM32MPU OpenSTLinux Developper Package by the X-LINUX-QT Developer Package.
5. Download the Demo example source code[edit | edit source]
 mkdir -p /opt/st/demos/Qt
 cd /opt/st/demos/Qt
 git clone https://github.com/KDABLabs/KDBoatDemo.git -b qt6
6. Build the Demo example[edit | edit source]
- Import the Project from STM32CubeIDE
- Start a new STM32 CMake Project

- Select Project with existing CMake sources

- Fill the Project name and source directory
- Project name = KDBoatDemo
- Source directory = /opt/st/demos/Qt/KDBoatDemo

- Configure default toolchain
- Select OpenSTLinux SDK for the Toolchain field
- Select your installed OpenSTLinux SDK (openstlinux-6.1-yocto-mickledore-mpu-v24.06.26) for the Version field

- Build the Project
- Select the project from the list and press the Build button
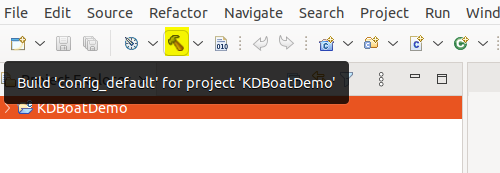
- Wait until the build is finished and make sure it is done successfully

7. Deploy the Demo example to your running board[edit | edit source]
- Copy the Example's binary into your connected board
 cd /opt/st/demos/Qt
 scp config_default/KDABBoatDemo root@192.168.7.1:/home/root/.
8. Run the Demo example on your board[edit | edit source]
- Connect to your running board
ssh root@192.168.7.1
- Run the Demo's example (windowed mode)
./KDABBoatDemo
- Check the running Demo example on your board's display

- Run the Demo's example (Full screen mode)
./KDABBoatDemo --fullscreen
- Check the running Demo example on your board's display
