Template:ArticleMainWriter Template:ArticleProposedVersion
| Let's start | Develop on Arm® Cortex®-A7 | |||||||
| Unpack the board | Populate the target and boot the image | Execute basic commands | Use the demo launcher | |||||
1. Overview[edit source]
This first stage will explain you the way to unpack the STM32MP157C-DK2 Discovery kit and the additional equipment you need.
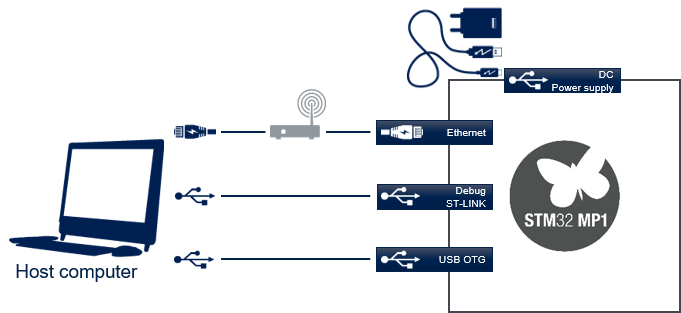
The following block diagram provide you high level information about how to connect them together.
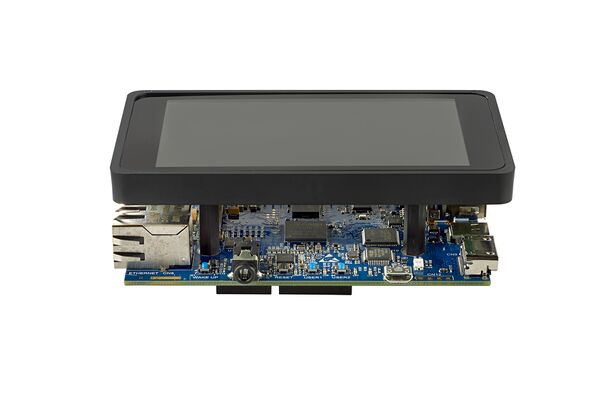
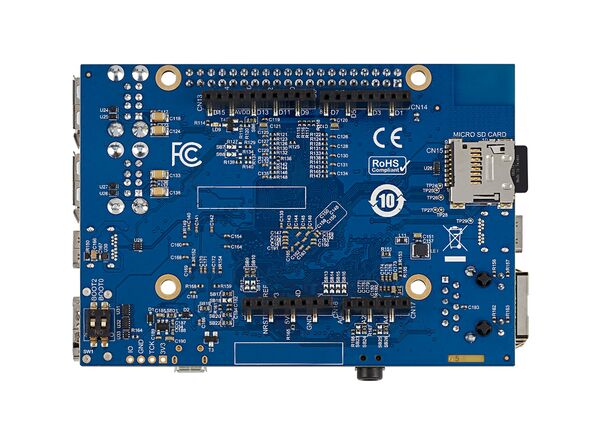
2. Out of the box[edit source]
3. Equipment[edit source]
The following table lists the required equipment to start playing with your STM32MP157C-DK2 board.
Some of them are delivered with the STM32MP157C-DK2 Discovery kit. The other need to be purchase separatly.
| STM32MP157C-DK2 Discovery kit | Flexible development platform for the STM32MP15 microprocessor device | Delivered |
| MicroSD card | To be populated with the OpenSTLinux Distribution (Linux software), and providing extra storage capacity. A 2-Gbyte minimum microSD card is needed |
Delivered |
| USB Type-C™ to USB Type-C™ cable | Used to connect the STM32MP157C-DK2 board to the power supply | Delivered |
| Micro USB Type-B to USB Type-A cable | Used to connect the STM32MP157C-DK2 Discovery kit to the PC through the USB micro-B (ST-LINK/V2-1) |
Not delivered |
| USB Type-C™ to USB Type-A cable | Used to connect the STM32MP157C-DK2 board to an USB OTG device. | Not delivered |
| Power Supply 5V/3A | The power supply should be able to output 5V / 3A (15W) | Not delivered |
| Laptop | Assume a Linux PC running Ubuntu 16.04 | Not delivered |
| Ethernet cable (optional) | Used to connect the STM32MP157C-DK2 Discovery kit through ssh | Not delivered |
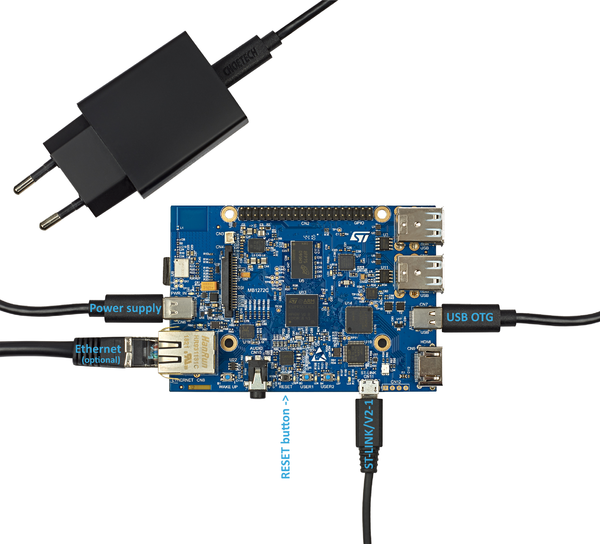
4. Connection[edit source]
- Connect the micro USB Type-B to USB Type-A cable between your laptop and the ST-LINK/V2-1 port of the board
- Connect the USB Type-C™ to USB Type-C™ cable to the 5V/3A power supply
- Connect the USB Type-C™ to USB Type-A cable betweenn your laptop and the USB Type-C™ OTG port of the board
- Optionally connect the Ethernet cable between your Ethernet network and the Ethernet port of the board
5. Check the host computer Internet access[edit source]
- An Internet access through http and https protocols must be provided.
The command below allows to check for Internet access through http/https protocols:
wget -q www.google.com && echo "Internet access over HTTP/HTTPS is OK !" || echo "No internet access over HTTP/HTTPS ! You may need to set up a proxy."
If a 'OK' message is returned, the network is well configured. In such case, skip the rest of this section and jump to next one (Install extra packages).
Any other situation likely indicates the need for a proxy for http/https protocols.
The best solution to set a proxy for http/https protocols is via the shell variables http_proxy and https_proxy:
 export http_proxy=http://<MyProxyLogin>:<MyProxyPassword>@<MyProxyServerUrl>:<MyProxyPort>
 export https_proxy=http://<MyProxyLogin>:<MyProxyPassword>@<MyProxyServerUrl>:<MyProxyPort>
Check again the Internet access with command:
wget -q www.google.com && echo "Internet access over HTTP/HTTPS is OK !" || echo "No internet access over HTTP/HTTPS ! You may need to set up a proxy."