| This page is a candidate for renaming (move). The requested new name is: X-LINUX-AZURE_Expansion_Package . The supplied reason is: Reason: for consistence with X-LINUX-AWS_Expansion_Package. No signature supplied! Wiki maintainers: remember to update the pages that link this page before renaming (moving) it. |
1. Article purpose[edit source]
X-LINUX-AZURE is an OpenSTLinux distribution Expansion Package that enables the development of your IoT solution by bringing Microsoft Azure IoT Edge[1] software, which transforms your STM32MPU into an IoT edge device that connects to Azure IoT Hub[2].

The purpose of this article is to explain step by step:
- How to install X-LINUX-AZURE Expansion Package on top of OpenSTLinux distribution.
- How to configure your IoT Edge device to connect to Azure IoT Hub
- How to secure the device identity and cloud connection with the use of OP-TEE or TPM for cryptographic operations, private key and certificate storage
- How to deploy modules on your IoT Edge device
2. X-LINUX-AZURE package software description[edit source]
2.1. Overview[edit source]
2.1.1. Connectivity[edit source]
X-LINUX-AZURE enables your STM32 Arm® Cortex® MPUs ![]() to:
to:
- Connect to Azure IoT Hub as an IoT edge device
- Connect client devices to local IoT Edge hub (MQTT, AMQP)
- Deploy our own code with custom modules

To learn more, please see Azure IoT Edge Documentation[3].
2.1.2. Software architecture[edit source]
The X-LINUX-AZURE Expansion Package provides open source components that enable you to develop your own IoT solution.
As an example, the X-LINUX-AZURE Expansion Package provides a basic graphic demonstration application to interact with Azure IoT Edge runtime.

2.2. Versioning[edit source]
The latest version of the X-LINUX-AZURE Expansion Package is 5.1.0.
Since its release v5.1.0, the major and minor versioning of the X-LINUX-AZURE OpenSTLinux Expansion Package are aligned on the major and minor versioning of the OpenSTLinux Distribution. This prevents painful backward compatibility attempts and makes dependencies straightforward. The X-LINUX-AZURE generic versioning vx.y.z is built as follows:
- x: major version matching the OpenSTLinux Distribution major version. Each new major version is incompatible with previous OpenSTLinux Distribution versions.
- y: minor version matching the OpenSTLinux Distribution minor version. Each new minor version might be incompatible with previous OpenSTLinux Distribution versions.
- z: patch version to introduce bug fixes. A patch version is implemented in a backward compatible manner.
2.3. Associated licenses[edit source]
3. Prerequisites[edit source]
- Knowledge of the Azure IoT Edge and Azure IoT Hub is advised.
- An Azure IoT Hub account is needed to connect your board as a IoT Edge device, you can start with a free account.
Instead of Azure IoT Hub, you can use Azure IoT Central to connect your device.
3.1. Hardware prerequisites[edit source]
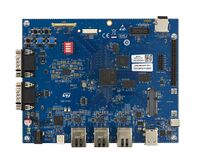
- STM32 MPU Board
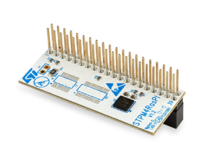
- TPM development kit (required if TPM is chosen as a secure solution, only available with X-LINUX-AZURE Distribution Package).
- Internet access.
- For Wi-Fi® connection, see how to setup a WLAN connection.
- For connection with proxy, see how to configure proxy support
3.2. Software prerequisites[edit source]
The X-LINUX-AZURE Expansion Package runs with OpenSTLinux ecosystem release v5.1.0 ![]() .
.
4. X-LINUX-AZURE package software installation[edit source]
There are two possibilities to install the additional X-LINUX-AZURE expansion package software to port on top of OpenSTLinux:
- X-LINUX-AZURE_Starter_package: quickly and easily bring Azure IoT Edge on the STM32 MPU with OP-TEE as a secure solution.
- X-LINUX-AZURE Distribution package: an OpenEmbedded meta-layer to be added on top of the STM32MPx Distribution Package to generate AZURE expansion package.
5. X-LINUX-AZURE package software setup[edit source]
5.1. Configuration with DPS provisioning and authentication with symmetric key stored in file system[edit source]
This configuration is used for fast prototyping using IoT Central for example.
- Customize the following variables
 export REGISTRATION_ID="STM32MP257F-EV1-******"
 export ID_SCOPE="0ne******"
 export SYMMETRIC_KEY="**********"
- Create a configuration file
 cat >/etc/aziot/config.toml <<EOL
# ==============================================================================
# Hostname
# ==============================================================================
hostname = "$(hostname)"

# ==============================================================================
# Provisioning
# ==============================================================================
# DPS provisioning with symmetric key
[provisioning]
source = "dps"
global_endpoint = "https://global.azure-devices-provisioning.net/"
id_scope = "${ID_SCOPE}"

[provisioning.attestation]
method = "symmetric_key"
registration_id = "${REGISTRATION_ID}"

symmetric_key = { value = "${SYMMETRIC_KEY}" }
EOL
- Apply the configuration
iotedge config apply
5.2. Configuration without DPS and authentication via x509 certificate and private key stored in OP-TEE[edit source]
- Set the PKCS11 paths
 export PKCS11_LIB="/usr/lib/libckteec.so.0"
 export OPENSSL_CONF_FILE="/etc/pki/openssl-pkcs11-provider-optee.cnf"
- Customize the following variables
 export PKCS11_SLOT="1"
 export PKCS11_TOKEN_LABEL="AZ_TOKEN"
 export PKCS11_KEY_LABEL="AZ_key"
 export PKCS11_KEY_ID="0"
 export PKCS11_SO_PIN="1234567890"
 export PKCS11_USER_PIN="12345"
 export DEVICE_NAME="STM32MP257F-EV1-******"
 export IOT_HUB_HOST_NAME="******.azure-devices.net"
 export CERTIFICATE_CN="$DEVICE_NAME"
- Set the certificate paths
 export CERTIFICATE_DIR="/var/aziot/certs"
 export CERTIFICATE_NAME="${CERTIFICATE_CN}.pem"
- Create configuration file
 cat >/etc/aziot/config.toml <<EOL
# ==============================================================================
# Hostname
# ==============================================================================
hostname = "$(hostname)"

# ==============================================================================
# Provisioning
# ==============================================================================

# Manual provisioning with X.509 certificate
[provisioning]
source = "manual"
iothub_hostname = "${IOT_HUB_HOST_NAME}"
device_id = "${DEVICE_NAME}"

[provisioning.authentication]
method = "x509"
identity_pk = "pkcs11:slot-id=${PKCS11_SLOT};object=${PKCS11_KEY_LABEL}?pin-value=${PKCS11_USER_PIN}"

identity_cert = "file://${CERTIFICATE_DIR}/${CERTIFICATE_NAME}"

[aziot_keys]
pkcs11_lib_path = "${PKCS11_LIB}"
pkcs11_base_slot = "pkcs11:slot-id=${PKCS11_SLOT}?pin-value=${PKCS11_USER_PIN}"
EOL
- Make the directory if doesn't exist and change ownership to aziotcs and set permissions
 mkdir ${CERTIFICATE_DIR} -p
 chown aziotcs:aziotcs ${CERTIFICATE_DIR}
 chmod 755 ${CERTIFICATE_DIR}
- Configure PKCS11
 pkcs11-tool --module ${PKCS11_LIB} --init-token --slot ${PKCS11_SLOT} --label ${PKCS11_TOKEN_LABEL} --so-pin ${PKCS11_SO_PIN}
 pkcs11-tool --module ${PKCS11_LIB} --label ${PKCS11_TOKEN_LABEL} --slot ${PKCS11_SLOT} --login --so-pin ${PKCS11_SO_PIN} --init-pin --pin ${PKCS11_USER_PIN}
- Generate key pair
pkcs11-tool --module ${PKCS11_LIB} -l --slot ${PKCS11_SLOT} --pin ${PKCS11_USER_PIN} --keypairgen --key-type rsa:2048 --label ${PKCS11_KEY_LABEL} --id ${PKCS11_KEY_ID} --usage-decrypt --usage-sign
- Set token user pin that will be used by OpenSSL configuration file:
echo ${PKCS11_USER_PIN} > /etc/pki/pin.txt
- Generate certificate
OPENSSL_CONF=${OPENSSL_CONF_FILE} openssl req -new -x509 -days 3652 -sha256 -key "pkcs11:type=private;object=${PKCS11_KEY_LABEL};token=${PKCS11_TOKEN_LABEL}" -subj "/CN=${CERTIFICATE_CN}" -out ${CERTIFICATE_DIR}/${CERTIFICATE_NAME}
- Give aziotcs ownership to certificate and set read and write permission for aziotcs, read-only for others
 chown aziotcs:aziotcs ${CERTIFICATE_DIR}/${CERTIFICATE_NAME}
 chmod 644 ${CERTIFICATE_DIR}/${CERTIFICATE_NAME}
- Compute certificate fingerprint
openssl x509 -noout -fingerprint -sha1 -inform pem -in ${CERTIFICATE_DIR}/${CERTIFICATE_NAME} | sed 's/://g' | sed 's/.*=//'
Register the certificate fingerprint generated by the last command on Microsoft Azure IoT Hub and associate it to your device.
Apply the configuration:
iotedge config apply
5.3. Configuration without DPS and authentication via x509 certificate and private key stored in TPM[edit source]
Follow the instructions of previous section (OP-TEE configuration) but simply change the following variables:
 export PKCS11_LIB="/usr/lib/pkcs11/libtpm2_pkcs11.so"
 export OPENSSL_CONF_FILE="/etc/pki/openssl-pkcs11-provider-tpm2.cnf"
5.4. Troubleshooting[edit source]
5.4.1. Sanity check[edit source]
You can check your configuration by running the following command:
iotedge check
If your board has never been connected, it is a normal to have 2 errors on EdgeAgent end EdgeHub because they do not have been deployed yet.
5.4.2. Logging[edit source]
You can see the IoTEdge logs by running the following command:
iotedge system logs -- -f
5.4.3. TPM Azure Service issue[edit source]
If your are not using a TPM for authentication, you might see TPM issues in logs that prevent from connection. You can disable the service if you do not need it:
 systemctl stop aziot-tpmd
 systemctl disable aziot-tpmd
6. How to run the Simulated Sensor Module[edit source]
6.1. On Azure IoT Central[edit source]
- Create a new edge manifest from the following json file:
{
    "modulesContent": {
        "$edgeAgent": {
            "properties.desired": {
                "schemaVersion": "1.0",
                "runtime": {
                    "type": "docker",
                    "settings": {
                        "minDockerVersion": "v1.25",
                        "loggingOptions": "",
                        "registryCredentials": {}
                    }
                },
                "systemModules": {
                    "edgeAgent": {
                        "type": "docker",
                        "settings": {
                            "image": "mcr.microsoft.com/azureiotedge-agent:1.0.9",
                            "createOptions": "{}"
                        }
                    },
                    "edgeHub": {
                        "type": "docker",
                        "status": "running",
                        "restartPolicy": "always",
                        "settings": {
                            "image": "mcr.microsoft.com/azureiotedge-hub:1.0.9",
                            "createOptions": "{}"
                        }
                    }
                },
                "modules": {
                    "SimulatedTemperatureSensor": {
                        "version": "1.0",
                        "type": "docker",
                        "status": "running",
                        "restartPolicy": "always",
                        "settings": {
                            "image": "mcr.microsoft.com/azureiotedge-simulated-temperature-sensor:1.0",
                            "createOptions": "{}"
                        }
                    }
                }
            }
        },
        "$edgeHub": {
            "properties.desired": {
                "schemaVersion": "1.0",
                "routes": {
                    "route": "FROM /* INTO $upstream"
                },
                "storeAndForwardConfiguration": {
                    "timeToLiveSecs": 7200
                }
            }
        },
        "SimulatedTemperatureSensor": {
            "properties.desired": {
                "SendData": true,
                "SendInterval": 10
            }
        }
    }
}
- Assign the manifest to your device
- After few minutes (~10 minutes), your device should have the following modules installed:
- edgeAgent
- edgeHub
- SimulatedTemperatureSensor
- You also should see messages sent by the module on device raw data section.
More information about IoT Edge on IoT Central can be found here.
6.2. On Azure IoT Hub[edit source]
From device configuration view:
- Click on "Set Modules"
- Choose "Marketplace Module" from the "Add" button.
- On "Simulated Temperature Sensor", click on "Simulated Temperature Sensor" from "Select" button.
- Click on" Review + Create", then click on "Create"
- After few minutes (~10 minutes), your device should have the following modules installed:
- edgeAgent
- edgeHub
- SimulatedTemperatureSensor
- From a console logged to azure or on cloud shell, run the following command to see the simulated messages:
az iot hub monitor-events --device-id YOUR_DEVICE_ID --hub-name YOUR_HUB_NAME
Arm® is a registered trademark of Arm Limited (or its subsidiaries) in the US and/or elsewhere. ![]()