This article provides information about how to use the STM32 sniffer for Bluetooth® Low Energy with Wireshark. For this tutorial, we presume that you have already installed the sniffer, but if this is not the case, you can follow this guide.
1. Starting the capture
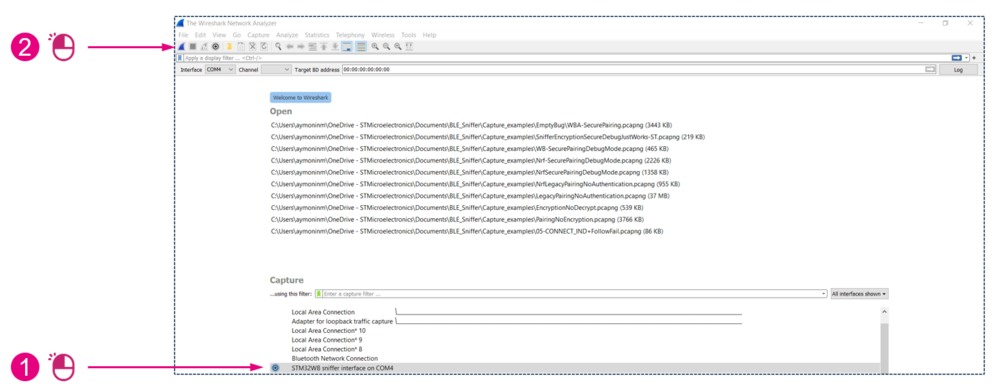
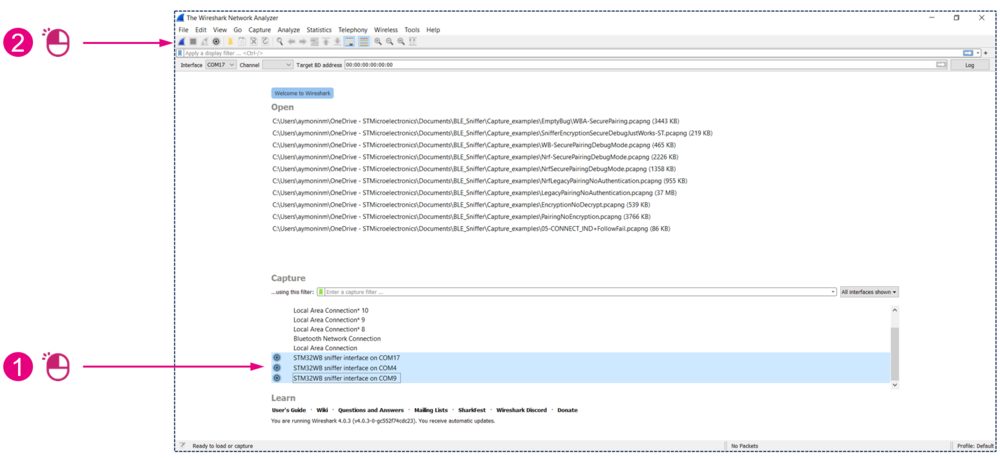
Plug in your sniffer board and open Wireshark.
1.1. Optional configuration
- In Wireshark, click on the wheel on the left side of the STM32 sniffer interface to open the interface configuration menu.
- The channel index parameter is the channel on which the sniffer will listen when started. It can be changed on the fly later on. The default channel index is 39.
- This is the channel index, not the frequency index (the primary advertising channel indexes are 37, 38, and 39).
| Channel index |
|---|
1.2. Launching the capture
To start the capture:
or
| Starting the capture |
|---|
1.3. Sniffer started
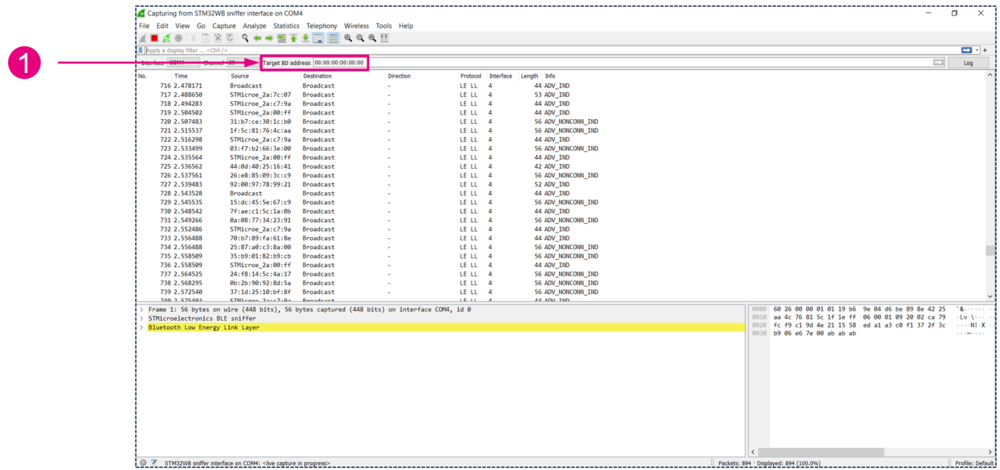
You should now see the advertising packets on the channel you configured.
| Target BD address |
|---|
2. Following a connection
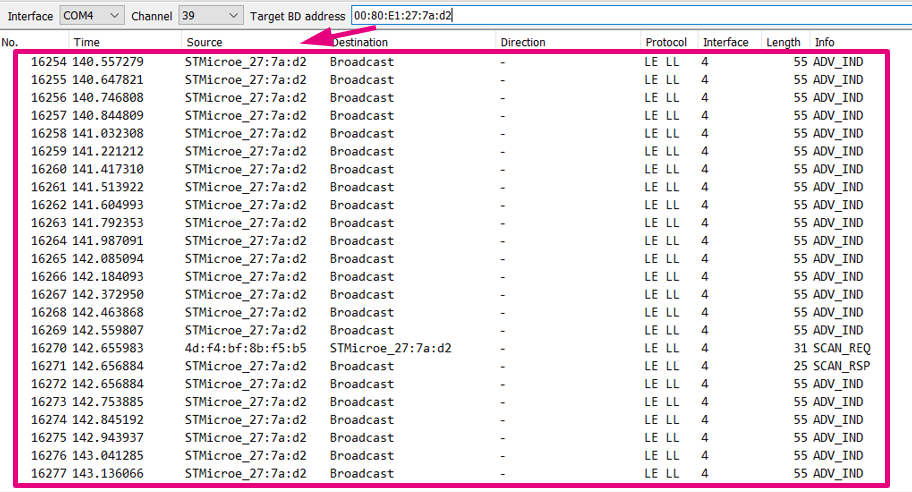
When the sniffer is running, it reports advertising and scan requests of all devices. You can then set the BD address of the target device that you want to follow when a connection to it occurs.
| Setting a target to follow |
|---|
Now you should only see:
- Advertising and scan response packets from the target.
- Scan requests to the target.
- Connection packets from and to the target.
| Target set |
|---|
If after setting the target there are no more incoming packets, either:
- There is no device with this BD address advertising on this channel.
- The sniffer has not received the command; set the target again. (You will need to make a change to be able to apply changes; just delete the last number and re-enter it.)
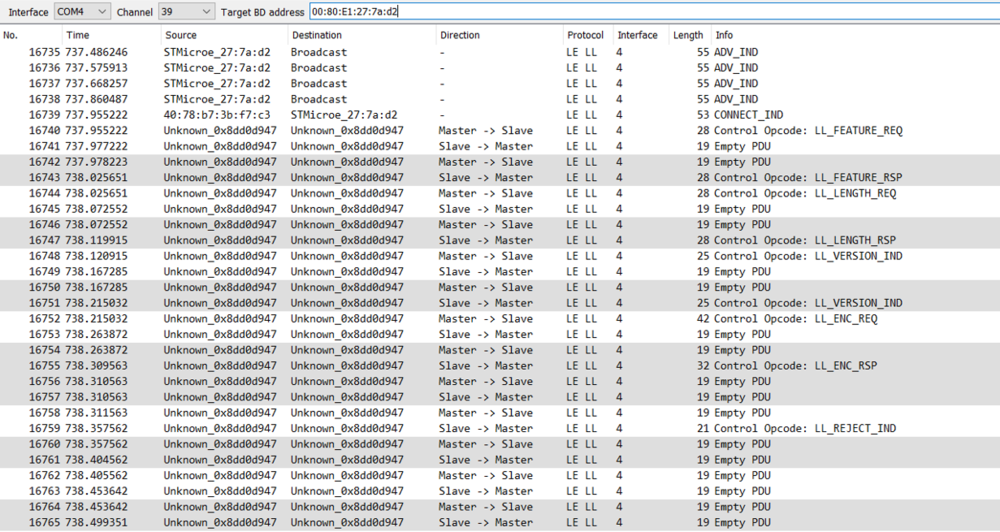
Now if a device connects to your target and the sniffer intercepts the CONNECT_IND packet, you will start to see the communications between the two devices.
| Connection intercepted |
|---|
The screen as shown above contains some additional data, where:
- The direction column indicates the direction of the packets.
- The color of the lines alternates with each connection event.
If the connection is terminated or if the sniffer loses it, it will return to the advertising channel you configured before.
3. Multiple interfaces capture
Because the sniffer can listen to only one channel at a time, capturing from multiple hardware interfaces can be very useful. You can capture traffic and pick up connect requests on all channels. You can also follow multiple links.
To capture with multiple sniffers, plug in your boards and:
| Start capturing from multiple interfaces |
|---|
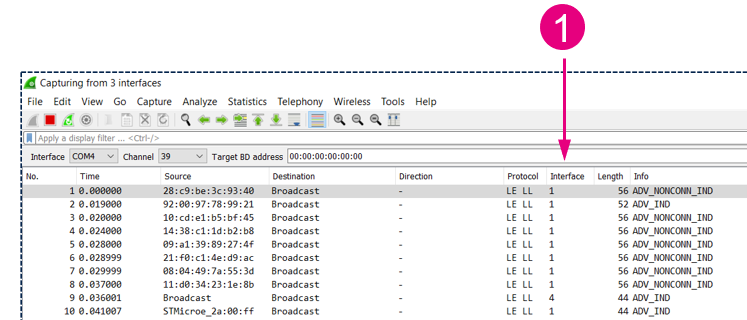
During the capture, you can identify on which sniffer the packets have been captured:
| Capture example from multiples interfaces |
|---|
To control each sniffer:
| Controlling multiples interfaces |
|---|
If you want each sniffer to be able to intercept a different channel, set a different target BD address for each sniffer.
4. Key input
For links that will be encrypted without debug mode or legacy pairing "just work" mode, the sniffer needs additional data to decrypt the traffic.
On the right side of the toolbar, there is a key type selector with an associated value field. This input gives you the possibility to provide additional data that the sniffer can't know just by listening to over-the-air communications.
You can enter the following data:
- Legacy PassKey: the key must be 128 bits wide and zero-padded. For example, if the passkey were 401190 (decimal) -> 0x61F26 (hexadecimal), you will enter: 000000000000000000000000000061F6.
- Legacy OOB data: the key must be 128 bits wide and entered with the MSO on the leftmost byte.
- LTK: the key must be 128 bits wide and be entered with the MSO on the leftmost byte. The key will be used during a secure connection pairing if none of the devices are in debug mode.
You must enter the key:
- Before the pairing start for the legacy PassKey and OOB data.
- Before the LL encryption start for the LTK.
If you encounter any problems, read the Troubleshooting article.

