1. Overview[edit | edit source]
This stage explains how to modify, rebuild and reload an STM32MP2 Arm® Cortex®-M33 coprocessor firmware.
It proposes to customize the STM32MP2Cube Package application example "OpenAMP_TTY_Echo" using STM32CubeIDE.
2. Software prerequisites[edit | edit source]
- Boot from SD card with ecosystem release v5.1.0
 , using FlashLayout_sdcard_stm32mp257f-ev1-ca35tdcid-ostl-m33-examples-optee.tsv
 - STM32CubeIDE v1.16.0, installation explained in this article, if not already done in previous steps
- Install build environment
- 1-Install dependencies:
 sudo apt-get install -y git curl wget build-essential libssl-dev python3 \
           python3-pip cmake make libncurses5
- 2-Add CMake path into environment:
export PATH=<CMake path>/bin:$PATH
- 3-Verify cmake version:
cmake --version
- 4-Use cmake at least or newer than 3.22.1
- Install python libraries needed by OP-TEE signature python script
 pip install pyelftools
 pip install pycryptodomex
3. Disconnect the "minicom" console[edit | edit source]
- If "minicom" is already opened, disconnect it to use the STM32CubeIDE built-in serial console.
Ctrl + A then Q
4. Open STM32CubeIDE[edit | edit source]
- Start STM32CubeIDE
- Choose a workspace (default is fine)
- Notice information provided in the "Information Center page" and close it. (you can open it later on)

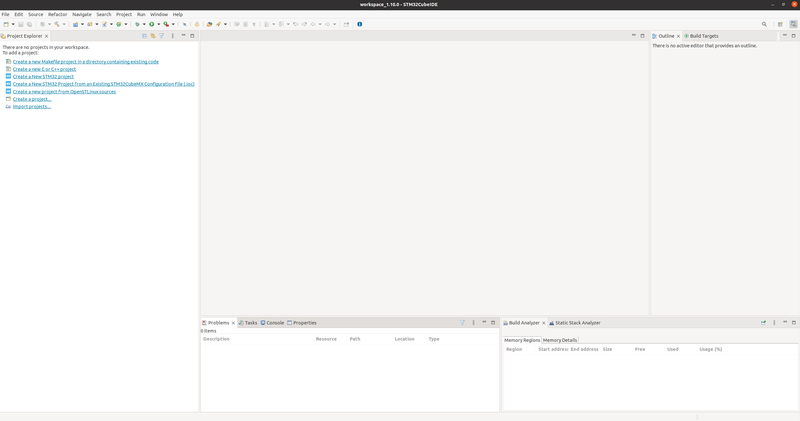
- Go into your workspace projet view
5. Import an existing example in STM32CubeIDE[edit | edit source]
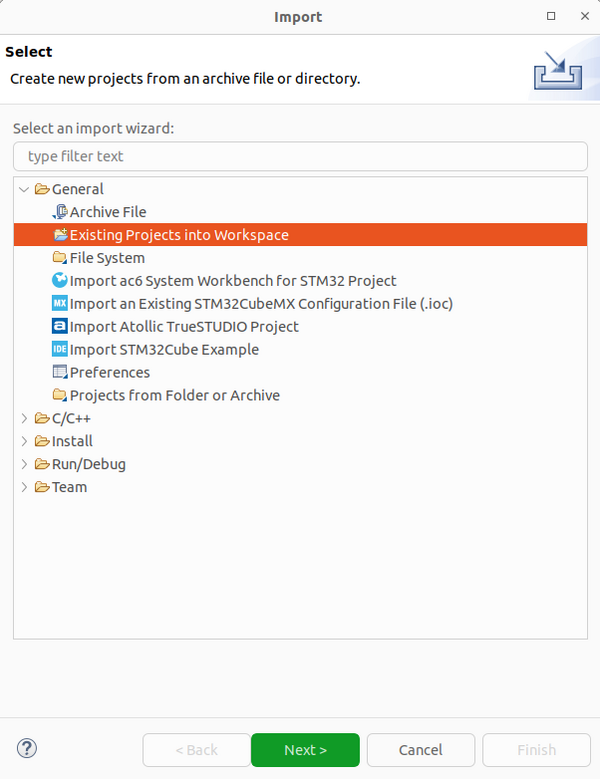
- Open the import screen File > Import... and select Existing Project into Workspace
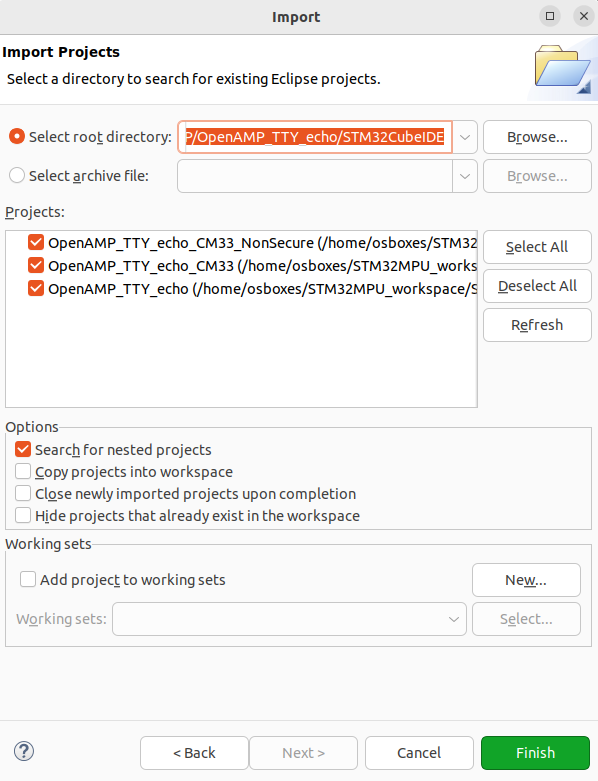
- Browse and select OpenAMP_TTY_echo application example in the folder matching your board :
$HOME//STM32MPU_workspace/STM32MPU-Ecosystem-v5.1.0/Developer-Package/STM32Cube_FW_MP2_V1.0.0/Projects/STM32MP257F-EV1/Applications/OpenAMP/OpenAMP_TTY_echo/STM32CubeIDE
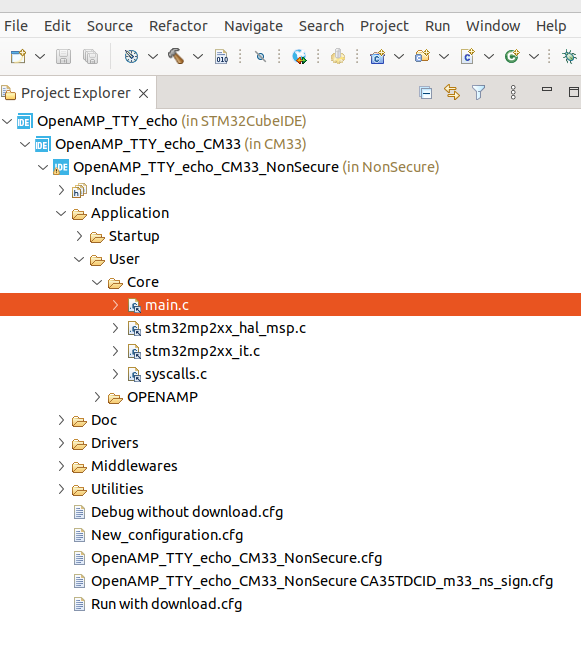
- STM32CubeIDE brings a specific project structure for dual core devices such as STM32MP2. A top level project contains sub-projects for each core.
- Here OpenAMP_TTY_echo top project contains OpenAMP_TTY_echo_CM33_NonSecure and OpenAMP_TTY_echo_CM33 sub projects. Keep the 3 projects selected and click on "Finish".
- The OpenAMP_TTY_echo project is opened and you can browse inside using the left pan.
6. Build the firmware[edit | edit source]
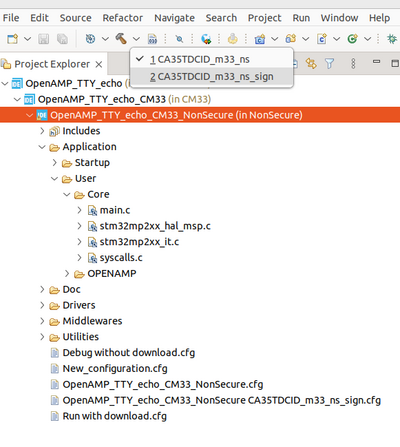
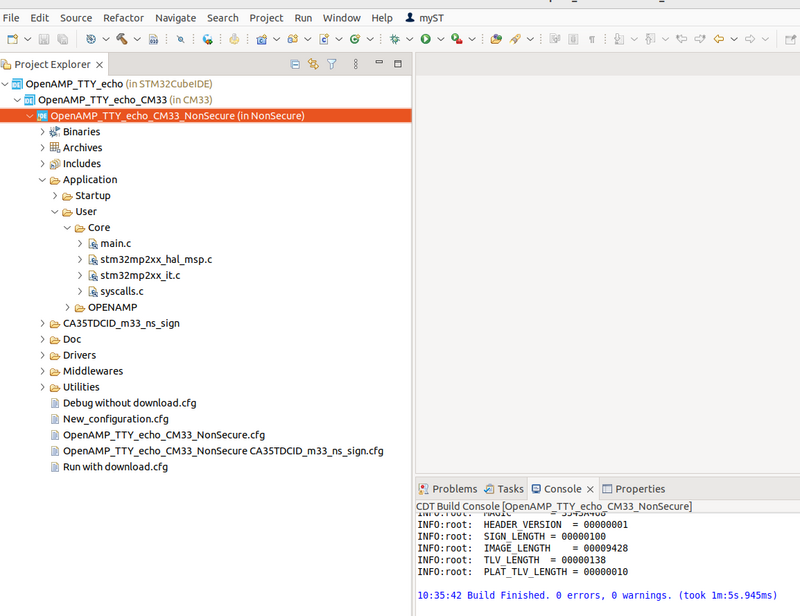
- Select project OpenAMP_TTY_Echo_CM33_NonSecure and choose CA35TDCID_m33_ns_sign build configuration (the little arrow on the right of the hammer in the toolbar), by default CA35TDCID_m33_ns is selected.
- "Build" is finished with no error
7. Check connection to the target[edit | edit source]
STM32CubeIDE requires to be connected to Linux® running on STM32MP2 device though serial connection.
This connection is automatically detected and configured when you have put cable on ST-Link port and board has booted.
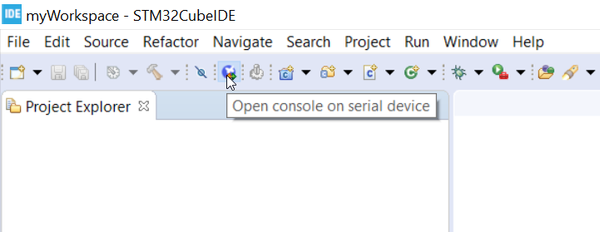
You can check you can get Linux® log and prompt by clicking on the "STM32 butterfly" button :
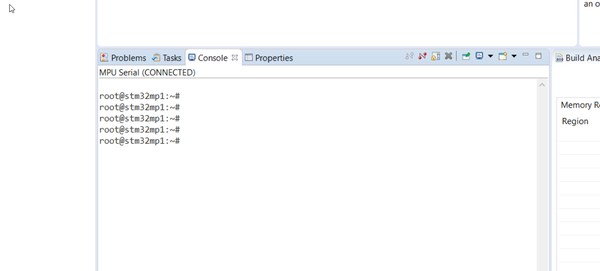
Connection is correct if Linux® log or prompt are displayed in the console windows.
Your board might be connected to the PC by Ethernet, either using RJ45 (point to point or VLAN) or USB0 EthernetOverUSB gadget (point to point connection with PC using TypeA-TypeC cable). Screenshot below uses the second solution.
When serial connection is established, STM32CubeIDE automatically detects the board IP address and displays sit in the "Serial Target widget status" window in bottom right part of the screen.
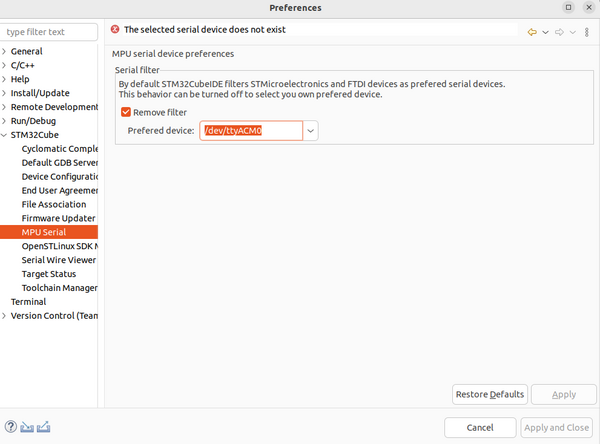
In case different status such as "busy" or "console in use", check you have no other terminal connected and close the console. And check the preferred device is /dev/ttyACM0 in the menu Window/Preferences then STM32Cube/MPU Serial:
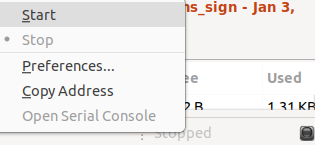
Furthermore, if the status is "Stopped", just right click over there and then click on "Start":
8. Start Debug Session[edit | edit source]
- Click on your OpenAMP_TTY_echo_CM33_NonSecure project to select it
- With the arrow right of the hammer sign, choose the project configuration with "_sign" in the name, then it is going to build it
- If not already created, you will need a run configuration (to load without debug) and a debug configuration (to debug without download).
- Run configuration: create it by doing a clicking on right click on "OpenAMP_TTY_echo_CM33_NonSecure and Select "Run As" and "STM32 C/C++ Application". It will open the "Embedded C/C++ Application" window.
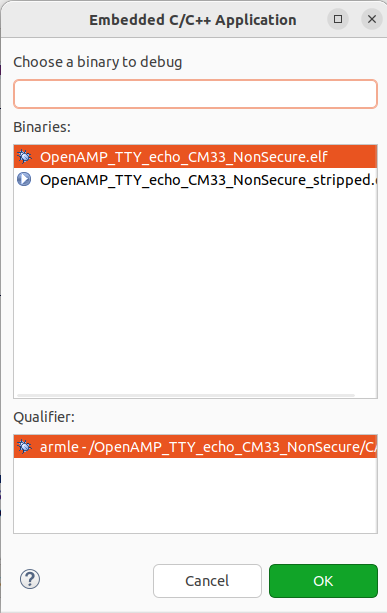
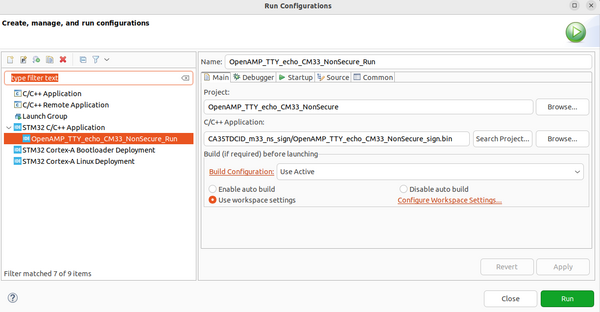
- Click the "OK" button". It will open the "Edit the Configuration" window. You may modify the name of the run configuration and must replace "CA35TDCID_m33_ns_sign/OpenAMP_TTY_echo_CM33_NonSecure.elf" with "CA35TDCID_m33_ns_sign/OpenAMP_TTY_echo_CM33_NonSecure_sign.bin" like it is done in the following picture and press the OK button.
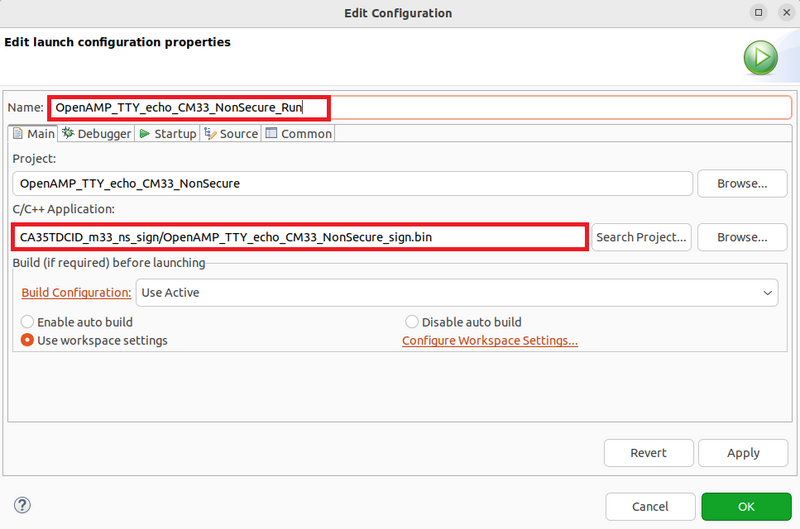
- The other tabs of the configuration should be fine by default. To check the IP, in the debugger tab you can check if the address is correctly filled.
- Make sure the "Thru Linux core (production mode)" is selected.
- When configuration is correct, click on OK.
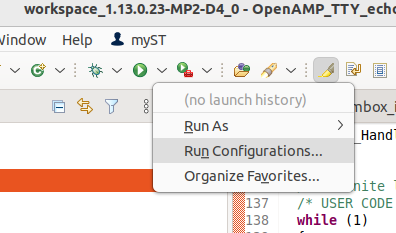
- To run the configuration, first click on the arrow right on the run button and then click on "Run Configurations..."
- When the Run Configurations window is open, select the user configuration and click on the Run button, the binary file is loaded (after this step, the user run configuration will appear in the menu of the run button).
- Now the FW is loaded, to debug it, a debug configuration is needed: create it by doing a right click on "OpenAMP_TTY_echo_CM33_NonSecure and Select "Debug As" and "STM32 C/C++ Application". It will open the "Embedded C/C++ Application" window.
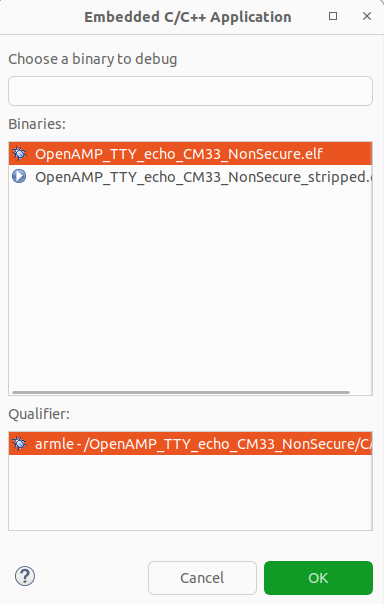
- Click the "OK" button. It will open the "Edit the Configuration" window. Click on the Startup tab and select the file. You may modify the name by adding "_Debug".
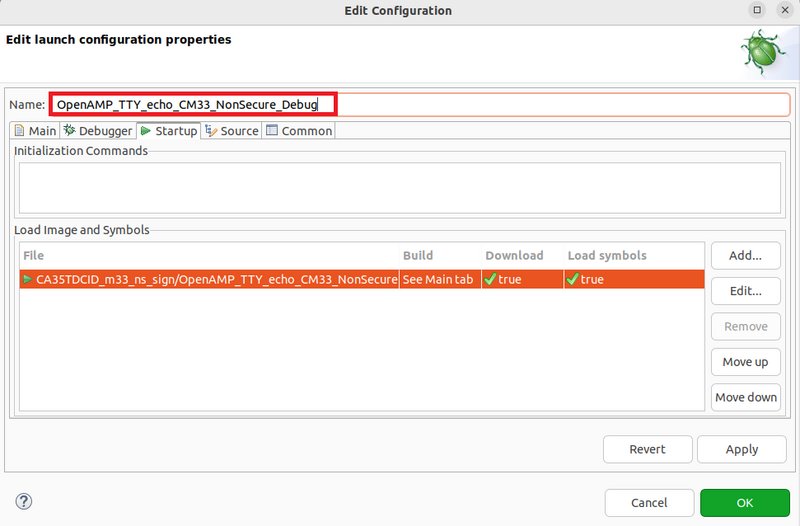
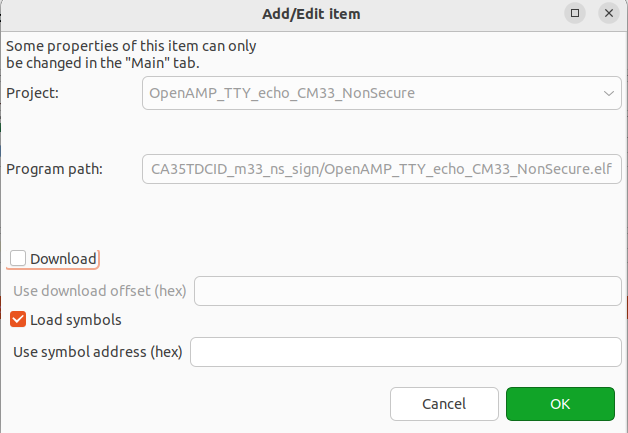
- And then click on the edit button, in the Add/Edit item, uncheck Download. And click OK.
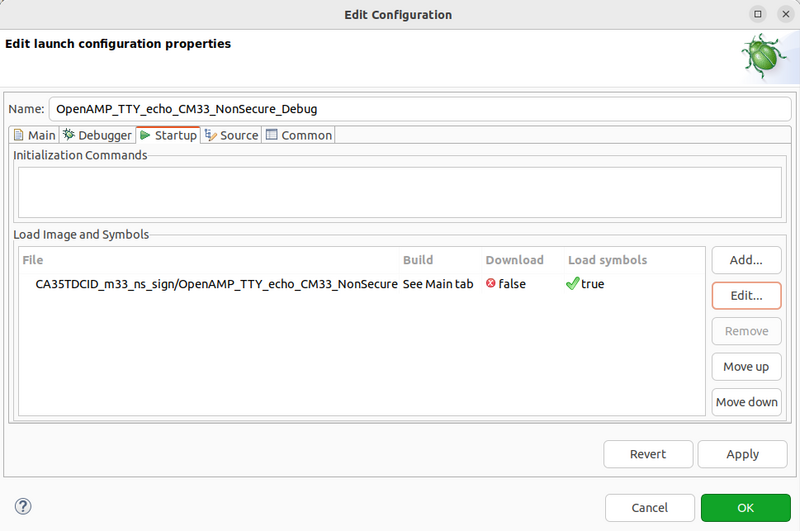
- Click OK in the Edit Configuration where there is a false for the download.
- The debug perspective is started (if not, proceed in the same way as the run configuration but with the debug button instead), and here press the suspend button and the FW will stop as it is shown here:
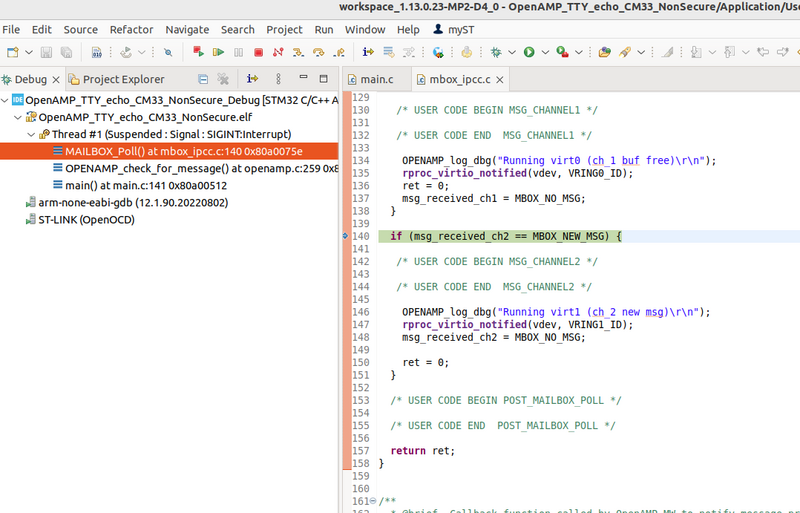
In "production mode", the firmware is not break at main. GDB is simply attached to the running target.
You can then use all features of the debugger.
For further information, refer to STM32CubeIDE documentation available in my.st.com
9. Test the firmware[edit | edit source]
The OpenAMP_TTY_echo_CM33 firmware do the following:
- CPU2(CM33) initializes OpenAMP middleware which initializes/configures IPCC peripheral through HAL and setup openamp-rpmsg framework infrastructure,
- CPU2(CM33) creates 2 rpmsg channels for 2 virtual UART instances (UART0 and UART1),
- CPU2(CM33) is waiting for messages from CPU1(CA35) on these both channels,
- When CPU2(CM33) receives a message on 1 Virtual UART instance/rpmsg channel, it sends the message back to CPU1(CA35) on the same Virtual UART instance.
Reopen the Serial console of STM32CubeIDE and enter following commands :
- Initialize the ttyRPMSG0 configuration
stty -onlcr -echo -F /dev/ttyRPMSG0
- Read constantly the ttyRPMSG0 channel in background
cat /dev/ttyRPMSG0 &
- Send a message on one ttyRPMSG0 channel and receive the echo on the same ttyRPMSG0 channel
 echo "Hello Virtual UART0" > /dev/ttyRPMSG0
Hello Virtual UART0
- You can perform the same steps with the ttyRPMSG1 channel
- Terminate the STM32CubeIDE debug session will stop the firmware.
10. Modify the firmware[edit | edit source]
The original firmware example receives a message for the host on one channel and acknowledge by returning the same message to the host on the same channel.
As this is not so obvious on which channel the message is received, we propose you to modify the firmware in order to add an indication to know what is the channel that is receiving the message.
For that, please modify main.c original code as follow:
  /* Infinite loop */
  /* USER CODE BEGIN WHILE */
  while (1)
  {

    OPENAMP_check_for_message();

    /* USER CODE END WHILE */
    if (VirtUart0RxMsg) {
      char msg_to_transmit[MAX_BUFFER_SIZE];
      int msg_size = 0;
      VirtUart0RxMsg = RESET;

      msg_size = snprintf(msg_to_transmit, MAX_BUFFER_SIZE, "Channel RPMSG0: ");
      msg_size += snprintf(msg_to_transmit + msg_size, MAX_BUFFER_SIZE, "%s\n", VirtUart0ChannelBuffRx);
      log_info("size of the message to transmit = %d bytes\n", msg_size);
      VIRT_UART_Transmit(&huart0, (uint8_t*)msg_to_transmit, msg_size);
    }

    if (VirtUart1RxMsg) {
      char msg_to_transmit[MAX_BUFFER_SIZE];
      uint16_t msg_size = 0;
      VirtUart1RxMsg = RESET;

      msg_size = snprintf(msg_to_transmit, MAX_BUFFER_SIZE, "Channel RPMSG1: ");
      msg_size += snprintf(msg_to_transmit + msg_size, MAX_BUFFER_SIZE, "%s\n", VirtUart1ChannelBuffRx);
      log_info("size of the message to transmit = %d bytes\n", msg_size);
      VIRT_UART_Transmit(&huart1, (uint8_t*)msg_to_transmit, msg_size);
    }
    /* USER CODE BEGIN 3 */
  }
  /* USER CODE END 3 */
- Save your modifications.
- Then open the properties of the project by right click on it then properties.
Go into C/C++ Build -> Settings -> MCU GCC Compiler -> Preprocessor
Add a new symbol __LOG_TRACE_IO_
This symbol will enable the log_info macro.
11. Testing the modified firmware[edit | edit source]
11.1. Relaunch debug session[edit | edit source]
- By clicking on the "Run" button, as explains in the Start Debug Session chapter, to download the firmware and then by clicking on the "Debug" button, the STM32CubeIDE relaunches the debug session after performing an incremental build to take into account your modification .
- If everything is correct, you will be back switch to "Debug Perspective" windows after reload of the new firmware.
11.2. Test[edit | edit source]
- Initialize the ttyRPMSG0 and ttyRPMSG1 configurations
 stty -onlcr -echo -F /dev/ttyRPMSG0
 stty -onlcr -echo -F /dev/ttyRPMSG1
- Read constantly the ttyRPMSG0 and ttyRPMSG1 channels in background
 cat /dev/ttyRPMSG0 &
 cat /dev/ttyRPMSG1 &
- Send a message on one ttyRPMSG0 channel and check the echo log
 echo "Hello Virtual UART0" > /dev/ttyRPMSG0
Channel RPMSG0: Hello Virtual UART0
- Send a message on one ttyRPMSG1 channel and check the echo log
 echo "Hello Virtual UART1" > /dev/ttyRPMSG1
Channel RPMSG1: Hello Virtual UART1
- Terminate the STM32CubeIDE debug session.
12. To go further[edit | edit source]
If you want to build and debug a secure project, refer to How_to_build_and_debug_secure_project_on_STM32MP25_co-processor_in_STM32CubeIDE
