This message will disappear after all relevant tasks have been resolved.
Semantic MediaWiki
There are 1 incomplete or pending task to finish installation of Semantic MediaWiki. An administrator or user with sufficient rights can complete it. This should be done before adding new data to avoid inconsistencies.Registered User mNo edit summary |
Registered User mNo edit summary |
||
| (37 intermediate revisions by 5 users not shown) | |||
| Line 3: | Line 3: | ||
[[File: Ubuntu_terminal.png|frame|center|link=|Ubuntu terminal]] | [[File: Ubuntu_terminal.png|frame|center|link=|Ubuntu terminal]] | ||
All the commands preceded by {{PC$}} have to be executed from the host computer terminal. | All the commands preceded by {{PC$}} have to be executed from the host computer terminal. | ||
* Create your STM32MPU workspace directory on | * Create your STM32MPU workspace directory on the host computer: | ||
{{PC$}} mkdir $HOME/STM32MPU_workspace | {{PC$}} mkdir $HOME/STM32MPU_workspace | ||
{{PC$}} cd $HOME/STM32MPU_workspace | {{PC$}} cd $HOME/STM32MPU_workspace | ||
| Line 10: | Line 10: | ||
* An Internet access through http and https protocols must be provided. | * An Internet access through http and https protocols must be provided. | ||
The command below | The command below enables checking for Internet access through http/https protocols: | ||
{{PC$}} wget -q www.google.com && echo "Internet access over HTTP/HTTPS is OK !" || echo "No internet access over HTTP/HTTPS ! You may need to set up a proxy." | {{PC$}} wget -q www.google.com && echo "Internet access over HTTP/HTTPS is OK !" || echo "No internet access over HTTP/HTTPS ! You may need to set up a proxy." | ||
If an 'OK' message is returned, the network is | If an 'OK' message is returned, the network is correctly configured.<br> | ||
In | In this case, skip the rest of this section.<br> | ||
<br> | <br> | ||
Otherwise, a proxy for http/https protocols is required.<br> | |||
The best solution to set | The best solution is to set this proxy through the shell variables http_proxy and https_proxy: | ||
{{PC$}} export http_proxy=http://''<MyProxyLogin>'':''<MyProxyPassword>''@''<MyProxyServerUrl>'':''<MyProxyPort>'' | {{PC$}} export http_proxy=http://''<MyProxyLogin>'':''<MyProxyPassword>''@''<MyProxyServerUrl>'':''<MyProxyPort>'' | ||
{{PC$}} export https_proxy=http://''<MyProxyLogin>'':''<MyProxyPassword>''@''<MyProxyServerUrl>'':''<MyProxyPort>'' | {{PC$}} export https_proxy=http://''<MyProxyLogin>'':''<MyProxyPassword>''@''<MyProxyServerUrl>'':''<MyProxyPort>'' | ||
Check again the Internet access | Check again the Internet access using the command: | ||
{{PC$}} wget -q www.google.com && echo "Internet access over HTTP/HTTPS is OK !" || echo "No internet access over HTTP/HTTPS ! You may need to set up a proxy." | {{PC$}} wget -q www.google.com && echo "Internet access over HTTP/HTTPS is OK !" || echo "No internet access over HTTP/HTTPS ! You may need to set up a proxy." | ||
| Line 27: | Line 27: | ||
===STM32CubeProgrammer=== | ===STM32CubeProgrammer=== | ||
* Create your STM32MPU tools directory on | * Create your STM32MPU tools directory on the host computer: | ||
{{PC$}} mkdir $HOME/STM32MPU_workspace/STM32MPU-Tools | {{PC$}} mkdir $HOME/STM32MPU_workspace/STM32MPU-Tools | ||
{{PC$}} mkdir $HOME/STM32MPU_workspace/STM32MPU-Tools/STM32CubeProgrammer-x.y.z | {{PC$}} mkdir $HOME/STM32MPU_workspace/STM32MPU-Tools/STM32CubeProgrammer-x.y.z | ||
* Create a temporary directory in your STM32MPU workspace | * Create a temporary directory in your STM32MPU workspace: | ||
{{PC$}} mkdir $HOME/STM32MPU_workspace/tmp | {{PC$}} mkdir $HOME/STM32MPU_workspace/tmp | ||
* Download | * Download [https://www.st.com/en/development-tools/stm32cubeprog.html#getsoftware-scroll STM32CubeProgrammer] in the following directory : '''$HOME/STM32MPU_workspace/tmp''' <br> [[STM32CubeProgrammer release note|STM32CubeProgrammer v2.12.0]] is recommended for {{EcosystemRelease | revision=4.1.0| range= }} . | ||
* Uncompress the archive file to get the STM32CubeProgrammer installers: | |||
* Uncompress the archive file to get the STM32CubeProgrammer installers | |||
{{PC$}} cd $HOME/STM32MPU_workspace/tmp | {{PC$}} cd $HOME/STM32MPU_workspace/tmp | ||
{{PC$}} unzip SetupSTM32CubeProgrammer.zip | {{PC$}} unzip SetupSTM32CubeProgrammer.zip | ||
* Execute the Linux<sup>®</sup> installer, which guides you through the installation process. Select "$HOME/STM32MPU-Tools/STM32CubeProgrammer-x.y.z" as | * Execute the Linux<sup>®</sup> installer, which guides you through the installation process. Select "$HOME/STM32MPU-Tools/STM32CubeProgrammer-x.y.z" as installation directory when it is requested by the installer. | ||
{{PC$}} ./SetupSTM32CubeProgrammer-x.y.z.linux | {{PC$}} ./SetupSTM32CubeProgrammer-x.y.z.linux | ||
The screenshots below have been obtained with old {{Highlight|STM32CubeProgrammer V2.7.0}}. They are provided {{Highlight| as examples}} and are still valid for higher versions : | |||
[[File: STM32CubeProgrammer_installation_splashscreen.png|frame|center|link=|Splash screen]] | [[File: STM32CubeProgrammer_installation_splashscreen.png|frame|center|link=|Splash screen]] | ||
[[File: STM32CubeProgrammer_installation_welcome_27.png|frame|center|link=|Welcome page]] | [[File: STM32CubeProgrammer_installation_welcome_27.png|frame|center|link=|Welcome page]] | ||
[[File: STM32CubeProgrammer_installation_path_25.png|frame|center|link=|Installation path]] | [[File: STM32CubeProgrammer_installation_path_25.png|frame|center|link=|Installation path]] | ||
* Add the STM32CubeProgrammer binary path to your PATH environment variable | * Add the STM32CubeProgrammer binary path to your PATH environment variable: | ||
export PATH=$HOME/STM32MPU_workspace/STM32MPU-Tools/STM32CubeProgrammer-x.y.z/bin:$PATH | export PATH=$HOME/STM32MPU_workspace/STM32MPU-Tools/STM32CubeProgrammer-x.y.z/bin:$PATH | ||
* Check that the STM32CubeProgrammer tool is properly installed and accessible | |||
* Check that the STM32CubeProgrammer tool is properly installed and accessible: | |||
{{PC$}} STM32_Programmer_CLI --h | {{PC$}} STM32_Programmer_CLI --h | ||
------------------------------------------------------------------- | ------------------------------------------------------------------- | ||
| Line 55: | Line 54: | ||
===USB serial link=== | ===USB serial link=== | ||
* Install the libusb on your host computer | * Install the libusb on your host computer: | ||
{{PC$}} sudo apt-get install libusb-1.0-0 | {{PC$}} sudo apt-get install libusb-1.0-0 | ||
* To allow STM32CubeProgrammer to access the USB port through low-level commands, proceed as follows | * To allow STM32CubeProgrammer to access the USB port through low-level commands, proceed as follows: | ||
{{PC$}} cd $HOME/STM32MPU_workspace/STM32MPU-Tools/STM32CubeProgrammer-x.y.z/Drivers/rules | {{PC$}} cd $HOME/STM32MPU_workspace/STM32MPU-Tools/STM32CubeProgrammer-x.y.z/Drivers/rules | ||
{{PC$}} sudo cp *.* /etc/udev/rules.d/ | {{PC$}} sudo cp *.* /etc/udev/rules.d/ | ||
| Line 63: | Line 62: | ||
==Download the image== | ==Download the image== | ||
{{ | * Create your STM32MP1 Starter Package directory on the host computer: | ||
{{PC$}} mkdir $HOME/STM32MPU_workspace/STM32MP1-Ecosystem-v4.1.0 | |||
{{ | {{PC$}} mkdir $HOME/STM32MPU_workspace/STM32MP1-Ecosystem-v4.1.0/Starter-Package | ||
{{PC$}} cd $HOME/STM32MPU_workspace/STM32MP1-Ecosystem-v4.1.0/Starter-Package | |||
* Download the [{{EcosystemRelease/Package | revision=4.1.0| package=Images package | request=url}}/{{EcosystemRelease/Package | revision=4.1.0| package=Images package | request=name}} STM32MP1-Ecosystem-v4.1.0 Starter Package] into the following directory:<br> '''$HOME/STM32MPU_workspace/STM32MP1-Ecosystem-v4.1.0/Starter-Package''' | |||
* Download the [{{EcosystemRelease/Package | revision= | |||
* Uncompress the tarball file to get the binaries for the different partitions of the image, and the Flash layout files | * Uncompress the tarball file to get the binaries for the different partitions of the image, and the Flash layout files | ||
{{PC$}} tar xvf {{EcosystemRelease/Package | revision= | {{PC$}} tar xvf {{EcosystemRelease/Package | revision=4.1.0| package=Images package | request=name}} | ||
<noinclude> | <noinclude> | ||
| Line 79: | Line 75: | ||
__NOTOC__ | __NOTOC__ | ||
[[Category:Sub-articles]] | [[Category:Sub-articles]] | ||
{{PublicationRequestId | | {{PublicationRequestId | 19647 | 2021-04-19}} | ||
</noinclude> | </noinclude> | ||
Latest revision as of 11:13, 22 November 2022
1. Open a terminal[edit source]
Open a terminal on the host computer.

Ubuntu terminal
All the commands preceded by PC $> have to be executed from the host computer terminal.
- Create your STM32MPU workspace directory on the host computer:
PC $> mkdir $HOME/STM32MPU_workspace
PC $> cd $HOME/STM32MPU_workspace
2. Check the host computer Internet access[edit source]
- An Internet access through http and https protocols must be provided.
The command below enables checking for Internet access through http/https protocols:
PC $> wget -q www.google.com && echo "Internet access over HTTP/HTTPS is OK !" || echo "No internet access over HTTP/HTTPS ! You may need to set up a proxy."
If an 'OK' message is returned, the network is correctly configured.
In this case, skip the rest of this section.
Otherwise, a proxy for http/https protocols is required.
The best solution is to set this proxy through the shell variables http_proxy and https_proxy:
PC $> export http_proxy=http://<MyProxyLogin>:<MyProxyPassword>@<MyProxyServerUrl>:<MyProxyPort>
PC $> export https_proxy=http://<MyProxyLogin>:<MyProxyPassword>@<MyProxyServerUrl>:<MyProxyPort>
Check again the Internet access using the command:
PC $> wget -q www.google.com && echo "Internet access over HTTP/HTTPS is OK !" || echo "No internet access over HTTP/HTTPS ! You may need to set up a proxy."
3. Install the tools[edit source]
3.1. STM32CubeProgrammer[edit source]
- Create your STM32MPU tools directory on the host computer:
PC $> mkdir $HOME/STM32MPU_workspace/STM32MPU-Tools
PC $> mkdir $HOME/STM32MPU_workspace/STM32MPU-Tools/STM32CubeProgrammer-x.y.z
- Create a temporary directory in your STM32MPU workspace:
PC $> mkdir $HOME/STM32MPU_workspace/tmp
- Download STM32CubeProgrammer in the following directory : $HOME/STM32MPU_workspace/tmp
STM32CubeProgrammer v2.12.0 is recommended for ecosystem release unknown revision 4.1.0 .
.
- Uncompress the archive file to get the STM32CubeProgrammer installers:
PC $> cd $HOME/STM32MPU_workspace/tmp
PC $> unzip SetupSTM32CubeProgrammer.zip
- Execute the Linux® installer, which guides you through the installation process. Select "$HOME/STM32MPU-Tools/STM32CubeProgrammer-x.y.z" as installation directory when it is requested by the installer.
PC $> ./SetupSTM32CubeProgrammer-x.y.z.linux
The screenshots below have been obtained with old STM32CubeProgrammer V2.7.0. They are provided as examples and are still valid for higher versions :
Splash screen
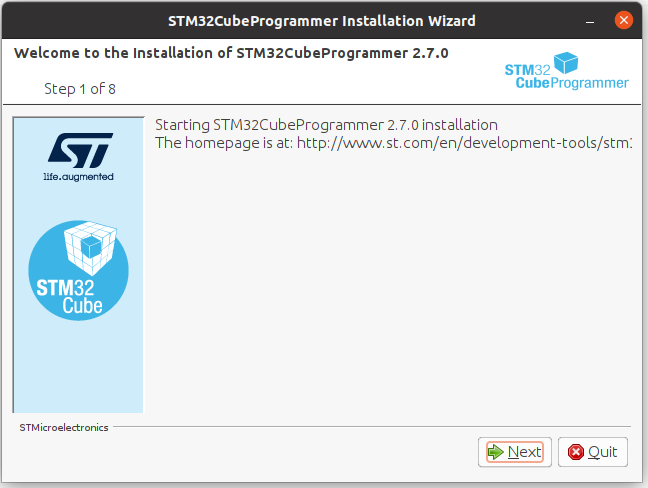
Welcome page
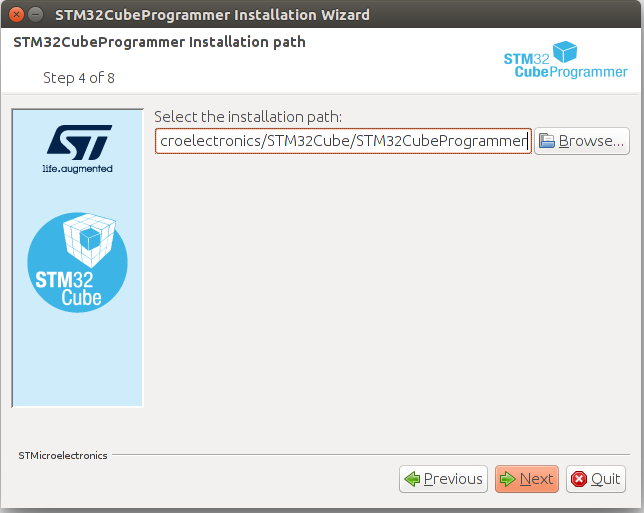
Installation path
- Add the STM32CubeProgrammer binary path to your PATH environment variable:
export PATH=$HOME/STM32MPU_workspace/STM32MPU-Tools/STM32CubeProgrammer-x.y.z/bin:$PATH
- Check that the STM32CubeProgrammer tool is properly installed and accessible:
PC $> STM32_Programmer_CLI --h
     -------------------------------------------------------------------
                       STM32CubeProgrammer vx.y.z
     -------------------------------------------------------------------
3.2. USB serial link[edit source]
- Install the libusb on your host computer:
PC $> sudo apt-get install libusb-1.0-0
- To allow STM32CubeProgrammer to access the USB port through low-level commands, proceed as follows:
PC $> cd $HOME/STM32MPU_workspace/STM32MPU-Tools/STM32CubeProgrammer-x.y.z/Drivers/rules
PC $> sudo cp *.* /etc/udev/rules.d/
4. Download the image[edit source]
- Create your STM32MP1 Starter Package directory on the host computer:
PC $> mkdir $HOME/STM32MPU_workspace/STM32MP1-Ecosystem-v4.1.0
PC $> mkdir $HOME/STM32MPU_workspace/STM32MP1-Ecosystem-v4.1.0/Starter-Package
PC $> cd $HOME/STM32MPU_workspace/STM32MP1-Ecosystem-v4.1.0/Starter-Package
- Download the [unknown revision/unknown revision STM32MP1-Ecosystem-v4.1.0 Starter Package] into the following directory:
$HOME/STM32MPU_workspace/STM32MP1-Ecosystem-v4.1.0/Starter-Package - Uncompress the tarball file to get the binaries for the different partitions of the image, and the Flash layout files
PC $> tar xvf unknown revision