1. Overview[edit source]
This stage explains how to modify, rebuild and reload a STM32MP1 Arm® Cortex®-M4 coprocessor firmware.
It proposes to customize the STM32MP1 Cube Package application example OpenAMP_TTY_Echo using STM32CubeIDE.
2. Disconnect the minicom console[edit source]
- If minicom is already opened, please disconnect it to use the STM32CubeIDE built in serial console.
Ctrl + A then Q
3. Open STM32CubeIDE[edit source]
- Start STM32CubeIDE
- Choose a workspace ( default is fine)
- Notice information provided in the Information Center page and close it. ( you can open it later on)

- You come into your workspace projet view

4. Import an existing example in STM32CubeIDE[edit source]
- Open the import screen File > Import... and select Existing Project into Workspace
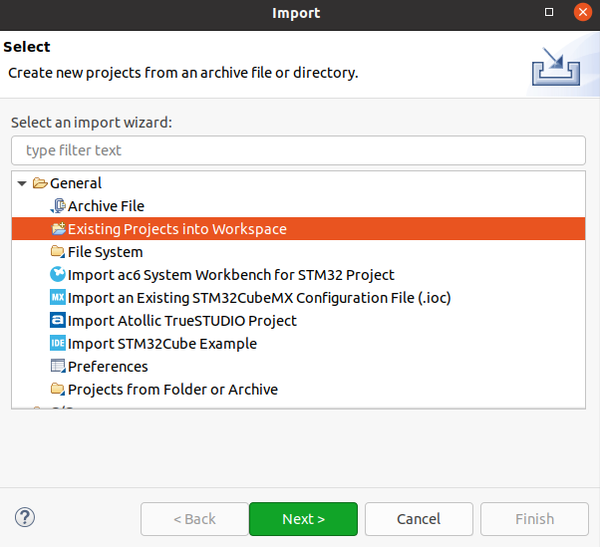
- Browse and select OpenAMP_TTY_echo application example :
$HOME/STM32MPU_workspace/STM32MP15-Ecosystem-v1.2.0/Developer-Package/STM32Cube_FW_MP1_V1.2.0/Projects/{{{board_type}}}/Applications/OpenAMP/OpenAMP_TTY_echo/STM32CubeIDE /* For ecosystem release v1.2.0 */$HOME/STM32MPU_workspace/STM32MP15-Ecosystem-v1.1.0/Developer-Package/STM32Cube_FW_MP1_V1.1.0/Projects/{{{board_type}}}/Applications/OpenAMP/OpenAMP_TTY_echo/SW4STM32 /* For ecosystem release v1.1.0 */ $HOME/STM32MPU_workspace/STM32MP15-Ecosystem-v1.0.0/Developer-Package/STM32Cube_FW_MP1_V1.0.0/Projects/{{{board_type}}}/Applications/OpenAMP/OpenAMP_TTY_echo/SW4STM32 /* For ecosystem release v1.0.0 */
- STM32CubeIDE brings a new project structure for dual core chip such as STM32MP1. A top level project contain sub-projects for each core.
- Here OpenAMP_TTY_echo top project contains OpenAMP_TTY_echo_CM4 sub project. Keep the 2 projects selected and click on "finish".
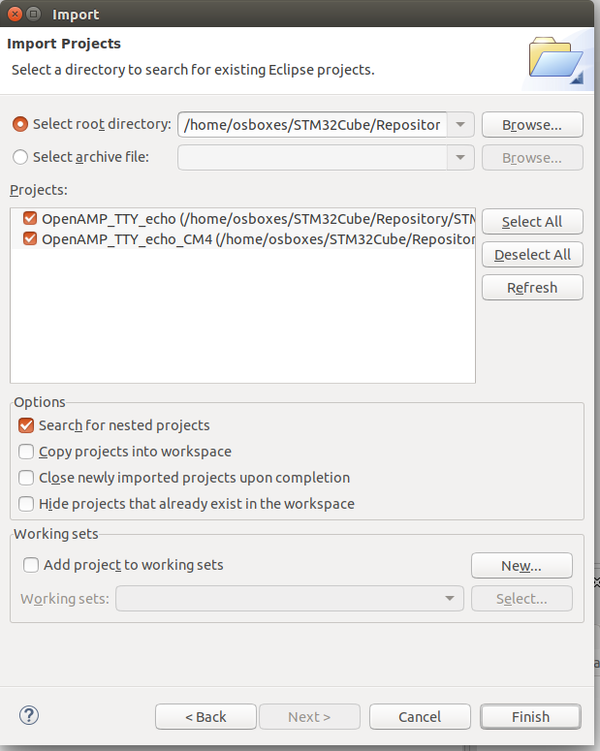
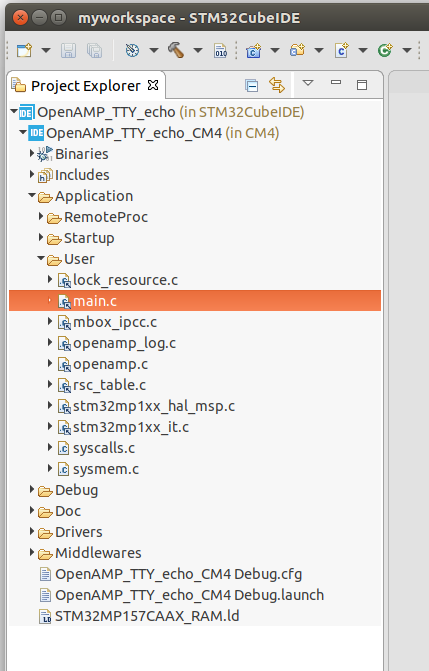
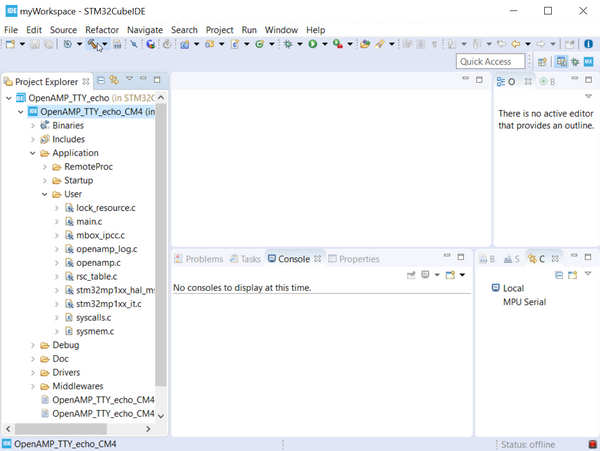
- The OpenAMP_TTY_echo project is open and you can browse inside using the left pan
5. Build the firmware[edit source]
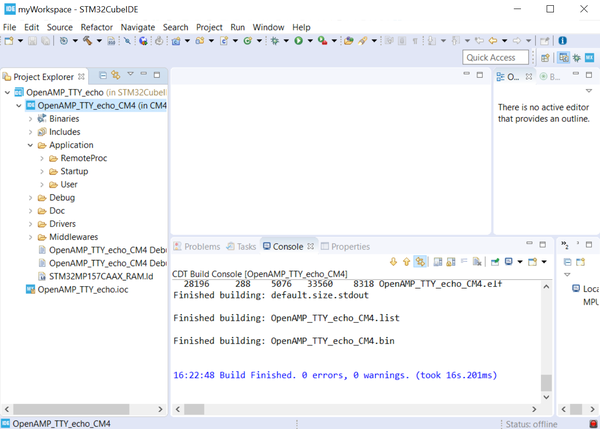
- Select project OpenAMP_TTY_Echo_CM4 and click the build button (the little hammer in the toolbar)
- Build is finished with no error
6. Check connection to the target[edit source]
STM32CubeIDE require to be connected to Linux running on MP1 though serial connection This connection is automatically detected and configured since you have put cable on ST-Link port and board has booted.
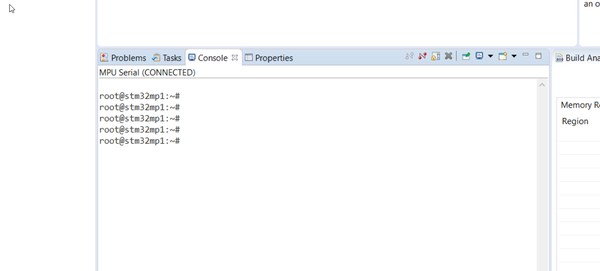
You can check you can get linux log and prompt by clicking on the STM32 butterfly button :
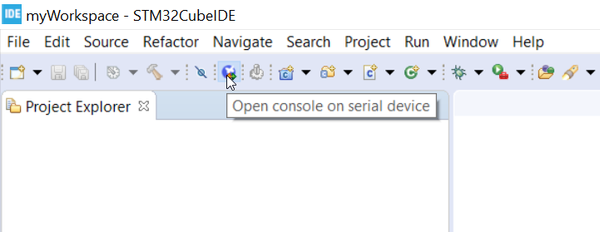
Connection is ok if Linux log or prompt are displayed in the console windows.
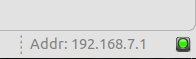
Your board might be connected to the PC by ethernet, either using RJ45 (point to point or VLAN) or USB0 EthernetOverUSB gadget ( point to point connection with PC with TypeA-TypeC cable). Screenshot below use the second solution. Since serial connection is established, STM32CubeIDE will automatically detect the board Inet address and display it in the Serial Target widget status window in bottom right part of the screen.
In case different status such as "busy" or "console in use", check you have no other terminal connected and close the console.
7. Start Debug Session[edit source]
- Select your OpenAMP_TTY_echo_CM4 project
- Right click on Debug As > Debug configurations... to open the Debug Configurations panel
- If not already created, create your debug configuration by double clicking on STM32 Cortex-M C/C++ Application and open "Debugger" pane.
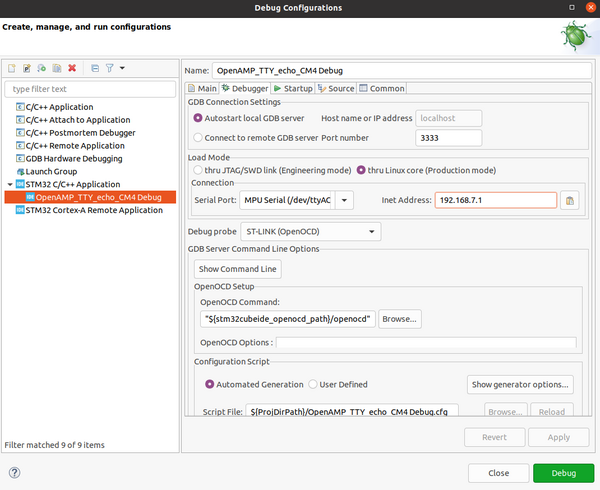
- Check IP addess is correctly filled (1). Else you can force detection using button on the right (2).
- Make sure the "Thru Linux core (production mode)" is selected (3)
- When configuration is ok, the "Debug" button (5) turn to active and you can launch the debug session. Else error message appears in area (4).
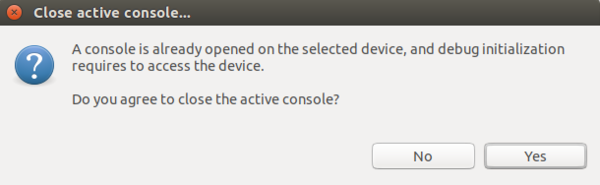
STM32CubeIDE need to use serial connexion to the board to manage firmware download. In case the console is opened it will request your approval to close it. Answer yes.
The debug in production mode' adds the cortex-M firmware transfer to the embedded Linux. This means also in case of network usage some specific pop-up appearing:
- the SSH Password is to complete: the default one is root.
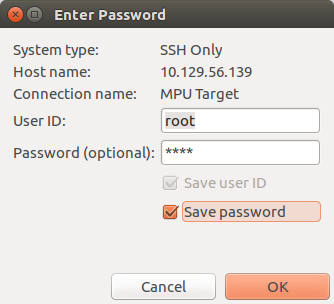
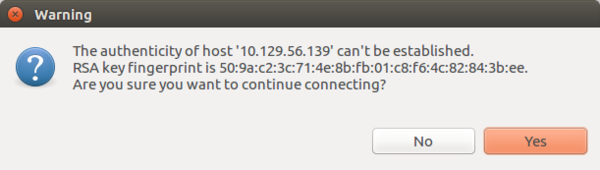
- the RSA key is to be approved.
After, download of the firmware STM32CubeIDE will switch into Debug Perspective. In production mode the firmware is not stopped at main. GDB is simply attached to the running target. You can then use all features of the debugger.
For further information refer to STM32CubeIDE documentation.
8. Test the firmware[edit source]
The OpenAMP_TTY_echo_CM firmware do the following:
- CPU2(CM4) initialize OpenAMP MW which initializes/configures IPCC peripheral through HAL and setup openamp-rpmsg framework infrastructure
- CPU2(CM4) creates 2 rpmsg channels for 2 virtual UART instances UART0 and UART1
- CPU2(CM4) is waiting for messages from CPU1(CA7) on these both channels
- When CPU2(CM4) receives a message on 1 Virtual UART instance/rpmsg channel, it sends the message back to CPU1(CA7) on the same Virtual UART instance
Reopen the Serial console of STM32CubeIDE and enter following command :
- Initialize the ttyRPMSG0 configuration
stty -onlcr -echo -F /dev/ttyRPMSG0
- Read constantly the ttyRPMSG0 channel in background
cat /dev/ttyRPMSG0 &
- Send a message on one ttyRPMSG0 channel and recieve the echo on the same ttyRPMSG0 channel
 echo "Hello Virtual UART0" > /dev/ttyRPMSG0
Hello Virtual UART0
- You can perform the same steps with the ttyRPMSG1 channel
- Terminate the STM32CubeIDE debug session will stop the firmware.
9. Modify the firmware[edit source]
The original firmware example receives a message for the host on one channel end sent back the same message to the host on the same channel.
As this is not so obvious on which channel the message is received, we propose to modify the firmware in order to add an indication to know what is the channel that is receiving the message.
Please modify main.c original code as follow:
  /* Infinite loop */
  /* USER CODE BEGIN WHILE */
  while (1)
  {

    OPENAMP_check_for_message();

    /* USER CODE END WHILE */
    if (VirtUart0RxMsg) {
      char msg_to_transmit[MAX_BUFFER_SIZE];
      int msg_size = 0;
      VirtUart0RxMsg = RESET;

      msg_size = snprintf(msg_to_transmit, MAX_BUFFER_SIZE, "Channel RPMSG0: ");
      msg_size += snprintf(msg_to_transmit + msg_size, MAX_BUFFER_SIZE, "%s\n", VirtUart0ChannelBuffRx);
      log_info("size of the message to transmit = %d bytes\n", msg_size);
      VIRT_UART_Transmit(&huart0, (uint8_t*)msg_to_transmit, msg_size);
    }

    if (VirtUart1RxMsg) {
      char msg_to_transmit[MAX_BUFFER_SIZE];
      uint16_t msg_size = 0;
      VirtUart1RxMsg = RESET;

      msg_size = snprintf(msg_to_transmit, MAX_BUFFER_SIZE, "Channel RPMSG1: ");
      msg_size += snprintf(msg_to_transmit + msg_size, MAX_BUFFER_SIZE, "%s\n", VirtUart1ChannelBuffRx);
      log_info("size of the message to transmit = %d bytes\n", msg_size);
      VIRT_UART_Transmit(&huart1, (uint8_t*)msg_to_transmit, msg_size);
    }
    /* USER CODE BEGIN 3 */
  }
  /* USER CODE END 3 */
- Save your modifications
10. Testing the modified firmware[edit source]
10.1. Relaunch Debug session[edit source]
- By clicking on the Debug button STM32CubeIDE will relaunch the debug session after performing an incremental build to take into account your modification
- If everything is ok you will be back switch to "Debug Perspective" after re-load of the new firmware.
10.2. Test[edit source]
- Initialize the ttyRPMSG0 and ttyRPMSG1 configurations
 stty -onlcr -echo -F /dev/ttyRPMSG0
 stty -onlcr -echo -F /dev/ttyRPMSG1
- Read constantly the ttyRPMSG0 and ttyRPMSG1 channels in background
 cat /dev/ttyRPMSG0 &
 cat /dev/ttyRPMSG1 &
- Send a message on one ttyRPMSG0 channel and check the echo log
 echo "Hello Virtual UART0" > /dev/ttyRPMSG0
Channel RPMSG0: Hello Virtual UART0
- Send a message on one ttyRPMSG1 channel and check the echo log
 echo "Hello Virtual UART1" > /dev/ttyRPMSG1
Channel RPMSG1: Hello Virtual UART1
- Terminate the STM32CubeIDE debug session
Arm® is a registered trademark of Arm Limited (or its subsidiaries) in the US and/or elsewhere. ![]()