This article gives details about updating the bootloader objects of NAND memory, located onto STM32MP157x-EV1 (e.g.), using STM32CubeIDE.
![]()
1. Overview[edit source]
Here is the different steps to update NAND with customized trusted image:
- Initialize the NAND with Starter Package image thanks to STM32CubeProgrammer.
- Build the trusted image inside STM32CubeIDE with device tree configured using embedded STM32CubeMX. For that follow explanation given in How to manage OpenSTLinux projects in STM32CubeIDE
- Update STM32MP15 board; this means the STM32MP15 board is up and running with network access: target status is green.
- Check this customization is correctly set up by comparing version appearing in boot messages (see chapter below).
2. Bootloader version after update with Starter Package[edit source]
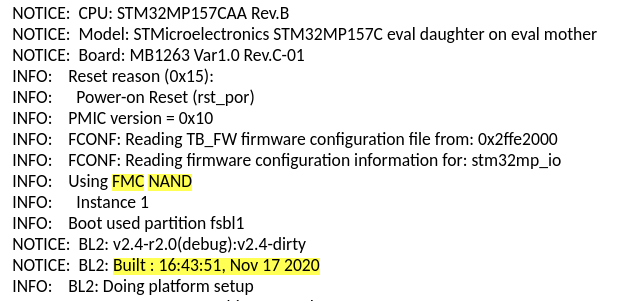
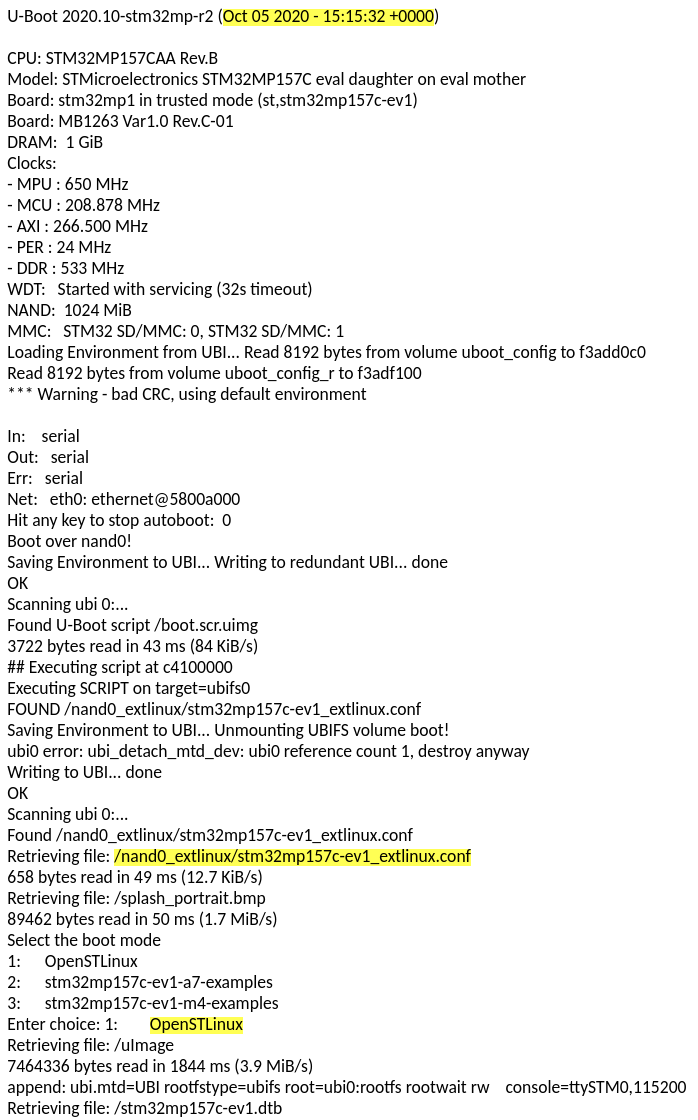
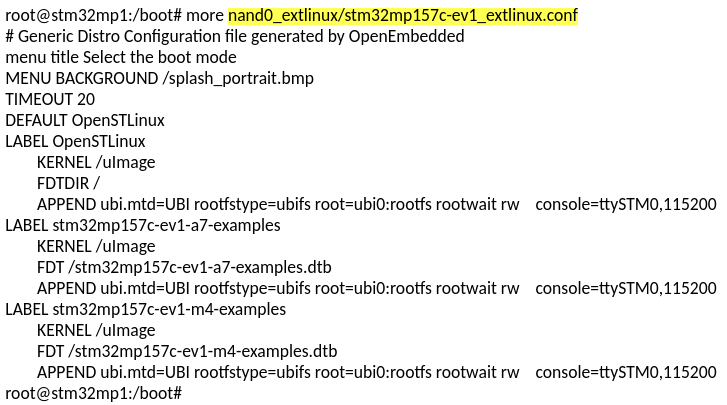
Below, the bootloader version appearing in boot messages:
- TF-A BL2 version, booting from NAND memory
- U-boot version & extlinux.conf file used, booting from NAND memory
- extlinux.conf content before update
3. Customizing bootloader with STM32CubeIDE[edit source]
After compiling device tree generated by STM32CubeMX , you need to :
- update MP15 target bootfs with new .dtb under /boot
- and adjust /boot/nand0_extlinux/stm32mp157c-ev1_extlinux.conf in order to declare new device tree and set it as default.
This is done thanks to "Cortex-A Linux® Deployment" shortcut configuration available from Linux® project Run As... menu.
- Linux® deployment configuration

- NAND Linux® deployment message

- NAND Linux® device tree update

Then, select Cortex-A project and right click to get Cortex-A Bootloader Deployment shortcut.

Connection is automatically set and you need to scan STM32MP15 target storage. This storage list depends on the board and on the used boot storage .
Then, select:
- the storage to update, NAND #0 here;
- TF-A BL2 & FIP image to update from FIP_artifacts/ .
- NAND bootloader deployment configuration

- NAND bootloader deployment message

4. Bootloader version after customization with STM32CubeIDE[edit source]
After the update, TF-A BL2 and U-Boot versions are modified and Linux® uses the generated device tree.
Here are the boot messages now:
- TF-A BL2 updated version, booting from NAND memory

- U-Boot updated version & Linux® device tree, booting from NAND memory

![]()