This article proposes to address the creation of a simple hello-world application with STM32CubeIDE.
![]()
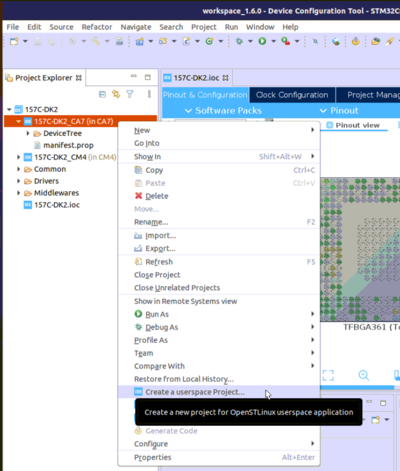
1 Create GtkHelloWorld user space project[edit source]
In Cortex®-A7 sub-project context, named here MP157C-DK2_CA7, right-click and select Create a userspace Project...
Here, an Executable project type in C language is selected. Note that the user space project uses by default the SDK version associated to the Cortex®-A7 sub-project.
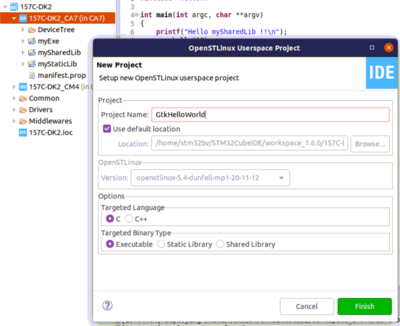
Below, the main.c source code is updated with gtk_hello_world.c as defined in article Create a simple hello-world application.
2 Update GtkHelloWorld project sources and properties[edit source]
The proposal to reference the Gtk library is to use the pkg-config command to update the compiler and linker flags, just like it is done in the Makefile of article Create a simple hello-world application. This properties update is done inside menu GtkHelloWorld properties: C/C++ Build > Settings > Tool Settings.
- main.c update and C flag: `pkg-config --cflags gtk+-3.0`

- Linker flags update: `pkg-config --libs gtk+-3.0`

- Now you can build GtKHelloWorld project: right-click on it and then Build Project.

3 Preparing Debug Configuration[edit source]
You can check boot messages via Linux® console opened with butterfly icon, but remember this console cannot be shared outside STM32CubeIDE (minicom,...).
In order to debug user space application, your target must be Linux® booted and network connected.
In order to check network connection, start the Target Status widget in the bottom right corner of the window.

Also check How to set up proxy and P2P Ethernet connection with STM32CubeIDE if you are in that case.
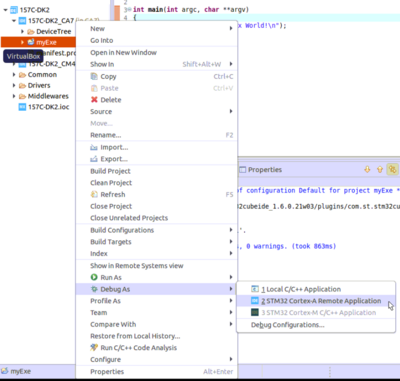
4 Debug Configuration[edit source]
Select your project, right-click Debug as... > Debug Configurations, then select STM32 Cortex-A Remote Application'.
In the Main tab, the default connection proposed is "MPU SSH", corresponding to the target IP address discovered by the Target Status widget. The default destination directory is /home/root.

5 Debug launch[edit source]
Click Debug :
- GtkHelloWorld is downloaded to the target,
- GDBServer is launched on the target,
- GDBClient is launched on the workstation and can exchange via the network with GDBServer.

![]()